4) Drag the two end points of the line or drag the whole line to adjust its posion according to
the actual scene.
5) Repeat the steps above to draw more lane lines.
4.
Click Start.
The auto calibraon starts, and you can view the calibraon status and progress. 100% means
the auto
calibraon is nished.
5.
Oponal: Click End if the calibraon eect has met the requirement during the process.
6.
Oponal: Click Copy Parameters to Coordinate Mode to copy the auto calibrated coordinates to
the coordinate mode.
7.
Click OK.
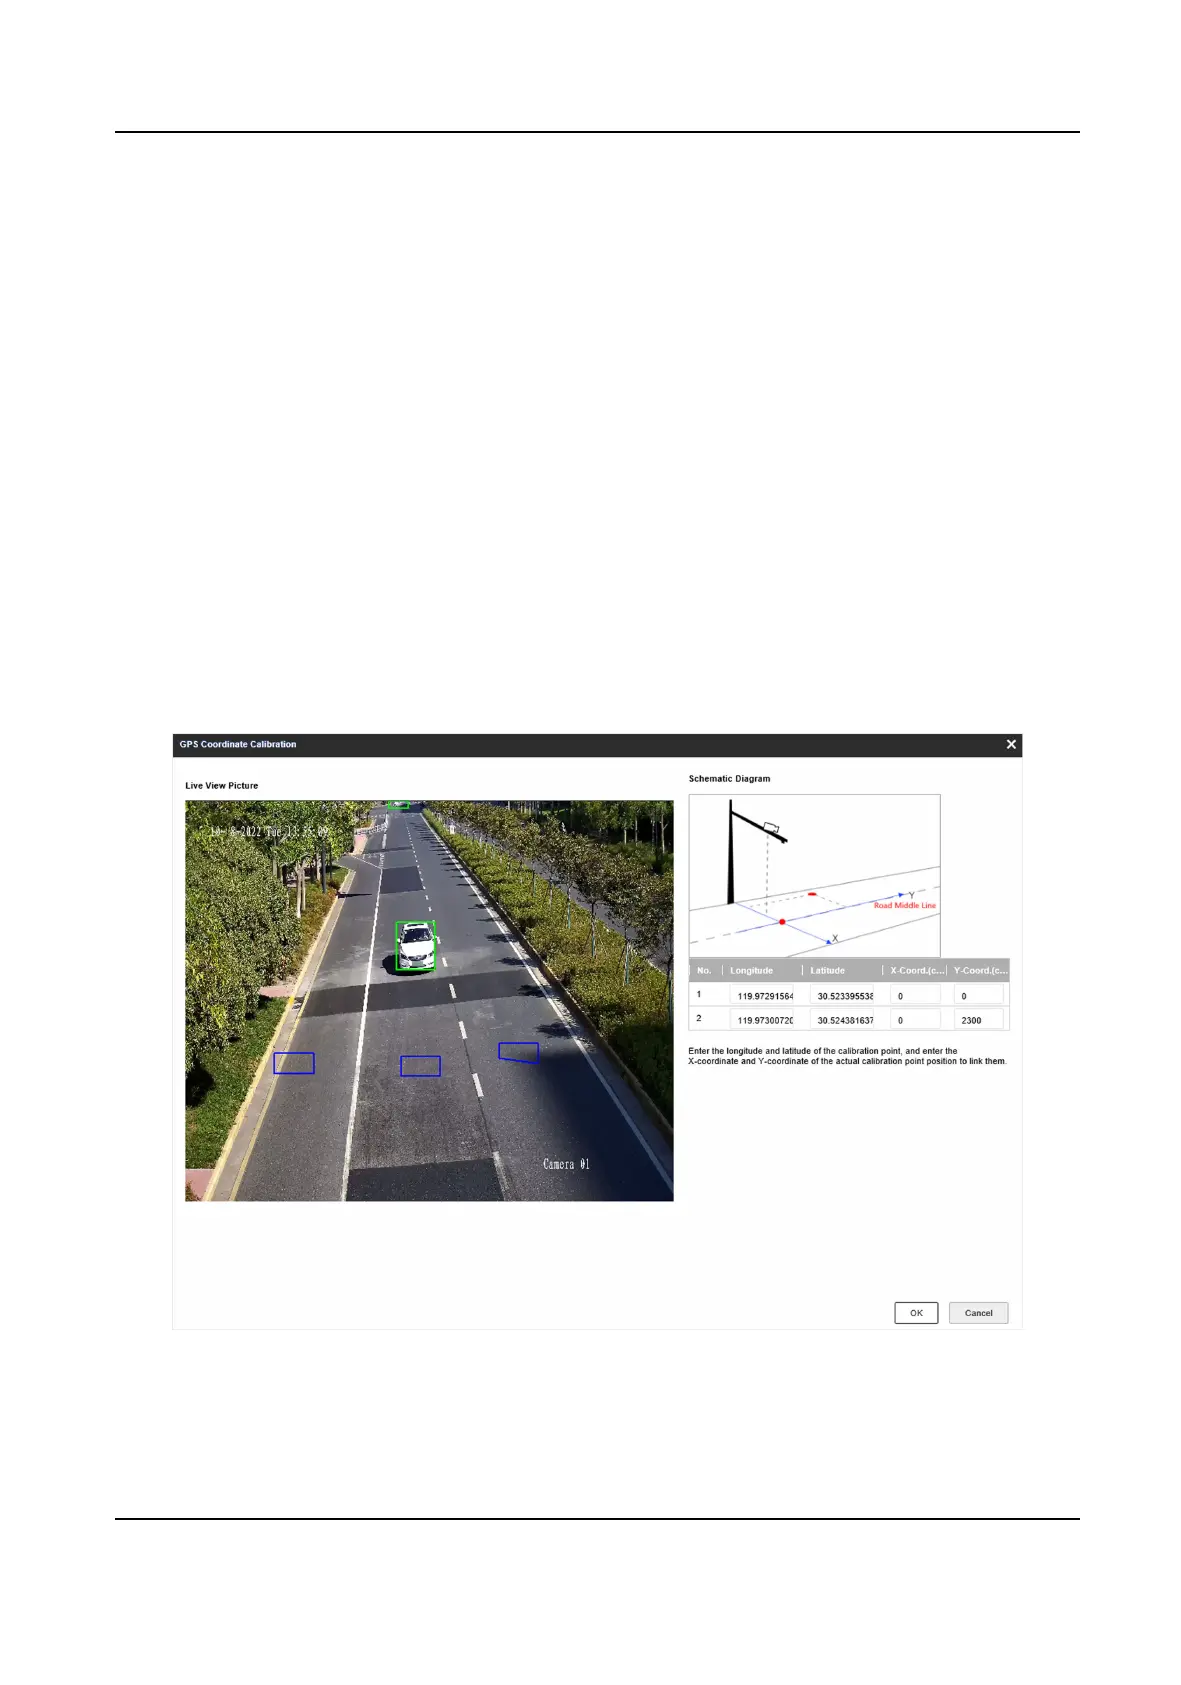
2.2.3 GPS
Calibraon
The coordinates of vehicle posions can be converted to GPS coordinates to sasfy the
requirements of third party or other
plaorms.
Steps
1.
Click GPS Calibraon.
Figure 2-4 GPS Coordinate Calibraon
2.
Enter the longitudes and latudes of the two calibraon points.
3.
Enter the coordinates of the two calibraon points.
Network Trac Camera Conguraon Manual
69
 Loading...