This document provides comprehensive instructions for the AG 125-A22 cordless angle grinder, designed for professional users. It covers safety, operation, maintenance, and disposal, ensuring safe and effective use.
Function Description
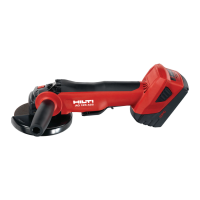
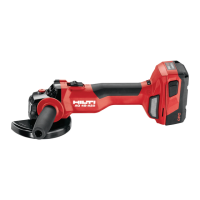
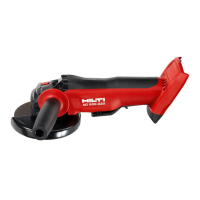
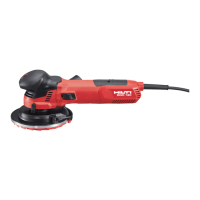
The AG 125-A22 is a hand-held cordless angle grinder primarily intended for cutting and grinding metals and mineral materials. It can also be used for drilling tiles without water, exclusively for dry grinding/cutting applications. For working on mineral materials, such as concrete or stone, the tool must be equipped with a dust removal hood and connected to a suitable Hilti vacuum cleaner. The product is designed to be used with Hilti Li-ion batteries from the B 22 series and charged with Hilti battery chargers from the C4/36 series.
The tool incorporates a temperature-dependent motor protection system that monitors current input and motor temperature to prevent overheating. If the motor is overloaded due to excessive working pressure, the tool's performance will noticeably drop or it may stall. In such cases, the user should release pressure and allow the tool to run under no load for approximately 30 seconds to cool down.
Usage Features
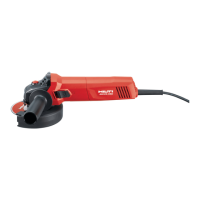
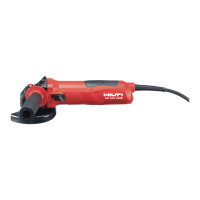
The angle grinder features a guard release button, spindle lock button, air vents, and a release button for charge status display activation. It is equipped with a battery, a switch-on interlock release button, an on/off switch, and a vibration-absorbing side handle. The standard guard, clamping flange with O-ring, clamping nut, and wrench are included, with an optional Kwik lock clamping nut available for tool-free accessory changes.
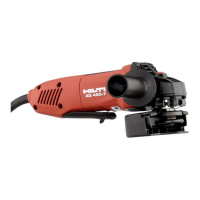
For cutting and slitting, abrasive cutting discs (AC-D) and diamond cutting discs (DC-TP, DC-D) are suitable. For rough grinding, abrasive grinding discs (AG-D, AF-D, AN-D) and diamond grinding discs (DG-CW) can be used. Diamond core bits (DD-M14) are specified for drilling in tiles. When cutting or slitting with abrasive cutting discs, the standard guard with an additional front cover or a fully enclosing dust hood must always be used. For cutting mineral materials with diamond cutting discs, the DC-EX 125/5"C compact dust hood is recommended, but its use for metalwork is prohibited. Similarly, the DG-EX 125/5" dust hood for grinding is suitable for occasional use with diamond cup wheels on mineral materials, but not for metal.
The Li-ion battery charge status is indicated by four LEDs after pressing one of the battery release buttons. Four LEDs signify 75-100% charge, three LEDs 50-75%, two LEDs 25-50%, one LED 10-25%, and a blinking LED indicates less than 10% charge. The charge status cannot be displayed during or immediately after operation.
To insert the battery, ensure the angle grinder is switched off and the safety lock is activated. Check that battery terminals and tool contacts are clean and free from foreign objects to prevent short circuits. Securely fit the battery to prevent it from falling out. Removing the battery involves pressing the release buttons and pulling it out.
The side handle can be screwed into one of the threaded bushings for improved grip and control. The guard is fitted by aligning its triangular marks with those on the power tool, pressing it onto the drive spindle collar, and rotating until it engages. To adjust the guard, press the release button and rotate it to the desired position. Removing the guard involves rotating it back to the alignment marks and pulling it off. The front cover clips onto the standard guard and is removed by releasing its catch. When positioning the DC-EX 125/5"C dust hood, ensure the on/off switch remains easily accessible.
Fitting an accessory tool requires removing the battery, checking the O-ring on the clamping flange for damage, and fitting the clamping flange onto the drive spindle. The accessory tool is then placed, and the clamping nut is screwed on. The spindle lock button is pressed, and the clamping nut is tightened securely with a pin wrench. When using a Kwik lock nut, it is screwed on until seated, with the "Kwik lock" name visible. The accessory tool is then turned clockwise by hand until the nut is securely tightened. Removing an accessory tool involves pressing the spindle lock button and turning the clamping nut counterclockwise with a wrench or by hand for the Kwik lock nut. For core bits, after fitting the side handle and guard, the core bit is placed and hand-tightened, then the arbor lock button is pressed, and the core bit is tightened with an open-end wrench.
For grinding, the tool should be held securely with both hands using the side handle. When cutting, moderate feed pressure should be applied, and the tool should be held at approximately 90° to the surface. For rough grinding, move the tool to and fro at a 5° to 30° angle of attack with moderate pressure to prevent overheating and ensure an even finish. The on/off switch with a safety lock prevents unintentional starting; push the safety lock forward to unlock, then press the switch. Release the switch to turn off the tool, and the safety lock will automatically engage.
Maintenance Features
Regular care and maintenance are crucial for the tool's longevity and safety. Always remove the battery before performing any maintenance tasks. Stubborn dirt should be carefully removed from the tool, and air vents cleaned with a dry brush. The casing should be cleaned with a slightly damp cloth, avoiding silicone-containing cleaning agents that could damage plastic parts.
For Li-ion batteries, keep them free from oil and grease, clean the casing with a slightly damp cloth (again, avoiding silicone-containing agents), and prevent moisture ingress.
All visible parts and controls should be checked regularly for damage and proper function. If any damage or malfunction is found, the cordless tool should not be operated and must be repaired by Hilti Service immediately. After cleaning and maintenance, all guards and protective devices must be refitted and checked for correct function.
For disposal, Hilti tools and appliances are recyclable. Materials should be separated for recycling, and old tools can be returned to Hilti for this purpose. Batteries should always be removed before transport and storage. They should be transported individually packaged, never loose, and their terminals covered with non-conductive material to prevent short-circuiting. Batteries should be disposed of out of reach of children, at a Hilti Store, or according to local governmental guidelines. The tool and batteries should be stored in a cool, dry place, away from direct sunlight, heating units, or windows, and inaccessible to children or unauthorized persons. Before use after long storage periods, check the tool and batteries for damage.