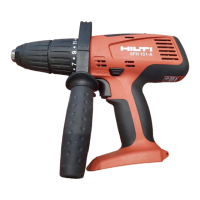
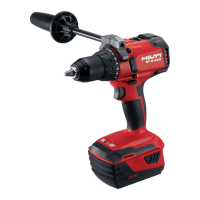
7.2.2 Speed selection using the 3-speed switch
(SFH 151-A) 5
NOTE
The mechanical 3-speed gear switch can be used to
select the speed range required. Speeds with fully-
charged battery: 1st gear: 0-370 r.p.m., 2nd gear:
0‑1380 r.p.m., 3rd gear: 0‑2000 r.p.m.
7.3 Switching on / off
CAUTION
To avoid damage to the tool, the switch must be
released (switched off) if the motor is stalled for
more than 2-3 seconds. After stalling, the tool must
be allowed to run for 2 minutes under no load.
1. The speed of the tool can be controlled smoothly
(increased from zero to maximum) by pressing
the control switch gradually.
7.4 Drilling
CAUTION
In the event of the drill bit sticking, the tool will pivot
about its own axis. Always use the tool with the side
handle fitted and hold it securely with both hands.
CAUTION
Use clamps or a vice to secure the workpiece. The
workpiece is thus held more securely than by hand
and both hands remain free to operate the tool.
7.4.1 Adjusting the side handle 6
1. Release the side handle clamping band by turning
the handle counterclockwise.
2. Pivot the side handle into the desired position.
3. Tighten the side handle securely by turning it
clockwise.
7.4.2 Fitting the drill bit
1. Set the forward / reverse switch to the middle
position or remove the battery from the tool.
2. Check that the connection end of the drill bit is
clean. Clean the connection end if necessary.
3. Insert the drill bit in the chuck and then turn the
quick-release chuck sleeve by hand until tight.
4. Check that the drill bit is held securely (check by
pulling).
7.4.3 Drilling
1. Move the forward / reverse switchtothe “forward”
position.
2. Turn the torque and operating mode setting ring
to the drilling symbol.
7.4.4 Removing the drill bit
CAUTION
Wear protective gloves when changing drill bits as
the drill bit will get hot during use.
1. Set the forward / reverseswitchtothemiddle
position or remove the battery from the tool.
2. Open the quick-release chuck.
3. Pull the insert tool out of the chuck.
7.5 Hammer drilling (SFH 151-A)
7.5.1 Fitting the drill bit
1. Set the forward / reverseswitchtothemiddle
position or remove the battery from the tool.
2. Check that the connection end of the drill bit i s
clean. Clean the connection end if necessary.
3. Insert the drill bit in the chuck and then turn the
quick-release chuck sleeve by hand until tight.
4. Check that the drill bit is held securely (check by
pulling).
7.5.2 Hammer drilling
CAUTION
Use the side handle. Hold the tool securely with both
hands, one hand on the grip and the other on the side
handle.
1. Move theforward / reverseswitch to the“forward”
position.
2. Turn the torque and operating mode setting ring
to the hammer drilling symbol.
7.5.3 Removing the drill bit
CAUTION
Wear protective gloves when changing drill bits as
the drill bit will get hot during use.
1. Set the forward / reverseswitchtothemiddle
position or remove the battery from the tool.
2. Open the quick-release chuck.
3. Pull the insert tool out of the chuck.
7.6 Screwdriving
7.6.1 Fitting the bit / bit holder
1. Set the forward / reverseswitchtothemiddle
position or remove the battery from the tool.
en
20
 Loading...