This document provides operating instructions for the Hilti TE 40 and TE 40-AVR combihammers. It covers information about the documentation, safety guidelines, product description, technical data, operation, care and maintenance, troubleshooting, disposal, and manufacturer's warranty.
This section emphasizes the importance of reading the documentation before initial operation for safe and trouble-free handling. It advises users to observe safety instructions and warnings, and to keep the operating instructions with the product.
Warnings are categorized by signal words:
- DANGER! Indicates an imminent hazard leading to serious personal injury or fatality.
- WARNING! Indicates a potential hazard leading to serious personal injury or fatality.
- CAUTION! Indicates a potentially dangerous situation leading to minor personal injury or material damage.
Symbols used in the documentation include:
- A book icon: Read the operating instructions before use.
- A lightbulb icon: Instructions for use and other useful information.
Symbols in illustrations refer to corresponding illustrations at the beginning of the instructions, indicating the sequence of operations. Item reference numbers in the overview illustration correspond to the product overview section. A specific symbol draws special attention to certain points when handling the product.
Product-dependent symbols on the tool itself indicate:
- Drilling without hammering.
- Drilling with hammering action (hammer drilling).
- Chiseling.
- Chisel positioning.
- Protection class II (double-insulated).
Hilti products are designed for professional use and should only be operated, serviced, and maintained by trained, authorized personnel who are aware of potential hazards. The type designation and serial number are found on the rating plate, and users are advised to record the serial number for service inquiries.
Safety
This section outlines general power tool safety warnings, electrical safety, personal safety, hammer safety warnings, and additional safety instructions.
General Power Tool Safety Warnings:
Users must read all safety warnings and instructions to prevent electric shock, fire, and serious injury. All warnings and instructions should be saved for future reference.
Work Area Safety:
- Keep the work area clean and well lit to avoid accidents.
- Do not operate power tools in explosive atmospheres, as sparks can ignite dust or fumes.
- Keep children and bystanders away to prevent loss of control.
Electrical Safety:
- Power tool plugs must match the outlet and should never be modified.
- Avoid body contact with earthed or grounded surfaces (pipes, radiators, ranges, refrigerators) to reduce the risk of electric shock.
- Do not expose power tools to rain or wet conditions.
- Do not abuse the cord; keep it away from heat, oil, sharp edges, or moving parts.
- Use an extension cord suitable for outdoor use when operating outdoors.
- Use a residual current device (RCD) protected supply in damp locations.
Personal Safety:
- Stay alert, watch what you are doing, and use common sense. Do not operate the tool while tired or under the influence of drugs, alcohol, or medication.
- Use personal protective equipment, including eye protection, dust mask, non-skid safety shoes, hard hat, and hearing protection.
- Prevent unintentional starting by ensuring the switch is in the off-position before connecting to power, picking up, or carrying the tool.
- Remove any adjusting key or wrench before turning the power tool on.
- Do not overreach; maintain proper footing and balance.
- Dress properly; avoid loose clothing or jewelry that can get caught in moving parts.
- Connect and properly use dust extraction and collection facilities.
Power Tool Use and Care:
- Do not force the power tool; use the correct tool for the application.
- Do not use the power tool if the switch does not turn it on and off.
- Disconnect the plug from the power source before making adjustments, changing accessories, or storing the tool.
- Store idle power tools out of reach of children and unauthorized persons.
- Maintain power tools; check for misalignment, binding, or breakage of parts. Have damaged tools repaired.
- Keep cutting tools sharp and clean.
- Use the power tool, accessories, and tool bits according to instructions and working conditions.
Service:
- Have your power tool serviced by a qualified repair person using identical replacement parts.
Hammer Safety Warnings:
- Wear ear protectors to prevent hearing loss.
- Use auxiliary handles if supplied.
- Hold the power tool by insulated gripping surfaces when the cutting accessory may contact hidden wiring or its own cord to prevent electric shock.
Additional Safety Instructions:
- Use the tool only when in perfect working order and never tamper with or modify it.
- Hold the tool firmly with both hands on the grips, keeping them clean and dry.
- Grip the side handle at the outer end to prevent the tool from twisting.
- Do not touch rotating parts.
- Set the forward/reverse selector switch to the middle position before changing accessory tools or batteries, or before storage/transportation.
- Wear suitable protective glasses, a hard hat, ear protection, protective gloves, and light respiratory protection.
- Wear protective gloves when changing accessory tools to prevent cuts and burns.
- Wear eye protection to prevent injury from flying fragments.
- Use large, heavy accessory tools only with the power tool set to first gear to avoid damage.
- Take breaks and do physical exercises to improve blood circulation in fingers to prevent vibration-related disorders.
- Use a dust removal system and suitable mobile dust extractor whenever possible, as dust from certain materials can be harmful.
- Ensure the workplace is well ventilated and wear a respirator if necessary.
- Before beginning work, check for concealed electric cables or gas and water pipes.
- Secure the workpiece in a vice or with clamping devices.
- Immediately switch off the power tool if the accessory tool jams.
- Wait until the power tool stops completely before laying it down.
Battery Use and Care (if applicable):
- Observe regulations for Li-ion batteries.
- Do not expose batteries to high temperatures, direct sunlight, or fire.
- Do not disassemble, crush, incinerate, or subject batteries to temperatures over 80 °C.
- Do not attempt to charge or use damaged batteries.
- If the battery is too hot, place the tool in a non-flammable location and contact Hilti Service after it cools down.
Description
This section details the parts, indicators, and operating controls of the combihammer, its intended use, and specific features like AVR and the service indicator.
Parts, Indicators, and Operating Controls:
The combihammer includes:
- Chuck
- Function selector switch
- Control switch
- Supply cord
- Side handle with depth gauge
- Service indicator
- Active Vibration Reduction (AVR) (TE 40-AVR only)
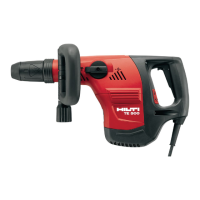
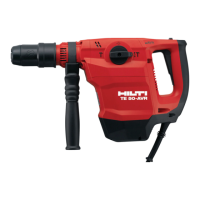
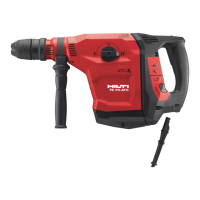
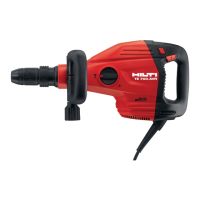
Intended Use:
The Hilti combihammer is an electrically powered tool with a pneumatic hammering mechanism. It is designed for:
- Drilling in concrete, masonry, wood, and metal.
- Light- to medium-duty chiseling on masonry and surface finishing work on concrete.
The tool must be connected to a power source with compatible voltage and frequency as specified on the type identification plate.
AVR Option:
The TE 40-AVR model is equipped with an Active Vibration Reduction (AVR) system to noticeably reduce vibration.
Service Indicator:
The product has a service indicator LED to alert users to maintenance needs.
Items Supplied:
The standard package includes:
- Combihammer
- Side handle
- Depth gauge
- Operating instructions
Users are advised to use only genuine Hilti spare parts and consumables for safe and reliable operation.
Operation
This section provides instructions for preparing the tool at the workplace, fitting the side handle, adjusting the depth gauge, removing and fitting the chuck, fitting/removing accessory tools, positioning the chisel, and selecting different types of work.
Preparations at the Workplace:
- CAUTION: Unplug the supply cord before making adjustments or changing accessories to prevent inadvertent starting.
- Observe all safety instructions and warnings.
Fitting the Side Handle:
- Release the side handle clamping band by turning the handle grip.
- Slide the clamping band over the chuck into the recess.
- Set the side handle to the desired position.
- Tighten the clamping band by turning the handle grip.
Adjusting the Depth Gauge:
- Press the release button on the side handle.
- Adjust the depth gauge to the desired drilling depth.
- Release the release button.
- Check that the side handle is securely attached.
Removing the Chuck:
- CAUTION: Remove the depth gauge if fitted but not used, as it may hinder the user.
- Set the function selector switch to the "Drilling without hammering" position.
- Disconnect the supply cord plug.
- Grip the end of the chuck and pull the chuck release collar upwards.
- Lift the chuck upwards away from the tool.
Fitting the Chuck:
- CAUTION: Remove the depth gauge if fitted but not used.
- Set the function selector switch to the "Chiseling" position when changing the chuck.
- Disconnect the supply cord plug.
- Grip the end of the chuck and pull the chuck release collar upwards.
- Fit the chuck onto the chuck mount.
- Rotate the chuck until it engages.
Fitting / Removing the Accessory Tool:
- Apply a small amount of genuine Hilti grease to the connection end of the accessory tool.
- Push the accessory tool into the chuck, turning it and applying light pressure until it clicks into place.
- After fitting, pull the tool firmly to check secure engagement.
- To remove, pull the chuck ring back and remove the accessory tool.
Positioning the Chisel:
- CAUTION: Do not operate the tool when the selector switch is set to "Chisel positioning" to avoid loss of control. Turn the switch to the "Chiseling" position.
- Set the function selector switch to the "Chisel positioning" symbol.
- The chisel can be adjusted to 12 different positions (30° increments) for optimal working position.
Types of Work:
- WARNING: Do not touch damaged supply cords or extension cords. Disconnect the plug immediately.
- Check supply cords regularly and replace if damaged.
Function Selector Switch:
- Set the function selector switch to the desired working position.
- Do not operate the function selector switch while the motor is running to prevent damage.
Drilling without Hammering:
- Set the function selector switch to the "Drilling without hammering" symbol.
Drilling with Hammering Action (Hammer Drilling):
- Set the function selector switch to the "Hammer drilling" symbol.
Chiseling:
- Set the function selector switch to the "Chiseling" symbol.
Care and Maintenance
This section provides instructions for cleaning and maintaining the combihammer.
Care:
- WARNING: Always unplug the supply cord before carrying out any care and maintenance tasks to prevent electric shock.
- Carefully remove stubborn dirt.
- Clean air vents with a dry brush.
- Use a slightly damp cloth to clean the casing; avoid silicone-containing cleaning agents.
Maintenance:
- WARNING: Only trained electrical specialists should repair electrical components to prevent electric shock and burns.
- Regularly check all visible parts and controls for damage and correct function.
- Do not operate the tool if damage is found; have it repaired by Hilti Service.
- After cleaning and maintenance, refit all guards or protective devices and check their function.
- Use only genuine Hilti spare parts and consumables, available at Hilti Centers or online.
Transport and Storage
This section provides guidelines for safe transport and storage of the combihammer.
- Do not transport electric tools with accessory tools fitted.
- Always unplug the supply cord before storing the tool.
- Store tools in a dry place, inaccessible to children or unauthorized persons.
- Check tools for damage after long periods of transport or storage.
Troubleshooting
This section lists common problems, possible causes, and actions to be taken.
Trouble or Fault: Power tool does not start.
- Possible Cause: Interruption in electric supply.
- Action: Plug in another electric tool to check the outlet.
- Possible Cause: Electronic restart interlock activated after an interruption.
- Action: Switch the power tool off and then on again.
- Possible Cause: Generator with sleep mode.
- Action: Apply a load to the generator (e.g., worklight), then switch the tool off and on again.
Trouble or Fault: No hammering action.
- Possible Cause: The power tool is too cold.
- Action: Bring the drill bit into contact with the working surface, switch the rotary hammer on, and allow it to run until hammering begins.
- Possible Cause: Function selector switch set to the "Drilling without hammering" position.
- Action: Set the function selector switch to the "Hammer drilling" position.
Trouble or Fault: Combihammer does not achieve full power.
- Possible Cause: Inadequate cross-section of extension cord conductors.
- Action: Use an extension cord with adequate conductor cross-section.
- Possible Cause: Voltage provided by electric supply is too low.
- Action: Connect the combihammer to a different electric supply.
Trouble or Fault: Drill bit does not rotate.
- Possible Cause: Function selector switch not engaged or in "Chiseling" or "Chisel positioning" position.
- Action: Set the function selector switch to "Drilling without hammering" or "Hammer drilling".
Trouble or Fault: Drill bit is not released.
- Possible Cause: Chuck not pulled back fully.
- Action: Pull the chuck back as far as it will go and remove the accessory tool.
- Possible Cause: Side handle not fitted correctly.
- Action: Disengage the side handle and refit it correctly so the clamping band and side handle engage in the recess.
Disposal
- Most Hilti tool materials are recyclable.
- Materials must be correctly separated for recycling.
- Old tools can be returned to Hilti for recycling.
- Disposal of electric tools or appliances with household waste is not permissible.
Manufacturer's Warranty
- Contact your local Hilti representative for questions about warranty conditions.