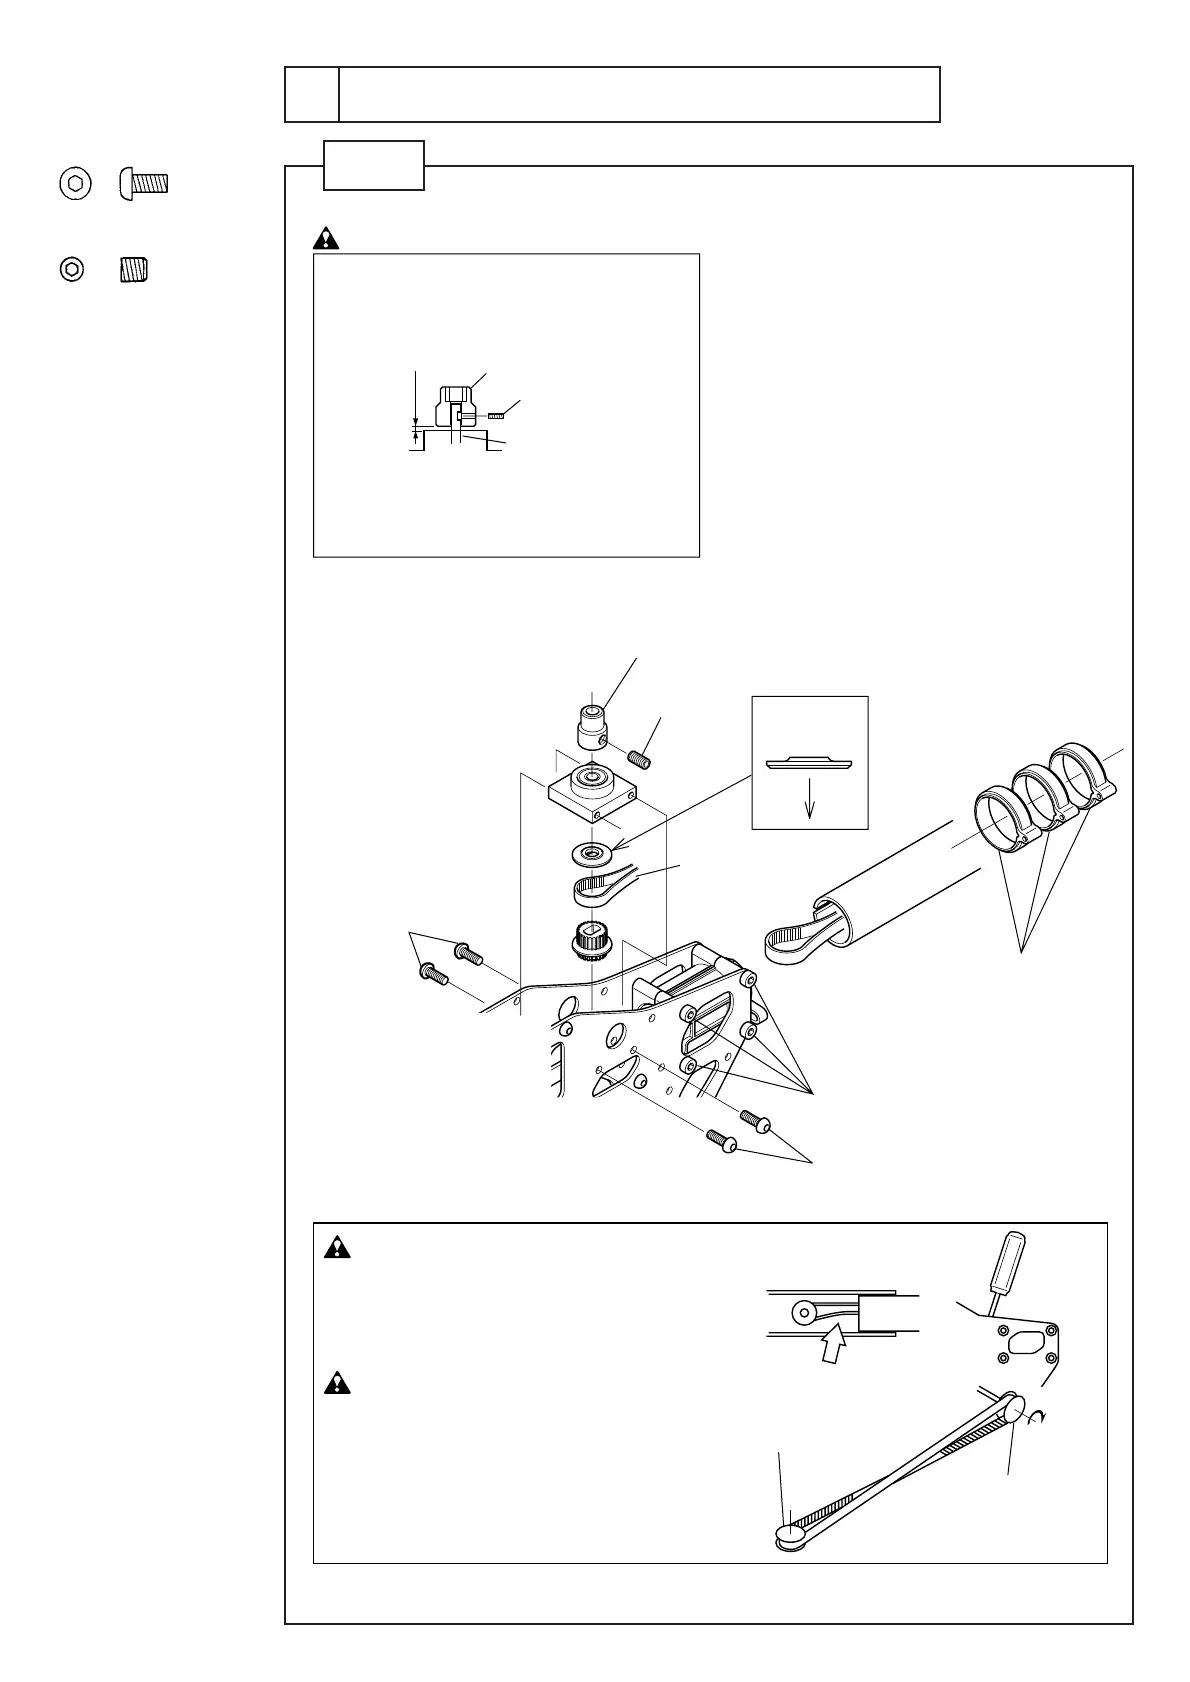
M3×6ボタンボルト
M3×6Buttonbolt
増し締め
Tighten
ラダーコントロールロッドガイド
Luddercontrollodguide
H4×4SS
タイミングベ ルト
Timingbelt
スターターカップリング
StarterCoupling
下
Lower
取付方向
Mounting
direction
M3×6ボタンボルト
M3×6Buttonbolt
M4×4SS
スターターカップリング
StarterCoupling
0.5mm
スターターシャフト
Startershaft
スターターカップリングは、スターターシャフトの Dカットに合わ
せてM4×4SSで固定してください 。
InstallthestartercouplingintotheD-cuttingofthestarter
shaft,andfixwithM4x4SS.
スターターシャフトは0.5mm程度、上下スキ間を作ってくだ
さい 。
Keepaclearanceofapproximately0.5mmattheupper
andlowerofthestartershaft.
注意 Caution
テールプーリー
Tailpilley
8Tドライブプーリー
Drivepilley
注意
Ⅰ.テールブームのミゾは、メインフレームRの
突起に合わせます。
Ⅱ.タイミングベルトは、ドライバーで軽く押し
て、接しない程度に張ります。
Ⅲ.ベルトの回転方向を確認します。
Ⅰ.Setthegrooveoftailpipetothebossontheinside
ofmainframeR.
Ⅱ.Adjustthetensionofthebeltsothatonesideofthe
beltcannotbebroughtintocontactwiththeother
sidewhenitispushedwithe.g.adriver.
Ⅲ.Checkthedirectionofrotationoftimingbelt.
Caution




 To Next Page