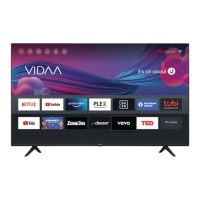
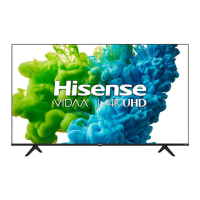
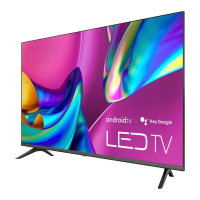
This document serves as a Quick Setup Guide for Hisense televisions, providing essential information for initial setup, connectivity, and troubleshooting. It aims to help users get their new TV up and running efficiently while also promoting environmental responsibility by encouraging online access to the full user manual.
Function Description
This guide outlines the fundamental steps required to set up and operate your Hisense TV. It covers the physical assembly of the TV stand or wall mount, connecting external devices, and preparing the remote control for use. The primary function is to provide a streamlined, easy-to-follow process for first-time users, ensuring a smooth initial experience with their new television. It also includes a troubleshooting section to address common issues that may arise during or after setup.
Usage Features
The guide begins by encouraging users to access the comprehensive online User Manual for detailed instructions and feature descriptions, emphasizing Hisense's commitment to reducing paper waste.
Initial Setup:
- Attaching the TV Stand or Mounting: Detailed instructions are provided for securely attaching the base stands to the TV. This involves carefully placing the TV face down on a soft surface, inserting the stands into the bottom slots, and securing them with the provided screws. Specific screw sizes are mentioned for different TV models (32", 40"/43"). For wall mounting (bracket not included), the guide advises removing the TV stand, placing spacers in the bracket holes, and using fixing screws of a specified length (8.0 - 10.0 mm) to prevent internal damage and ensure secure mounting. Important cautions are highlighted, such as disconnecting the AC power cord before installation and ensuring the TV screen is protected. It also warns against mounting on slanted walls and recommends maintaining a parallel position to the wall.
- Connecting Devices: A visual diagram illustrates the various ports on the TV back and front, along with a table explaining the function of each port. This includes connections for:
- ANT/CABLE: For outdoor VHF/UHF antennas or cable.
- HDMI: For High Definition Multimedia Interface devices.
- AV IN: For composite video and left-right audio cables from external AV devices.
- HEADPHONE /: For connecting headphones (microphones are not supported).
- USB: For browsing photos, music, and movies from USB devices. It specifies current consumption limits for hard disks.
- DIGITAL AUDIO OUT: For connecting an optical cable to an external digital audio system.
- LAN: For connecting an Ethernet cable to access a network or the Internet, noting the TV's wireless connectivity feature.
The guide stresses the importance of using the correct cables and ensuring secure connections to maintain picture quality.
- Remote Control Preparation: Instructions are given for inserting batteries into the remote control, emphasizing correct polarity. A table describes each button on the remote, including power on/off, microphone/indicator, input source selection, Google Assistant, accounts/sign-in, settings access, navigation (D-pad), confirmation (OK), back, home, live TV/EPG, volume, channel, mute/accessibility, menu, media controls, numeric input, and quick access to apps. It notes that button functions may vary by model and region.
- Pairing the Remote Control: A step-by-step process for pairing the remote to the TV is provided. This involves keeping the remote within 10 feet of the TV, accessing the "Remotes & Accessories" menu via the Home button and Settings icon, and then pressing and holding specific buttons on the remote for at least 3 seconds to initiate pairing. Confirmation messages are displayed on screen.
- Power On and First-Time Setup: Users are instructed to plug in the power cord, which will display the Hisense logo. The guide then explains that a guided setup will appear, facilitating connection to the Internet and completion of the TV's initial configuration.
- Establishing Network Connection: Instructions for both wired and wireless network connections are provided. For wired connections, it shows how to connect an external modem and an IP sharer (router) to the TV's LAN port. For wireless connections, it illustrates connecting to a wireless router via the TV's built-in wireless LAN adapter.
Maintenance Features
While the guide primarily focuses on setup, it includes elements that contribute to the long-term usability and care of the device:
- Troubleshooting Section: A comprehensive troubleshooting table lists common issues and their possible solutions. This empowers users to resolve minor problems independently, reducing the need for immediate customer support. Issues covered include:
- No sound or picture: Checking power cord, remote battery, input mode.
- No picture/sound from external source: Verifying connections and input mode selection.
- Delay in picture appearance: Explained as normal initialization.
- Picture normal, no sound: Checking volume and mute settings.
- Sound but no picture/black and white picture: Unplugging/replugging TV, checking color settings, trying different channels.
- Distorted/wavy picture/sound: Checking for nearby electrical appliances, trying different power outlets.
- Blurry/cutting out picture/sound: Checking external antenna, adjusting antenna direction/fine-tuning channels.
- Horizontal/vertical stripe/shaking picture: Checking for nearby interfering appliances/tools.
- "Clicking" sound from cabinet: Explained as normal due to temperature changes.
- Remote control not working: Confirming TV power, changing/checking batteries.
- Remote Control Battery Information: Important guidelines for battery handling are provided, including proper disposal, immediate removal of old batteries, removing batteries if the remote won't be used for a long time, and precautions regarding battery chemicals. It also advises against mixing battery types or using a warm/hot remote.
- Environmental Protection: The guide features a symbol indicating that the product should not be disposed of with domestic garbage. It encourages responsible recycling through local return systems or by contacting the vendor, promoting sustainable reuse of materials and protecting the environment. This reflects a commitment to product lifecycle management beyond initial use.
- Disclaimer: A disclaimer regarding application services, internet connection, and Hisense's responsibility for third-party content or service disruptions is included, setting clear expectations for users. This helps manage user expectations regarding software functionality and potential limitations.