Do you have a question about the Hisense PX2-PRO and is the answer not in the manual?
Adjusting image to match screen's bottom edge.
Shifting image to fit the screen's bottom edge.
Safety warning about looking directly at the laser lens.
Solutions for common issues and errors.
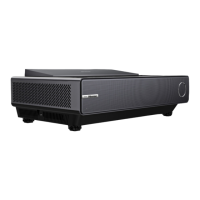
The Hisense Laser Cinema, Model PX1, is an advanced home entertainment system designed to deliver a large, immersive display experience. This Quick Setup Guide provides essential information for setting up, operating, and maintaining your new Laser Cinema.
The Hisense Laser Cinema functions as a high-performance projector, utilizing laser technology to create a vibrant and detailed image on a screen. It is designed for ultra-short throw projection, meaning it can be placed very close to the screen while still producing a large image. The device supports various input sources, allowing users to connect external audio/video devices such as DVD players, set-top boxes, and video cameras, as well as digital audio adapters and Ethernet for internet connectivity. It also features USB ports for browsing photos, music, and movies from USB memory sticks. The Laser Cinema incorporates built-in wireless connectivity for seamless integration into your home network.
Setting up the Laser Cinema involves a few key steps. First, if you have a Hisense screen, refer to its dedicated installation guide. When positioning the Laser Cinema itself, it is strongly recommended that two people handle the device due to its weight, and care should be taken to protect the lens. The device should be positioned parallel to the screen surface. All necessary cables, including audio, video, and Ethernet (if applicable), should be connected to the ports on the back of the Laser Cinema before final positioning. Once connected, the power cord is plugged into a wall outlet, and the device is turned on using the POWER button.
Proper ventilation is crucial for the Laser Cinema's operation and longevity. Insufficient ventilation can lead to overheating and damage. Users must ensure that air vents are not blocked and that the device is not placed in narrow, enclosed, or poorly ventilated spaces. A minimum clearance of 8 inches on the sides and 6 inches above the device is recommended for proper airflow.
Adjusting the display image and screen is a critical step for optimal viewing. This involves several adjustments to ensure the image is perfectly aligned and sized to the screen. The guide provides instructions for paralleling the bottom of the image with the screen by rotating the device clockwise or counterclockwise. It also details how to fit the bottom of the image to the screen by moving the Laser Cinema left or right. Further adjustments include aligning the upper-right and upper-left corners of the image. This is achieved by rotating the front and back feet of the Laser Cinema using a provided wrench, and then rotating the entire device to make the image parallel with the screen. Finally, instructions are given for filling the top of the image to the screen, which may involve moving the projector closer to or farther from the screen and rotating the front or back feet. Throughout these adjustments, it is emphasized not to look directly at the lens when the device is on, as the laser light can cause eye damage.
The Laser Cinema comes with a remote control that offers a wide range of functionalities. Buttons are provided for power on/off, adjusting brightness, accessing the Google Assistant, muting/restoring sound, controlling media content, quick access to picture and sound modes, navigating menus, returning to previous screens, and displaying the Home screen. There are also buttons for input selection, numerical input, and D-pad navigation. The remote control requires two AAA or AA batteries. Pairing the remote with the Laser Cinema is a simple process, typically involving pressing and holding specific buttons on the remote for a few seconds. The remote operates within a range of up to 26 feet from the Laser Cinema.
The device also features an "Automatic Geometric Correction" function. Before using this, ensure the Laser Cinema and your mobile device are connected to the same wireless network. The process involves adjusting the Laser Cinema's physical position so the screen frame is within a rectangular border displayed on the projector. Then, using your mobile device to scan a QR code, an app will load, displaying an alignment grid on the screen. You take a photo of the entire screen and image, and the app will automatically correct the geometry. For manual adjustments, a "Geometric Correction" option allows users to select and adjust specific points (corners and midpoints) of the image using the remote's navigation buttons.
The Laser Cinema includes "Focus Adjustment" which allows users to fine-tune the image focus using the up and down buttons on the remote, with real-time feedback on the displayed background image card. For eye protection, the device is designed to shut down if someone looks into the lens, with the screen closing immediately.
The "Text-to-Speech (TTS)" and "Video Description" functionalities enhance accessibility. TTS converts written text on the screen into voice, assisting visually impaired users in navigating menus. Video Description adds audio narration to programs, describing visual elements. These features can be enabled through the device's settings menu under "Accessibility" and "Channels & Inputs," respectively.
Proper maintenance ensures the longevity and optimal performance of your Laser Cinema. It is important not to touch the device when it is running or immediately after being turned off, as it may be hot. Avoid wiping the device with oil, as this can damage the exterior or paint. If the outside of the Laser Cinema becomes dirty, turn it off and wipe it with a damp, soft cloth.
Crucially, do not touch the lens with your hands or wipe it with ordinary cleaning cloths. Dust on the lens should be removed using a dust blower. Grease, dirt, and fingerprints on the lens require careful cleaning by a professional using optical cleaning cloth, lens wiping paper, or professional cleaning solutions to prevent damage to the optical filming and maintain image quality.
To turn off the device, always use the Power button on the remote control. Do not cut off the power directly while the device is operating.
For troubleshooting common issues, the guide provides quick tips. If there's a delay before the picture appears upon turning on, this is normal as the Laser Cinema initializes. If there's no sound or picture, check the power cord connection and ensure the unit is activated from 'Standby' mode. If the picture is normal but there's no sound, check volume settings and ensure 'Mute' mode is off. For sound but no picture or a black and white picture, try unplugging and replugging the Laser Cinema after 60 seconds, and check the Color setting. If the sound or picture is distorted or wavy, nearby electric appliances might be interfering; try moving them away or plugging the Laser Cinema into a different outlet. A "clicking" sound from the plastic cabinet due to temperature changes is normal. If the remote control isn't working, confirm the Laser Cinema has power, change the batteries, and ensure they are correctly installed.
| HDCP | - |
|---|---|
| Video apps | 4oD, All 4, Amazon Prime Video, Apple TV, BBC iPlayer, DAZN, Disney+, ITV X, Netflix, Paramount+, YouTube |
| Noise level | 36 dB |
| Screen mirroring | Yes |
| Country of origin | China |
| Operating system installed | VIDAA U |
| High Dynamic Range (HDR) technology | Dolby Vision |
| Package volume | 0 cm³ |
| Native aspect ratio | 16:9 |
| Contrast ratio (typical) | 3000:1 |
| Projector native resolution | 2160p (3840x2160) |
| Light source type | Laser |
| Service life of light source | 25000 h |
| Throw ratio | .25 |
| Product color | Black |
| Built-in display | No |
| HDMI ports quantity | 3 |
| USB 2.0 ports quantity | 1 |
| VGA (D-Sub) ports quantity | 0 |
| Audio decoders | Dolby Atmos |
| RMS rated power | 30 W |
| Number of built-in speakers | 2 |
| Power consumption (standby) | 0.5 W |
| Power consumption (typical) | 200 W |
| Cables included | AC |
| Depth | 324 mm |
|---|---|
| Width | 520 mm |
| Height | 160 mm |
| Package depth | 401 mm |
| Package width | 604 mm |
| Package height | 295 mm |
| Package weight | 12000 g |