Do you have a question about the Hisense 55A7G and is the answer not in the manual?
Guidance on proper disposal of electronic waste for environmental protection.
Step-by-step guide for attaching the TV stand to the TV base.
Instructions for mounting the TV using a wall bracket, including dimensions.
Connecting antennas, HDMI, and AV sources to the TV.
Connecting headphones, digital audio systems, and eARC/ARC.
Connecting USB devices and setting up wired/wireless networks.
Instructions for inserting AAA batteries into the remote control.
Steps to pair a Bluetooth remote control with the TV.
Details on the effective distance and angles for remote operation.
Guidelines for environmentally responsible disposal of the remote control.
Configuring essential settings like language, network, and country.
Setting up accounts, naming the TV, and selecting voice assistants.
Information regarding HDMI and HDMI High-Definition Multimedia Interface trademarks.
Details on Dolby, Dolby Vision, and Dolby Atmos trademarks.
This document is a Quick Setup Guide for Hisense A7G series televisions, specifically models 50A7G, 55A7G, 65A7G, and 75A7G. It provides essential information for setting up and using the TV, emphasizing safety precautions, installation, connections, and remote control operation.
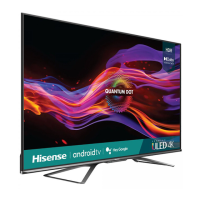
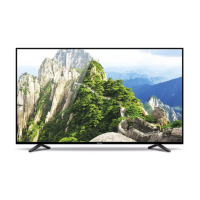
The Hisense A7G series televisions are designed for home entertainment, offering a range of features for viewing various content. They support multiple input sources, including antenna, HDMI, and AV, allowing users to connect external devices such as video cameras, set-top boxes, satellite receivers, and gaming consoles. The TVs are equipped with digital audio output options for connecting to external audio systems, enhancing the sound experience. For network connectivity, the televisions support both wired (LAN) and wireless (Wi-Fi) connections, enabling access to online content and smart TV features. The built-in Wireless LAN Adapter supports IEEE 802.11 a/b/g/n/ac communication protocols, ensuring compatibility with various wireless networks. The TVs also feature USB ports for connecting external storage devices like hard drives and USB sticks, allowing users to browse photos, listen to music, and watch movies directly on the TV. The remote control provides comprehensive control over the TV's functions, including power on/standby, input source selection, channel navigation, volume adjustment, and access to smart TV applications and settings. The TV's software functions are subject to changes with system upgrades, ensuring continuous improvement and new features.
The TV offers a user-friendly experience with a clear setup process. After initial power-on, the TV guides the user through an Installation Guide to set up basic preferences. This includes selecting the desired language, connecting to the internet (either via Ethernet or a wireless network), choosing the country of operation, and reviewing terms and conditions. The "Enhanced Viewing" feature can automatically adjust picture and sound modes to match the content being displayed, provided the automatic content recognition service is enabled. Users can also link their TV to a VIDAA account and assign a custom name to the TV. The option to select a voice assistant is available for enhanced control.
The TV's front panel includes a remote sensor, a power indicator, and a single button that serves as both standby/source control. The remote sensor receives signals from the remote control, and it's important to keep the area around it clear to avoid interference. The power indicator light is red when the TV is in standby mode. The single button allows users to turn the TV on, bring up the control menu, navigate between different inputs, and make selections with a long press.
For connectivity, the TV provides various ports on the rear. The ANT port allows connection to an outdoor VHF/UHF antenna or cable for receiving broadcast signals. HDMI ports (HDMI 1, HDMI 2, HDMI 3) are available for connecting external AV equipment, with HDMI 2 supporting eARC/ARC for enhanced audio return channel functionality. AV IN ports (Red, White, Yellow) are provided for older devices. Digital Audio Out (Optical) allows connection to external digital audio systems. USB ports (USB 1, USB 2) are for connecting USB devices. The LAN port facilitates a wired internet connection.
The remote control is designed for intuitive operation. It includes dedicated buttons for input sources, power on/standby, channel list, electronic program guide (DTV mode), quick setup, navigation (Up/Down/Left/Right), OK/on-screen keyboard, exit, home screen, volume, channel, microphone activation, audio description, mute, info, and media. Quick access buttons to various apps and a BROWSER button are also available. The remote control typically operates within a distance of up to 8 meters in front of the TV, with a controlled horizontal angle of ±30° and a vertical angle of ±15°. The operating distance may vary based on room brightness. For Bluetooth remote controls, a pairing process is required, which involves keeping the remote within 3 meters of the TV and pressing any button (except power and mic) to initiate pairing.
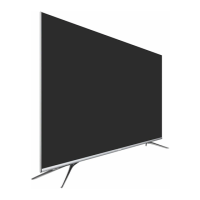
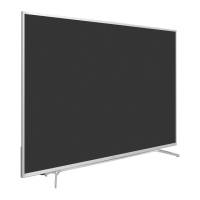
The guide emphasizes several safety and maintenance aspects to ensure the longevity and proper functioning of the TV. When installing the stand or wall mount bracket, it is crucial to disconnect the AC power cord first to prevent electrical hazards. The TV screen is fragile, so care must be taken to avoid scratches or damage from hard objects or pressure during installation. After installation, it's important to ensure the TV is stable before removing any protective film.
For battery installation in the remote control, users are instructed to slide open the battery compartment, insert two AAA size batteries, ensuring correct polarity (+ and - ends), and then close the compartment. Several notes are provided regarding battery care:
When connecting external devices, users should check the jacks for correct position and type to avoid image or color problems, ensuring all connections are tight and secure. It is advised not to connect external equipment while the TV's power cord is plugged in to prevent electric shock. The service jack is for factory testing purposes only and not for connecting external devices.
For USB connections, if a hard disk or USB hub is used, its mains adapter should be connected to the power supply. The TV may not support USB devices requiring more than 500mA or 5V (for USB 1.1/2.0) or exceeding 1A (for USB 3.0), and exceeding these limits can result in damage or data loss. Certain digital cameras may also not be compatible.
For network connectivity, using a modem or router that supports Dynamic Host Configuration Protocol (DHCP) is recommended, as it automatically provides necessary network settings. To ensure smooth network performance, the distance between the router and the TV should ideally be less than 10 meters. The TV's built-in Wireless LAN Adapter supports specific security systems (WPA, WEP, WPA2); other systems may not work.
The guide also advises against rapidly turning the TV off after powering it on, as it takes several seconds to load programs, and doing so may cause the TV to work abnormally. In case of difficulty setting up the TV, users are directed to refer to the troubleshooting tips in the User Manual or E-Manual. The product should not be damaged, dismantled, or thrown in municipal waste; instead, it should be packed and handed over to an authorized recycler.