EasyManua.ls Logo

Hitachi 3400-N - User Manual

Hitachi 3400-N
9 pages
Print Icon
To Next Page IconTo Next Page
Loading...
Using the Hitachi 3400-N VP-SEM
Before You Begin:
Sign in on the Calendar (we are pretty strict about this).
Wear gloves when handling anything that goes in the chamber such as stubs,
specimens, sample holders. Finger oils contaminate the machine and destroy image
quality.
Measure your sample’s diameter and height accurately:
Improper sample measurements will cause the sample to hit
the detectors and create thousands of dollars of damage!
Opening the Chamber to Load Specimens
(This may also be done later using the software)
1. Click the “AIR” button on the front of the machine
(push hard enough to hear vacuum change) (Fig. 1-A):
2. Wait a few minutes until you hear the machine beep
3. Insert sample holder. **For multi-holder, insert with
sample #1 facing blue pen mark in chamber**
4. Close the chamber and hold it shut with your hand.
Press “EVAC” button on front of machine (Fig. 1-B). Let go
of chamber door when vacuum engages it.
Starting PC-SEM:
5. Click the “PC-SEM” icon on the desktop. There is no
password.
6. When the PC-SEM finishes booting, you will see the
Specimen Dimensions window above (Fig. 2). Select the
correct Diameter/Size and Height (Fig. 2-A) for the
sample. Click OK.
7. On the right side of the screen are 4 overlapping control
panels -Condition, Image, Utility and Stage (Fig. 3). The
software will launch on the stage control panel as shown.
8. Check the other panels to be sure the last user left
this in the modes you want to use or you’ll have
difficulties and could damage your sample.
Figure 2. Specimen Size Setting
-A
Figure 3. Control Panels
EVAC AIR
-A B-
Figure 1. Front Panel Buttons
Question and Answer IconNeed help?

Do you have a question about the Hitachi 3400-N and is the answer not in the manual?

Summary

Before You Begin: Initial Setup and Safety

Safety and Sample Preparation

Essential precautions for handling specimens and ensuring accurate measurements to prevent damage.

Loading Specimens: Opening the Chamber

Chamber Opening Procedure

Step-by-step guide to safely open the SEM chamber for specimen loading.

Starting the PC-SEM Software

Software Initialization and Setup

Steps to launch the PC-SEM software and configure initial specimen settings.

Image and Condition Setup

Select Imaging Mode

Choose between Secondary Electron (SE) or Backscattered Electron (BSE) imaging modes.

Set Vacuum Mode

Configure the vacuum to SEM mode, not VP-SEM, for standard imaging.

Stage Control and Specimen Positioning

Set Stage Height (Z-position)

Adjust the stage height for optimal focus, depth of field, or EDAX analysis.

Sample Manipulation on Stage

Utilize stage controls to rotate, tilt, and move the specimen for feature inspection.

Multi-Holder Operation

Using the Stage Memory Function

Load and access pre-programmed sample positions using the stage memory feature.

Electron Beam Setup

Beam Settings Frame Configuration

Access and adjust key beam parameters like kV and probe current for specimen analysis.

Set Working Distance and Focus

Match working distance to stage height for beam focus and optimal imaging.

Turn ON Electron Beam

Activate the electron beam after chamber evacuation and await HV progress completion.

Auto-Saturate Filament (AFS)

Use AFS to auto-saturate the filament for stable electron emission.

Mechanical Aperture Selection

Choose the appropriate mechanical aperture size based on magnification for clear imaging.

Set Magnification and Initial Focus

Adjust magnification and use manual dial for initial specimen finding and focus.

Record Best Settings

Best Settings Log

Template to record optimal Kilovolts (KV) and Stage Height/WD settings.

Focus, Brightness and Alignment Setup

Start Scan and Auto Contrast;Brightness

Initiate scanning and use ABCC for automatic contrast and brightness adjustment.

Adjust Scan Speed and Image Display

Select scan speed for image refresh and adjust illumination using mechanical aperture.

Alignment Procedure Reminder

Note: Alignments are critical after KV, probe current, or aperture changes.

Multi-Step Focusing Process

Detailed steps for achieving optimal focus using magnification, focus, contrast, and stigmation controls.

Image Adjustment and Capture

Adjust Contrast and Brightness

Fine-tune contrast and brightness for optimal dynamic range after initial ABCC adjustment.

Select Scan Speed for Capture

Choose appropriate scan speed (Slow3/5) before capturing a high-resolution image.

Capturing and Saving Images

Image Capture Workflow

Steps for capturing an image, observing progress, and returning to live view.

Image Saving Options

Select thumbnails, embed annotations, and save images to the desired folder.

Manage Open Images and RAM

Limit the number of open images to prevent software freezing and clear RAM.

Changing Specimens and Shutdown

Turn OFF Electron Beam

Deactivate the electron beam before changing specimens or shutting down.

Prepare for Specimen Change or Shutdown

Open the chamber to air, set dimensions, and remove/store specimens.

Evacuate Chamber for Next Use or Shutdown

Evacuate the chamber after changing specimens or to initiate shutdown.

System Shutdown Procedure

PC-SEM Program Exit

Properly quit the PC-SEM software and sign out from the calendar.

File Transfer and Area Cleanup

Transfer files via Dropbox, ensure the computer remains ON, and clean the area.

Appendix 1: Align the Instrument

Mechanical Alignment

Adjust aperture controls to achieve the brightest beam for initial setup.

Begin Beam Alignment

Perform initial focus and stigmation before opening the alignment window.

Appendix 1 Continued: Alignment Steps

Aperture Alignment

Use 'Wobbler' mode to align the aperture for optimal image stability.

Beam Alignment Tilt and Shift

Adjust tilt and shift using stigmation knobs to achieve maximum brightness.

Stigma Alignment

Minimize rocking movement by adjusting stigmation dials and repeat Degauss if needed.

Appendix 2: Using Variable Pressure Mode

VP Mode Requirements

Utilize higher KV and probe current for viewing uncoated specimens in VP mode.

VP Mode Setup Procedure

Set up beam on SE mode first, then select VP-SEM and adjust vacuum to 30-50 Pa.

VP Mode Imaging Adjustments

Focus on Slow 1/2, adjust BSE Gain, and use COMP/TOPO/3D modes. Do not adjust stigmators.

Overview

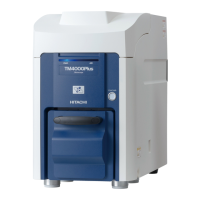
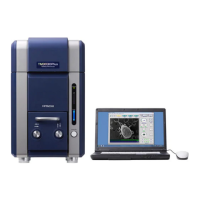
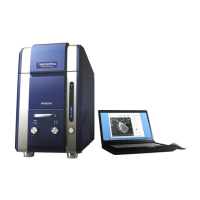
The Hitachi 3400-N VP-SEM is a scanning electron microscope designed for imaging and analysis of specimens, including those that are uncoated and non-conductive, through its Variable Pressure (VP) mode.

Function Description:

The device operates by generating an electron beam that scans the surface of a specimen. Interactions between the electron beam and the specimen produce various signals, which are then detected and converted into an image. The VP-SEM offers two primary imaging modes: Secondary Electron (SE) mode for surface topography and Backscattered Electron (BSE) mode for compositional and topographical information. The Variable Pressure mode is particularly useful for imaging non-conductive samples without the need for a conductive coating, as it suppresses charging by allowing air molecules to absorb some of the charge.

Important Technical Specifications:

  • Accelerating Voltage (KV): Adjustable, typically 10-25 KV for VP mode, and can be set to specific values like 10.0 KV.
  • Probe Current: Adjustable, starting around 50 uA, with higher currents for EDAX or long working distances, and lower for very high magnifications (>20,000x). Emission current should ideally be above 65-70 uA after auto-saturation.
  • Working Distance (WD): Adjustable, typically 5-10 mm for VP mode, and can be set to specific values like 65.0 mm. This determines the focal plane of the electron beam.
  • Magnification: Adjustable, from 100x for initial specimen finding and focusing, up to very high magnifications (>20,000x). Alignments are recommended at 1000x-5000x and then at 2x the desired magnification.
  • Vacuum Modes:
    • SEM Mode: Standard high vacuum for conductive samples.
    • VP-SEM Mode: Variable pressure mode for non-conductive samples, with adjustable vacuum settings (e.g., 30-50 Pa).
  • Detectors:
    • SE (Secondary Electron) Detector: Primarily for surface topography.
    • BSE (Backscattered Electron) Detector: Provides compositional (COMP), topographical (TOPO), and 3D details.
  • Specimen Dimensions: The system requires accurate input of specimen diameter/size (e.g., 15 mm) and height (e.g., +5 mm, Standard) to prevent collisions with detectors.

Usage Features:

  • Loading Specimens:
    • Requires signing in on a calendar and wearing gloves to prevent contamination.
    • Accurate measurement of sample diameter and height is crucial to avoid damage.
    • The chamber is opened by pressing the "AIR" button, waiting for a beep, inserting the sample holder (multi-holder samples #1 facing blue pen mark), closing the chamber, and then pressing "EVAC" until vacuum engages.
  • Software Interface (PC-SEM):
    • Launched by clicking the "PC-SEM" icon on the desktop (no password).
    • Initial setup involves selecting specimen dimensions (Diameter/Size and Height) in the "Specimen Dimensions" window.
    • The interface features four overlapping control panels: Condition, Image, Utility, and Stage.
  • Imaging Modes and Settings:
    • Image Tab: Select SE or BSE mode.
    • Condition Tab: Set vacuum to SEM or VP-SEM mode.
    • Stage Tab: Set desired stage height (z-position), rotate, tilt, and move the stage. A "Memory" button is available for multi-holder sample positions.
  • Electron Beam Setup:
    • Accessed via the "Beam Settings Frame."
    • Adjust Accelerating Voltage (KV), Probe Current, and Working Distance.
    • Turn ON the electron beam after chamber evacuation.
    • Use the "AFS" button for auto-saturation of the filament to ensure good electron flow (emission current > 65-70 uA).
    • Select the appropriate Mechanical Aperture based on sample and magnification.
    • Initial magnification is set to 100x for finding and focusing the specimen.
  • Focus, Brightness, and Alignment:
    • "Freeze/Run" button starts the scan.
    • "ABCC" button sets auto contrast and brightness as a starting point.
    • Scan speed settings ("Fast 1," "Slow 1," "Slow 3/5") are used for adjusting focus and capturing high-resolution images. "Slow 1" or "Slow 2" is necessary for BSE imaging.
    • Mechanical aperture can be slightly adjusted to even out illumination.
    • Focusing is a multi-step process involving increasing magnification, adjusting focus, contrast, and brightness, and using Stigmator X and Y dials to minimize image distortion.
    • Alignments (mechanical aperture, accelerating voltage, probe current) are critical and require assistance. They should be performed at 2000-5000x and then repeated at 2x the desired magnification.
  • Capturing and Saving Images:
    • Must be in "Slow3/5" scan mode to capture.
    • "M/2560" button captures the image.
    • Captured images appear as thumbnails.
    • "Embed into image" checkbox burns annotations into the image.
    • "Save" button opens a dialogue box to select a folder and name the file.
    • It is recommended to save and delete images frequently to prevent software freezing (do not keep > 10-15 images open).
  • Variable Pressure Mode Usage (Appendix 2):
    • Requires higher KV (10-25 KV), WD (5-10 mm), and probe current (>50 uA).
    • Beam setup, focus, stigmation, and alignment should first be done in regular SE mode using a control sample.
    • Turn KV Off, select VP-SEM under Conditions Tab, set vacuum (30-50 Pa), then evacuate and switch to the test sample.
    • Turn KV back ON and focus in "Slow 1" or "Slow 2" mode.
    • Adjust BSE Gain (3 or 4) on the Image Tab.
    • COMP, TOPO, and 3D modes are available for BSE imaging.
    • Crucially, do NOT adjust stigmators in VP mode; use fine focus only.

Maintenance Features:

  • Cleaning: Leave the computer ON and the area clean after use.
  • Troubleshooting:
    • If the image disappears or turns flat grey after adjusting the mechanical aperture, click ABCC again or go back to a lower aperture and perform an alignment.
    • If the image moves when increasing magnification, repeat alignment.
    • If the beam is lost during Y-Align, carefully readjust.
  • Shutdown/Changing Specimens:
    • Click "HV OFF" and then "AIR" to open the chamber.
    • The "Specimen Dimensions" window will open; enter new specimen dimensions or select "Size=15mm" and "Height=Standard" for shutdown.
    • Wait approximately 90 seconds for the chamber to open ("Processing to Air" message).
    • Remove specimens using gloves or forceps.
    • Close the chamber door and click "EVAC" (software or front panel).
    • If continuing, re-saturate the filament.
    • Quit the PC-SEM Program when finished.
    • Say "No" if prompted to save stage history.
    • Sign out on the calendar.
    • Transfer files using Dropbox (NOT USB).

Alignment Procedures (Appendix 1):

  • Mechanical Alignment: Performed when changing mechanical aperture, accelerating voltage, or probe current. Involves turning X-Align and Y-Align knobs to achieve the brightest beam, followed by ABCC readjustment.
  • Beam Alignment:
    • Begin at 1000x-5000x magnification, repeating the process at 2x the desired magnification.
    • Apply desired KV and probe current settings.
    • Perform normal focus and stigmation without opening the align window first.
    • Open the alignment window and adjust "Aperture Align," "Beam Align Tilt," "Beam Align Shift," "Stigma Align X," "Stigma Align Y," and "AFC Align" using the X and Y dials.
    • "Wobbler" mode (with "Red1" scan) assists in aperture alignment by exaggerating motion.
    • Minimize image movement using stigmator knobs for aperture alignment.
    • Achieve maximum brightness using stigmation knobs for beam alignment.
    • Degaussing the image (via "CeGauss" button in Beam Setup Panel) may be necessary before stigma alignment for best results.
    • Stigma alignment involves adjusting X and Y stigmation dials to minimize rocking movement until the image appears to move in and out towards you.
    • Close the alignment window and repeat the Degauss step.

Hitachi 3400-N Specifications

General IconGeneral
BrandHitachi
Model3400-N
CategoryMicroscope
LanguageEnglish

Related product manuals