Item Description
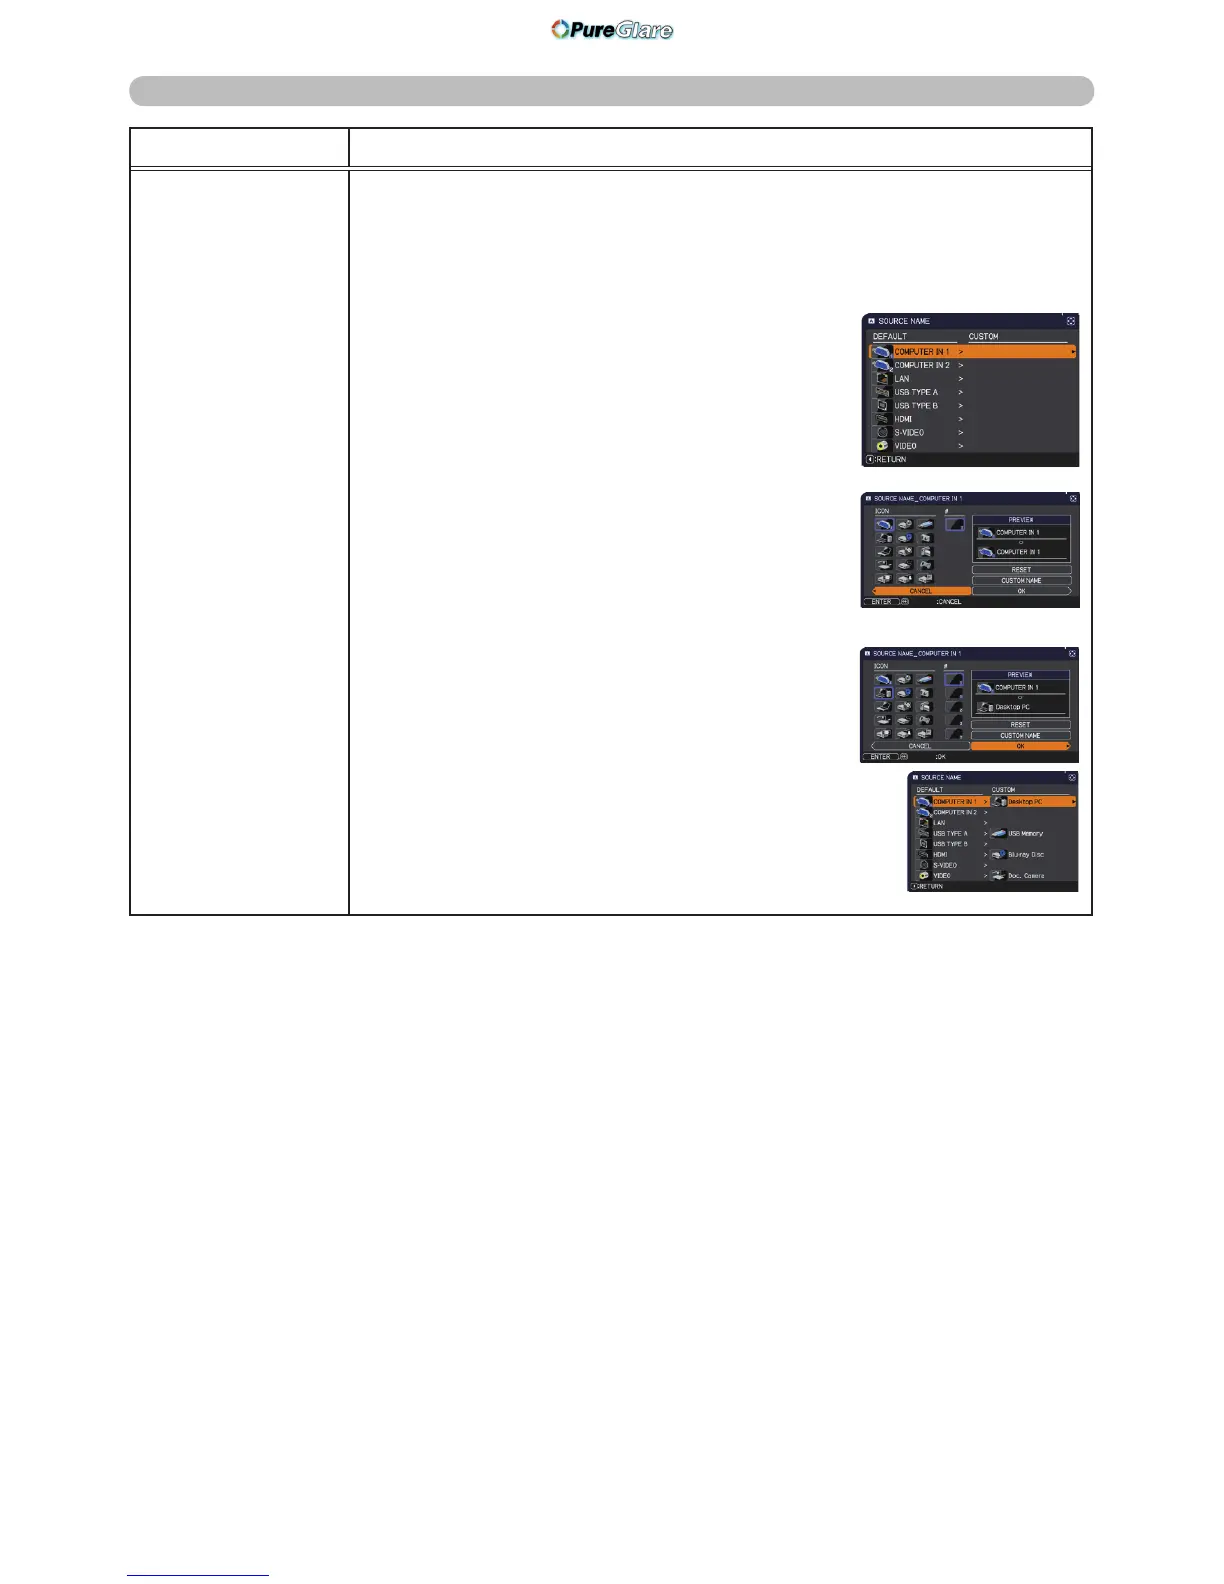
SOURCE NAME
Each input port for this projector can have a name applied to it.
(1) Use the ▲/▼ buttons on the SCREEN menu to select SOURCE
NAME and press the ► or ENTER button.
The SOURCE NAME menu will be displayed.
(2) Use the ▲/▼ buttons on the SOURCE
NAME menu to select the port to be
named and press the ► button. The
SOURCE NAME dialog will be displayed.
Right side of the menu is blank until a
name is specied.
(3) Select an icon you would like to assign to
the port in the SOURCE NAME dialog.
The name assigned to the port will also be
automatically switched according to your
icon selection. Press the ENTER or INPUT
button to determine your icon selection.
(4) Select a number you would like to assign
to the port along with the icon. You can
select the number either from blank
(no number assigned), 1, 2, 3, or 4. Then
press the ENTER or INPUT button.
(5) If you would like to modify the name assigned
to the port, select CUSTOM NAME and
press the ENTER or INPUT button.
(continued on next page)
 Loading...