EasyManuals Logo

Hitachi CP-X505 Service Manual

Hitachi CP-X505
104 pages
To Next Page IconTo Next Page
To Previous Page IconTo Previous Page
Page #54 background imageLoading...
Page #54 background image
54
CP-X505(EDX35N)
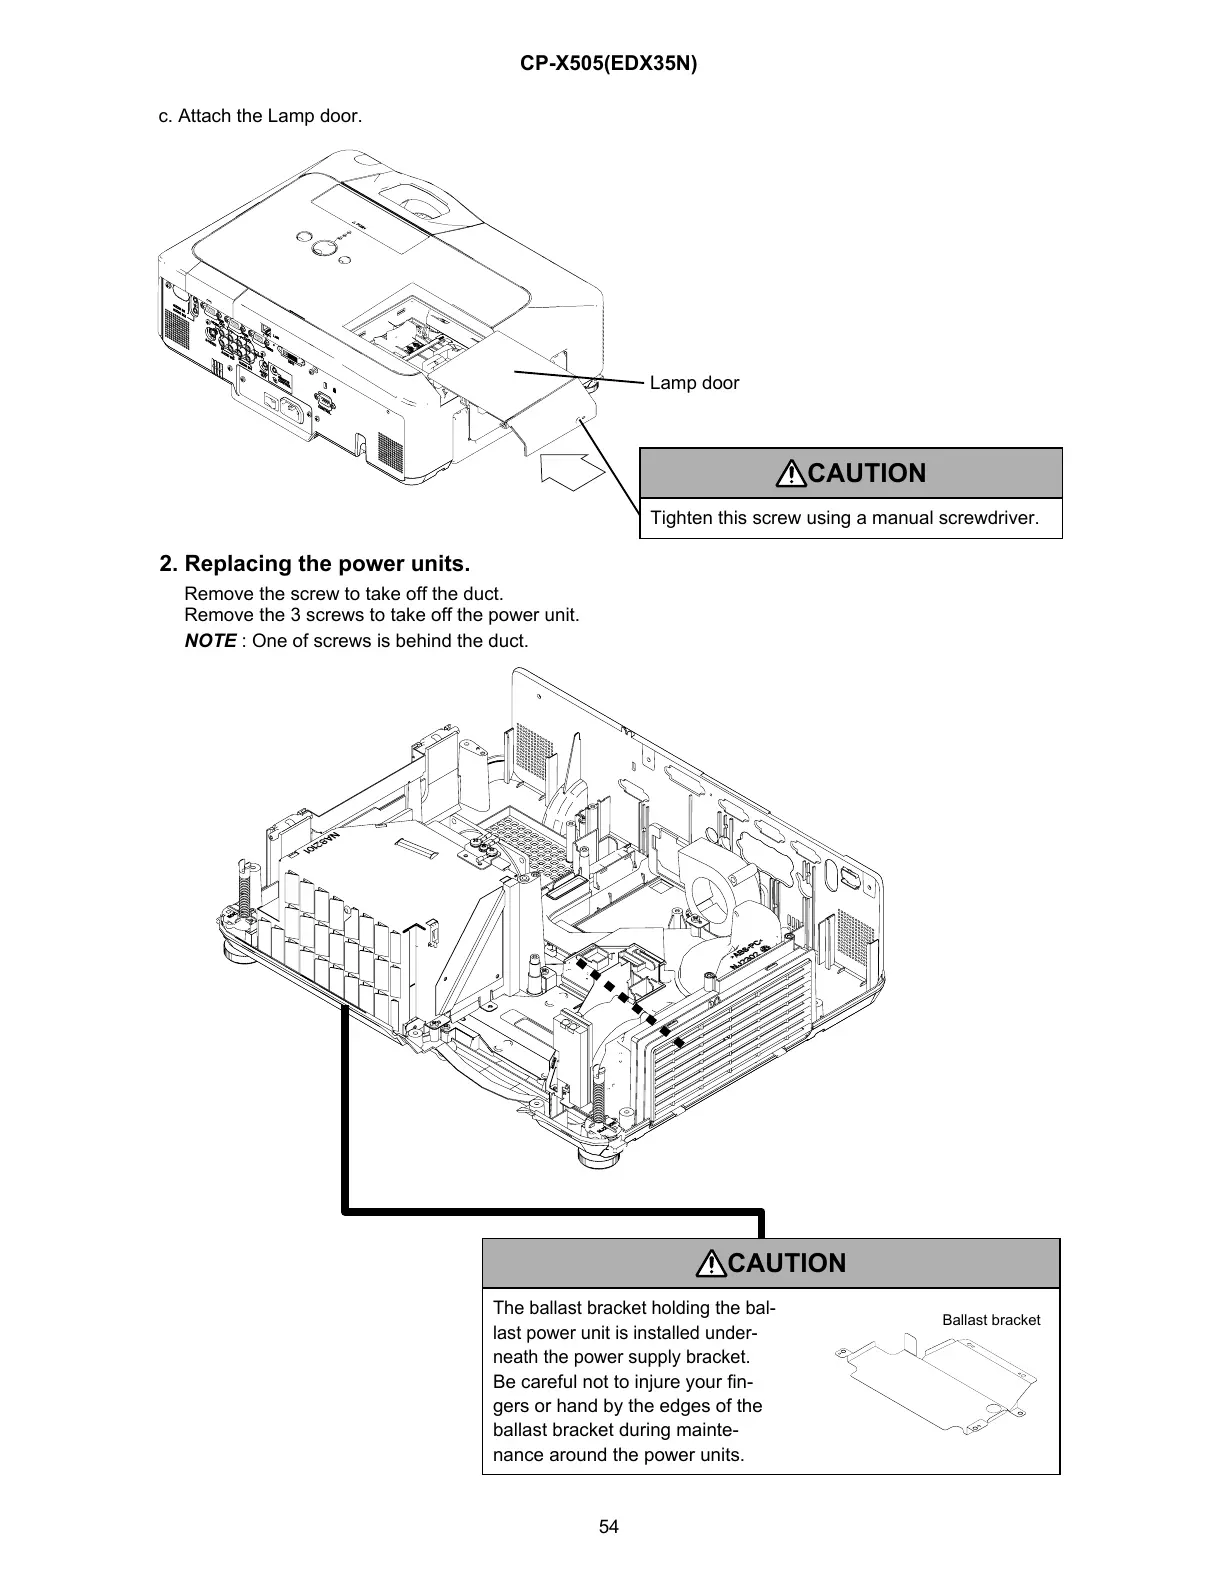
c. Attach the Lamp door.
2. Replacing the power units.
Remove the screw to take off the duct.
Remove the 3 screws to take off the power unit.
NOTE : One of screws is behind the duct.
Lamp door
CAUTION
The ballast bracket holding the bal-
last power unit is installed under-
neath the power supply bracket.
Be careful not to injure your n-
gers or hand by the edges of the
ballast bracket during mainte-
nance around the power units.
Ballast bracket
CAUTION
Tighten this screw using a manual screwdriver.
All manuals and user guides at all-guides.com

Other manuals for Hitachi CP-X505

Questions and Answers:

Question and Answer IconNeed help?

Do you have a question about the Hitachi CP-X505 and is the answer not in the manual?

Hitachi CP-X505 Specifications

General IconGeneral
BrandHitachi
ModelCP-X505
CategoryProjector
LanguageEnglish

Related product manuals