--- 11 ---
8-2. Reassembly
Reassembly can be accomplished by following the disassembly procedures in reverse. However, special
attention should be given to the following items.
8-2-1. Reassembly of armature and stator
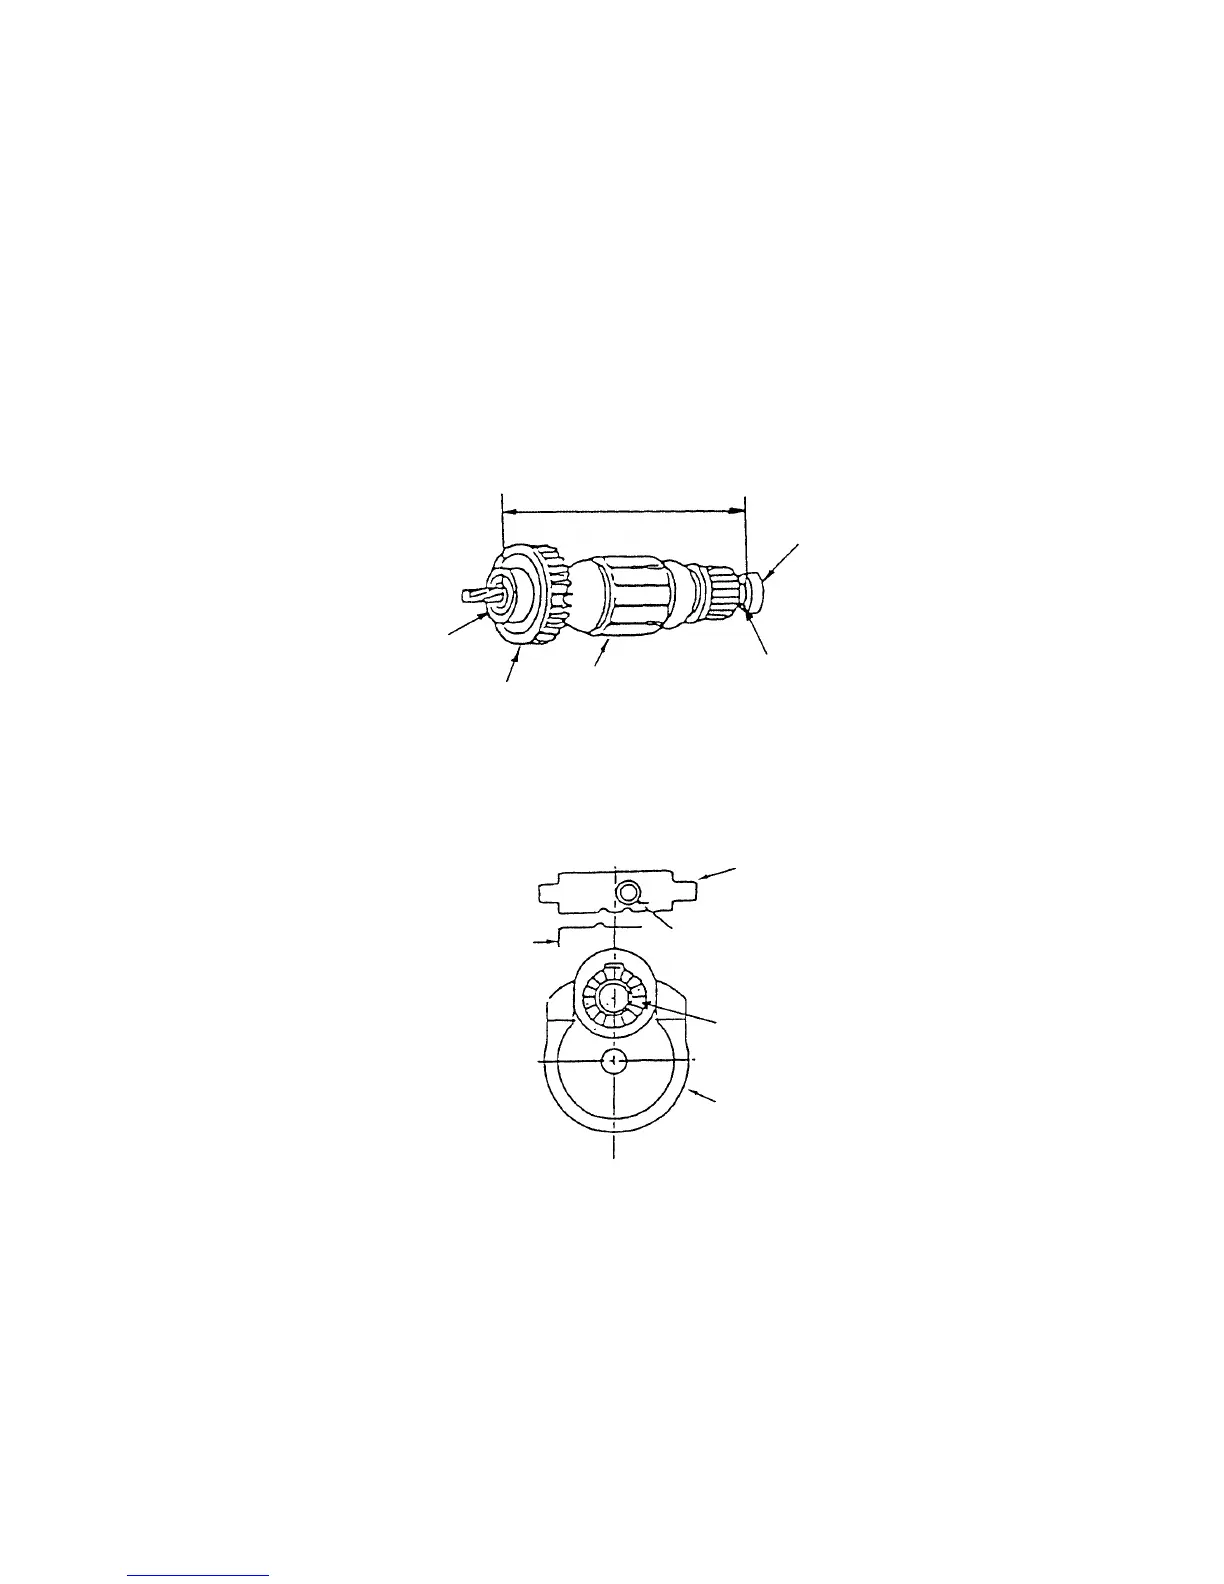
(1) Press fit Ball Bearing 608VVC2PS2L [14] and Ball Bearing 626VVC2PS2L [17] onto the Armature [15]. Stop
pressing when Ball Bearing 608VVC2PS2L [14] comes in contact with the fan. With a vernier caliper or similar
tool, check that the press-fit dimension is 123.8 mm as shown in the following figure. As excessive press
fitting can cause deformation or other damage to the fan, particular attention is required. Also, if press fitting is
insufficient, it will cause loss of thrust of the Armature [15], resulting in heat generation. Accordingly, press-fit
Ball Bearing 626VVC2PS2L [17] until it butts against the stepped portion of the shaft.
8-2-2. Reassembly of holder
(1) When installing the Change Plate [11] and Spring (A) [12] to the Holder [13], be careful of the direction of
each part.
Ball Bearing
608VVC2PS2L [14]
Armature [15]
Stepped portion of shaft
Ball Bearing
626VVC2PS2L [17]
Fan
123.8
Spring (A) [12]
Holder [13]
Ratchet
Change Plate [11]
(2) Insert the Armature [15] and the gear spindle ass'y into the Holder [13] and insert them into the Stator [16].
Be sure to reassemble the Steel Ball D4.76 [9] at this time. Apply ATTOLUB MS No. 2 to the ball chamber of
the Spindle [4] and then reassemble the Steel Ball D4.76 [9].
(3) Install the reassembly from the above step (2) in housing (A) of Housing (A). (B) Set [18]. Check that the fan
of the Armature [15] can be turned freely by finger.
8-2-3. Other
When re-mounting housing (A) of Housing (A).(B) Set [18], be very careful to ensure that the lead wires are not
excessively slack, and that they are not pinched between components during reassembly.
0
- 0.3
0
- 0.3
 Loading...