6.3.5 User controller wiring connection
For YUTAKI S80 TYPE 1, the YUTAKI user controller has to be
requested as accessory (PC-ARFHE).
1 Connect the user controller wires to the terminals 3 and 4 of
the TB2 of the indoor unit.
2 Pass the wires through the cord bands placed in the upper
side of the indoor unit (left or right side) and take them out
through the holes on the rear side of the indoor unit.
N O T E
Try to keep the maximum possible distance between the user
controller wire the power cables.
3 )LQDOO\¿[WKHXVHUFRQWUROOHUWRWKHZDOODWDQRSWLPXPKHLJKW
as explained in its Instruction manual.
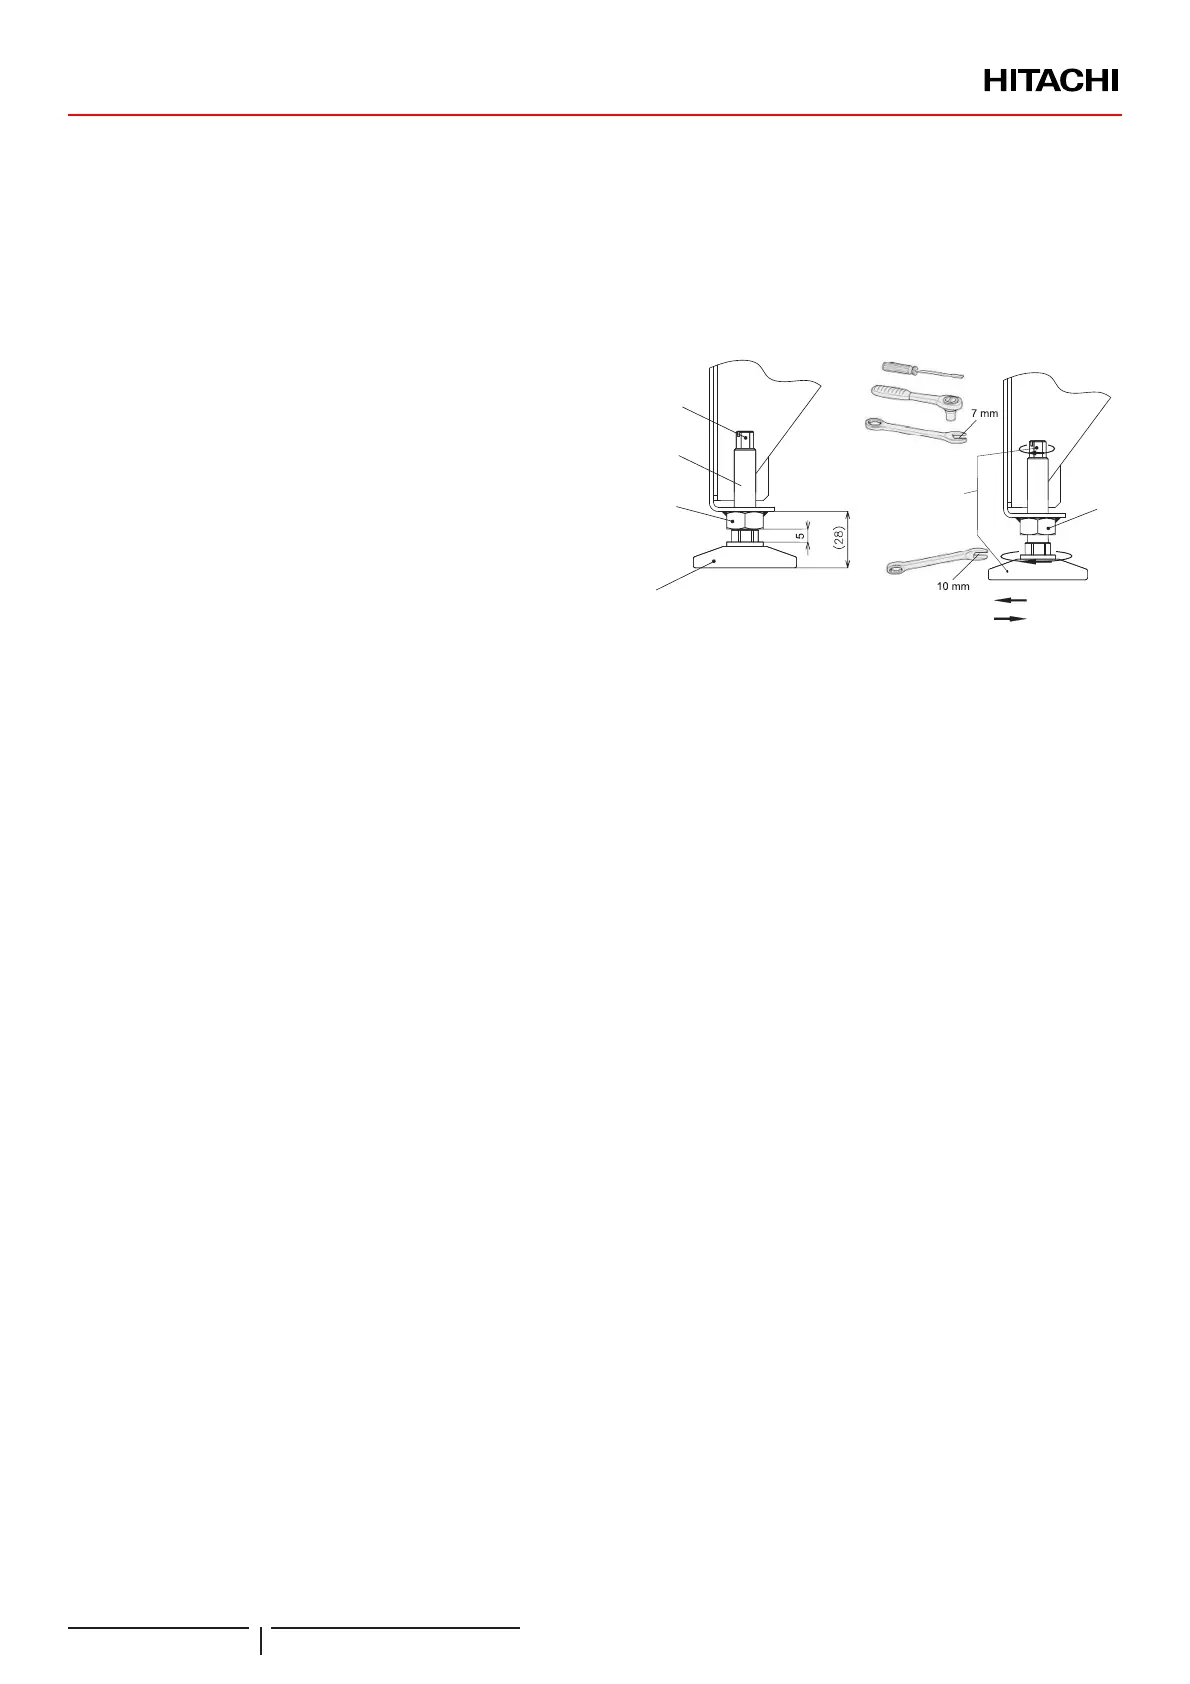
6.3.6 Levelling procedure
2QFHWKHLQGRRUXQLWFRQQHFWLRQVKDYH¿QLVKHGDGMXVWWKH
height of the mounting foot to align perfectly the refrigerant
piping outlet to the installation connection.
N O T E
• Adjust only the necessary mounting foot of the unit.
• Start with all four feet screwed in as far as possible (factory supplied
position).
• Two people are necessary for the levelling procedure.
Follow the process:
Turn the mounting foot to extend the height (use the hexagon or
slot designed for this purpose in the shaft end).
C A U T I O N
• Take care do not turn the weld nut when turning the mounting foot.
8VHDQVORWZLWKDKHLJKWSUR¿OHORZHUWKDQPP
• 1HYHUZRUNRQPRUHWKDQRQHIRRWDWWKHVDPHWLPH:KHQ¿QLVKLQJ
DOOORFNQXWVPXVWEHWLJKWHQHG¿UPO\
Foot
Weld nut
Threaded
shaft
Hexagon and slot
for help in the
foot adjustment
process
Adjust the
foot’s height as
needed
(2 options)
Extend
Take in
o
6.3.7 Test and check
Finally, test and check the following items:
• Water leakage
• Refrigerant leakage
• Electrical connection
• ...
N O T E
Please refer to the chapters of
“4.2.1 Refrigerant charge”, “4.3.5 Water
¿OOLQJ´
and “7 COMMISSIONING” in this document and refer the Outdoor
XQLW ,QVWDOODWLRQ DQG 2SHUDWLRQ PDQXDO IRU WKH VSHFL¿F GHWDLOV DERXW
refrigerant charge tasks.
D A N G E R
'RQRWFRQQHFWWKH SRZHU VXSSO\ WRWKHLQGRRUXQLW SULRU WR ¿OOLQJ
the space heating circuit (and DHW circuit if it were the case) with
water and checking water pressure and the total absence of any
water leakage.
UNIT INSTALLATION
PMML0340B rev.1 - 03/201628
 Loading...