Do you have a question about the Hive SLT4A and is the answer not in the manual?
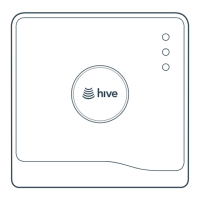
Step-by-step guide for setting up the Hive Hub.
Instructions for physically installing the Hive thermostat device.
Process for connecting the thermostat and Hub wirelessly.
Final steps involving account creation and configuration.
Connect the Hive Hub to your internet router using the provided Ethernet cable.
Plug the Hub into a power outlet and wait for the indicator light to flash yellow.
Switch off power to the central heating and cooling system at your electrical breaker box before installation.
Take a photo of current wire connections before removing the old thermostat.
Use the optional plate to cover wall marks before attaching the thermostat backplate.
Screw the Hive thermostat backplate to the wall and prepare for wire connections.
Connect wires to the correct terminals and attach the thermostat body to the backplate.
Verify the Hub's indicator light is flashing yellow to confirm readiness.
Turn power back on; the thermostat will search for the Hub.
Confirm wiring on-screen and view the welcome message after successful pairing.
Go to hivehome.com or the app and log in with your provided account details.
Input the Hub ID, found on the underside of the Hub, to finalize setup.
Repeat steps 1-7 from the thermostat installation for each additional zone.
Log in online or via the app to install devices and follow on-screen instructions for each zone.
Install the thermostat without a Hub for basic programmable functions.
Upon power-up, the thermostat shows 'Search'; press and hold buttons until timer runs down.
Check Hub's internet and power connection if the thermostat displays a connection error.
Contact Hive or visit hivehome.com for a Signal Booster if connection issues persist.
| Power Supply | 4 x AA batteries |
|---|---|
| Connectivity | Zigbee |
| Mounting | Wall-mounted |
| Display | LCD |
| Temperature Range | 5°C to 32°C |
| Control | Via Thermostat, App |
| Hive Hub | Required |