Warning : A severe impact or drop may cause
immediate breakage or enough damage so that the
glazed panel breaks later for no apparent reason.
Stacking Panel Guidelines:
• When using stacking panels,
total height may not exceed 80”.
• Structural stacking panels must have immediate
adjacent panels or corner connectors of the same
height at each end of run.
• Stacking panel congurations that create a variable
height will require the use of a variable height nish
kit as listed in pricer.
Use of variable height conguration is not allowed
if the stacker is to be congured with hanging
accessories.
• Variable height congurations greater than
30” not allowed.
• Glass stackers may be stacked above fabric panel or
fabric stacker but must always be on top. Do not add
other stackers above glass stacker.
• Stacker pins (Fastener #5) are only needed at corner
post connections.
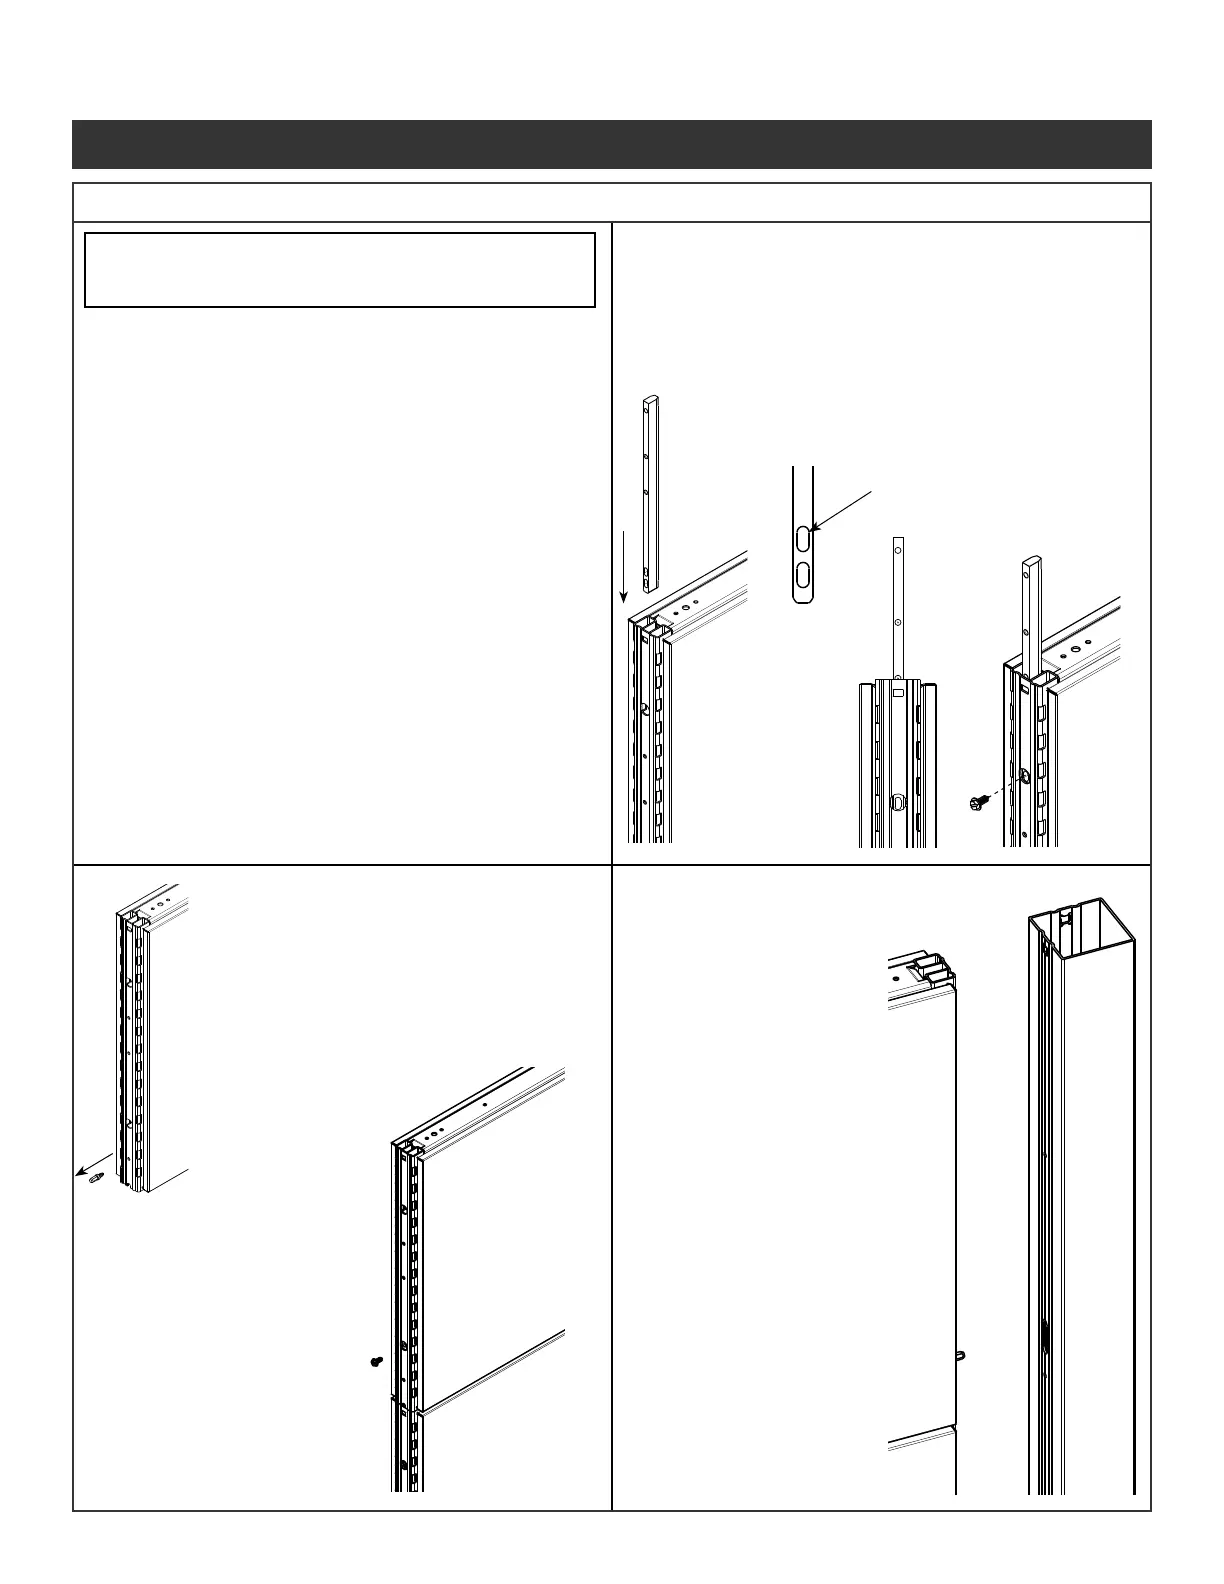
Step 1 - Before installing the stacking panel, the base
panel must not be attached to any other panel
or corner connector.
Step 2 - Remove any top cap center clips if needed.
Step 3 - Insert attachment legs into
center channel of the base
panel vertical tube.
Step 4 - In the second obround hole
from the bottom secure
attachment leg with screw
(Fastener #3) provided.
Step 5 - Remove all pre installed alignment
pins (Fastener #5) from the
vertical using a 3/16” hex driver or
adjustable pliers, or drill chuck.
Step 6 - Place stacking panel over the
attachment legs until fully seated
on the panel.
Step 7 - Secure stacking panel
on both sides using
screws (Fastener #3)
provided.
Step 8 - Install the top cap
center clip and top cap
on to stacking panel
when trimming out
panels.
Step 9 - When installing a
connector post to
a stacking panel
the alignment pin
must be used in
the stacking panel
vertical.
Step 10 - The alignment pins
are inserted into
the slots in each
connector post at
the same time as
the glide tower tab
is inserted into the
connector post.
Illustration 9. Stacking Panel Installation
Panel System Installation Packet
343-3890A
(03/17)
Page 9 of 27
 Loading...