– 3 –
1. Back out Thumb Screw.
Lay Fence on Carriage Tray.
2. Rotate to Vertical.
3. Slide Fence Up. Tighten Screw.
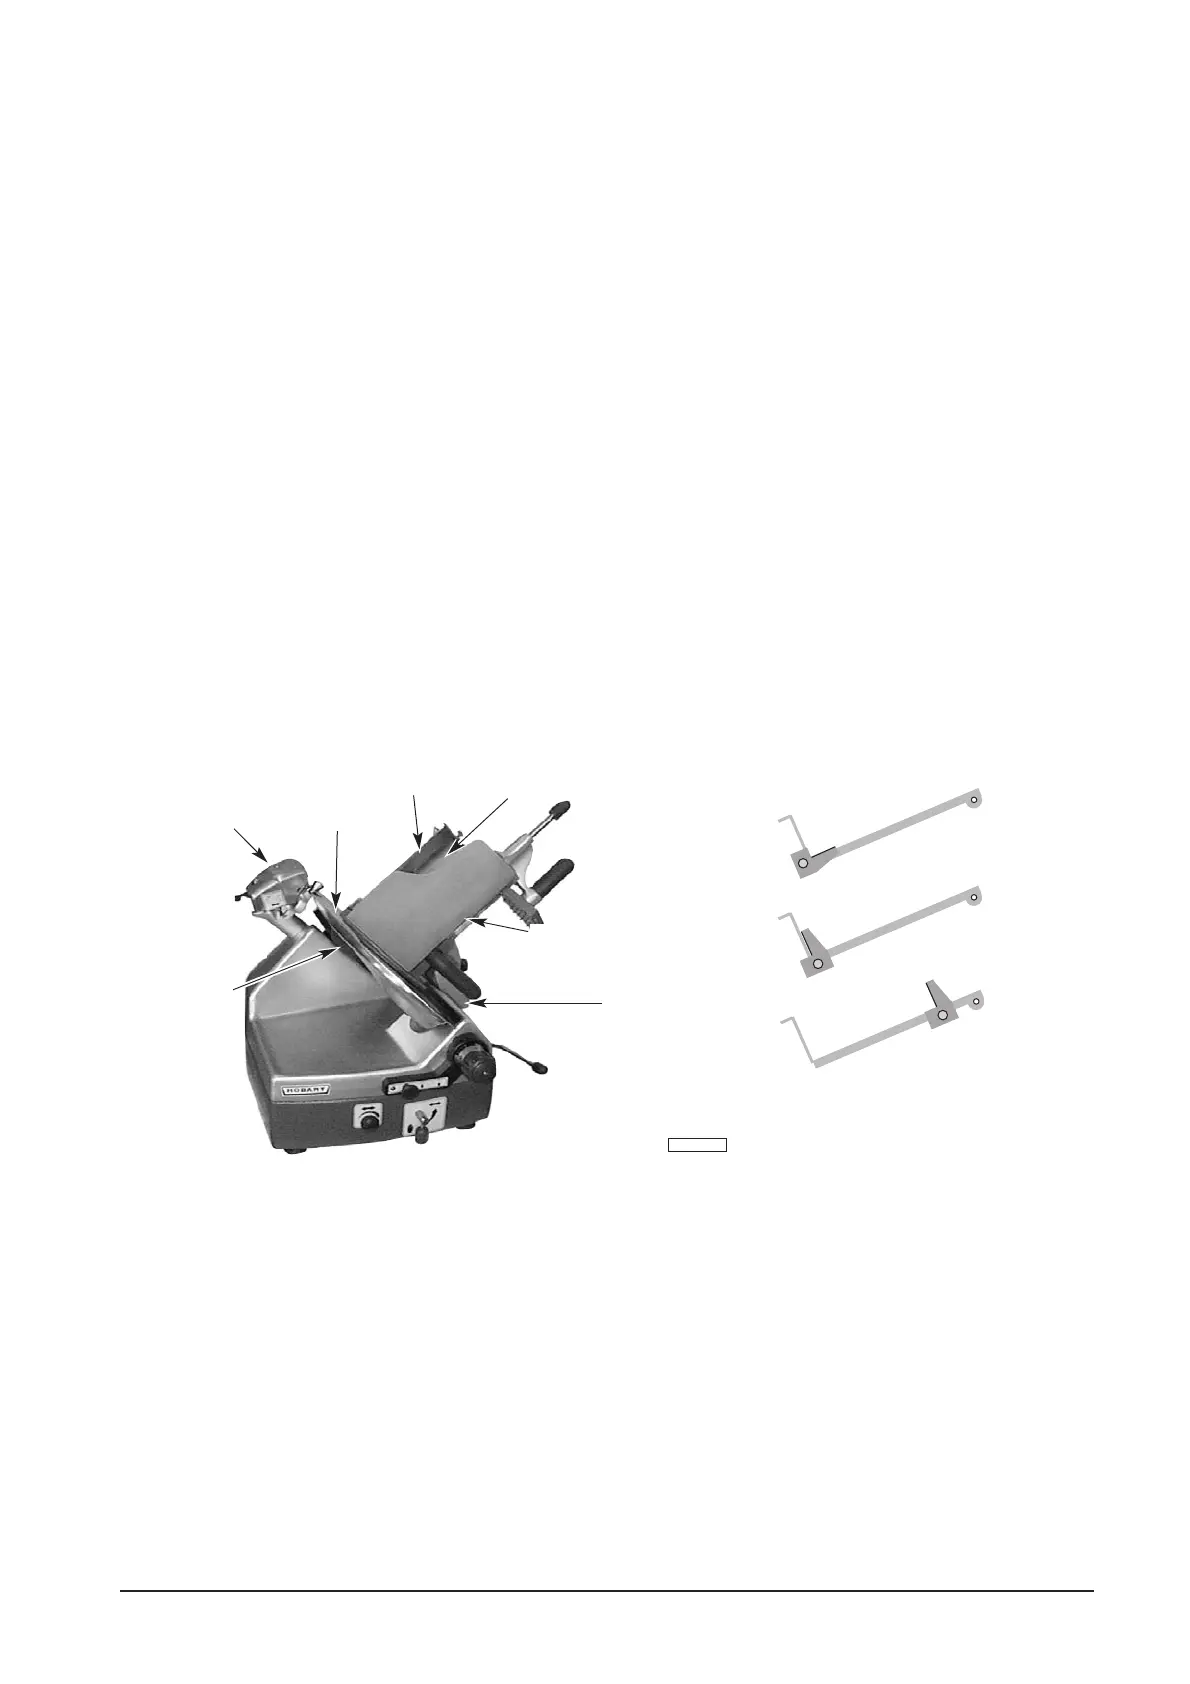
Carriage Tray
The Carriage Tray is secured to the slicer when the knob on the Carriage Tray / Support Arm is
turned clockwise until snug (Fig. 1). Refer to page 7 for assembly information.
Sharpener
The Sharpener should always be mounted on top of the slicer and locked to its bracket during use
(Fig. 1).
Top Knife Cover
The Top Knife Cover should always be in place and secured with its Latch Knob during use (Fig. 1).
Deflector
The Deflector should already be mounted below the knife (Fig. 1).
Fence
The Fence (Fig. 1) can be clamped on the Carriage Tray to limit product movement during slicing.
Product Shield
The Product Shield is shipped separate and must be permanently assembled to the carriage tray
according to the instructions shipped with the Product Shield. The Product Shield can be cleaned
in place.
Fig. 1
CLEAN BEFORE USING
The 2912 slicer must be thoroughly cleaned and sanitized after installation and before being used.
Refer to Cleaning, page 6.
PL-41481-1
SHARPENER
DEFLECTOR
TOP KNIFE COVER
CARRIAGE TRAY
CARRIAGE TRAY /
SUPPORT ARM
PRODUCT SHIELD
FENCE
 Loading...