– 18 –
Remove and Clean Wire Cage (Fig. 14)
1. Lower the bowl. Remove the agitator and bowl.
2. While holding the wire cage securely with both hands, rotate it to your left until the front-center
retainer shoe reaches the gap in the circular ridge of the planetary drip cup.
3. Lower the front of the wire cage and move the wire cage slightly to the rear so the rear retainer
shoes clear the ridge of the drip cup. The wire cage can now be removed.
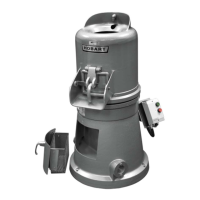
Fig. 14
4. Wash the wire cage in a sink, rinse with clear water, and dry with a clean cloth.
5. The stainless steel splash guard can be wiped o and/or washed with a cloth or sponge using
warm, soapy water. Rinse with clear water and dry with a clean cloth.
Reinstall Wire Cage
1. Position the ring of the wire cage so the front-center retainer shoe is positioned below the gap in
the circular ridge of the planetary drip cup.
2. Position the grooves so the rear retainer shoes straddle the circular ridge on the planetary drip
cup.
3. Lift the front of the wire cage so the front-center retainer shoe passes up through the gap in the
circular ridge on the planetary drip cup.
4. Rotate the wire cage to your right until all three retainer shoes straddle the ridge on the drip cup.
 Loading...