Sanding the joiner
Cl If the wing joiner will not Fit in the cavity, lightly
sand the excess epoxy and uneven surface joints
from the joiner edges and sides. Caution: A snug fit
is desirable between the joiner and the wing cavity.
Do not sand excessively.
Viewing the wing dihedral
Cl Pay close attention to the orientation of the wing
joiner in relation to the dihedral of the wings.
Marking the wing cavity
1-1 Lay the wing halves on the work surface with the
flat side facing up. Remove the precut balsa from the
root rib. Using the measurements in the sketch, trim
away the balsa sheeting from the bottom of the wing
to allow for the installation of the aileron servo.
Gluing the joiner in the wing
1-1 Mix l/4oz. (7.5ml) of 30-minute epoxy to glue
the joiner into one wing half. Use a mixing stick or
epoxy brush to apply epoxy to all four sides of the
joiner cavity wall. Insert the joiner into the cavity
up to the centerline marked on the joiner plate. Be
sure you are installing the joiner in the correct
orientation to the wing. It should angle upwards
when installed correctly. Clean the excess epoxy
from the wing root rib. You must be sure all the
excess glue is removed from the wing root or the
wings will not fit together correctly. Allow enough
time for the epoxy to fully cure before proceeding
to the next step.
Applying the epoxy
l-l Mix l/2oz. (14.5ml) of 30-minute epoxy and
apply to the wing root rib and inside the joiner
cavity of the second wing half.
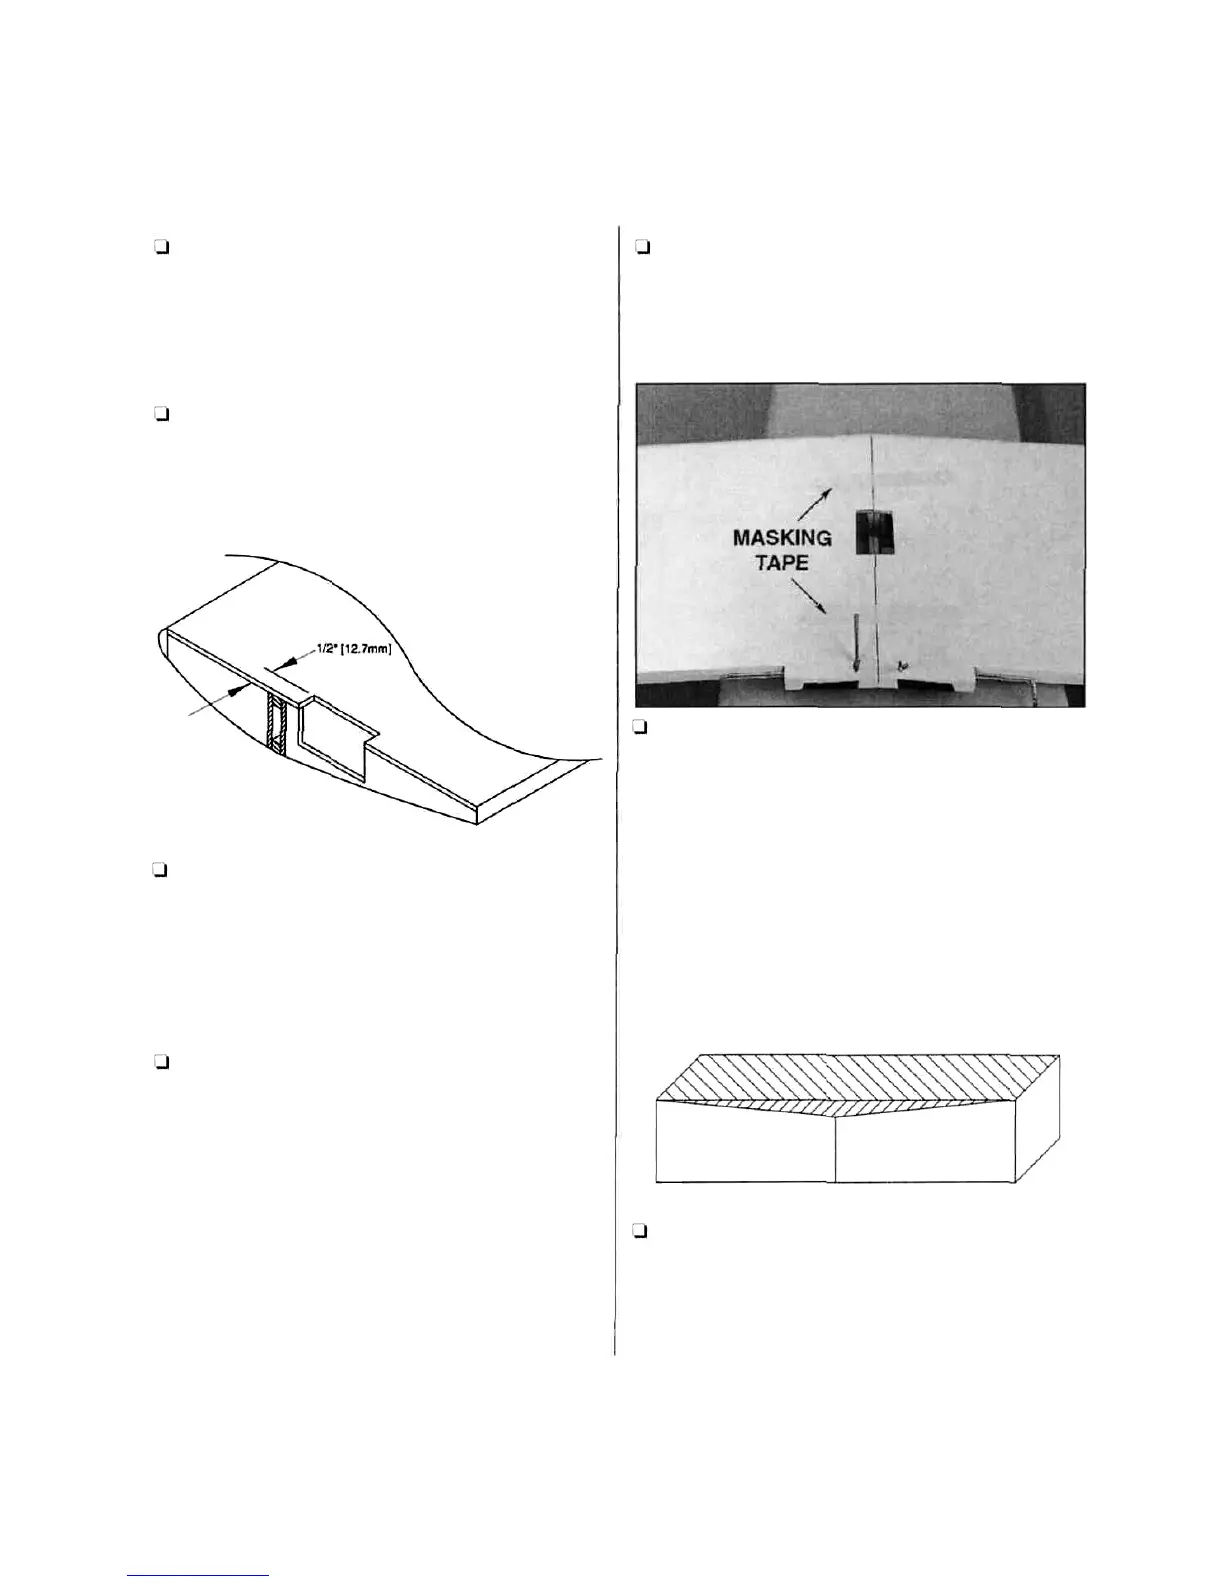
Joining the wing halves
Q Assemble the two wing halves with the tightest
seam possible. No gaps should be showing between
the two wing halves. Clean the excess epoxy from
the outside of the wing using a paper towel and
rubbing alcohol. Tape the wing halves together with
masking tape. Set the wing aside to cure.
Cutting the mounting blocks
l-l Find the aileron servo tray and the two balsa
servo tray mounting blocks and position them
with the marked dihedral line up. Using a sharp
hobby knife, cut the angle out of the block. This
angle will be placed against the wing when the
servo tray is installed.
6