3
ENGLISH
instillation exceeding 1liter should be followed with care
due to the possibility of fluid overload.
Potential Complications of Continuous Flow Hysteroscopy:
• Hyponatremia
• Hypothermia
• Uterine perforation resulting in possible injury to adjacent
anatomy
• Pulmonary edema
• Cerebral edema
Precautions
• Vaginal ultrasonography before hysteroscopy may identify clinical
conditions that will alter patient management.
• Intrauterine distension can usually be accomplished with
pressures in the range of 35–75mmHg. Unless the systemic
blood pressure is excessive, it is seldom necessary to use
pressures greater than 75–80mmHg.
• Do not use the seals if the sterile package is open or appears
compromised. Do not use the device if damage is observed.
• Avoid exposing the scope to sudden temperature changes. Do
not immerse hot scopes into cold water or liquid.
• Any mechanical manipulation of the eyepiece may result in seal
breakage, therefore do not attempt to remove the eyepiece.
• Avoid contact with metal parts of the scope and other conductive
accessories by ensuring before activation of the HF output that
the active electrode is at a sufficient distance from the tip of the
scope.
• To avoid perforation, do not use the scope tip as a probe and
exercise caution when the scope is being inserted through the
cervix and when the scope tip is near the uterine wall.
Inspection Prior to Use
Prior to each use, the outer surface of the insertion portion of the
hysteroscope, sheath(s) and outflow channel(s) should be inspected
to ensure there are no unintended rough surfaces, sharp edges or
protrusions. Check that both the hysteroscope and outflow channel
contain seals.
Hysteroscope System Set-up Instructions
The Omni Hysteroscope consists of a base scope (60-200),
compatible sheaths including an Omni 3.7mm Diagnostic Sheath
(60-201), Omni 5.5mm Operative Sheath (60-202) and Omni 6mm
Operative Sheath (60-203), and Removable Outflow Channels (40-
201 and 50-201XL) as shown in Figure 1.
FIGURE1. REPRESENTATIVE HYSTEROSCOPE &
OUTFLOW CHANNEL
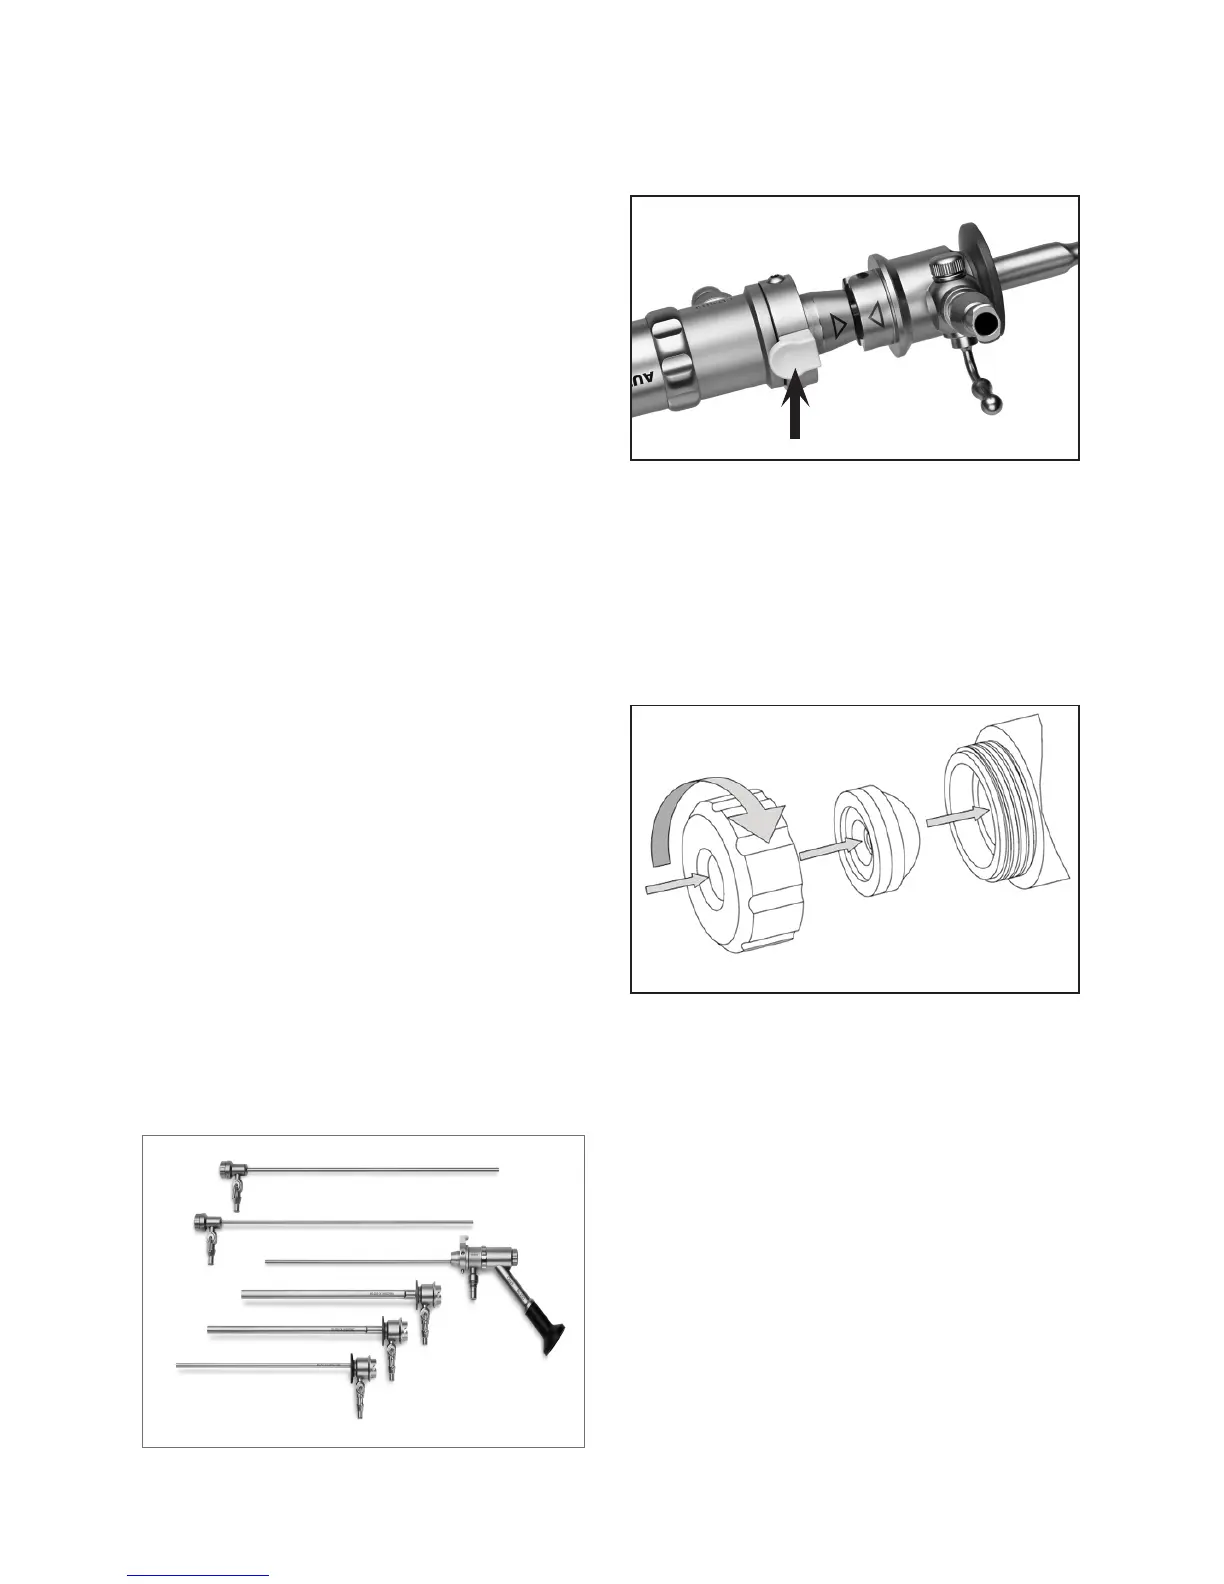
To place compatible sheath over base hysteroscope
Using the arrows for orientation, slide the sheath over the exposed
rod lens until the end of the sheath engages with the base of the
scope and is secure as seen in Figure 2. To release the sheath,
push the locking mechanism pin at the base of the scope.
FIGURE2. SECURE SHEATH
To Insert Sterile Single-Use Seal (40-902):
Both the hysteroscope and the outflow channel contain single-use
seals for their working channels. Figure3 below illustrates the
installation of the seals.
Caution: To ensure proper performance of the system and prevent
leaks, install new seals in the hysteroscope and the outflow
channel prior to use.
FIGURE3. SEAL INSTALLATION
To place removable outflow channel into hysteroscope:
Insert the removable outflow channel into the proximal seal of the
hysteroscope working channel. Reverse this process to remove the
outflow channel.
To Attach Fluid Connections:
The Omni 3.7mm Diagnostic Sheath, Omni 5.5mm Operative
Sheath and Omni 6mm Operative Sheath accept a standard male
luer connection for fluid inflow. The Removable Outflow Channel
includes a universal stopcock for both luer and friction connections.
Needed Equipment for Indicated Procedures
Fiber optic light source, fiber optic light guide (not supplied with
this product)
Hysteroscope Assembly/Disassembly Instructions
The Omni Hysteroscope is compatible with Metal-Halide and Xenon
light sources with up to 300watts of power.
Place the correct adapter on the light post of the fiber optic scope
and on the instrument end of the light guide. Adapters are available
Seal Cap
Seal
6.0mm Sheath
5.5mm Sheath
3.7mm Diagnostic Sheath
Hysteroscope
Removable Outflow Channels
Push to Release
 Loading...


