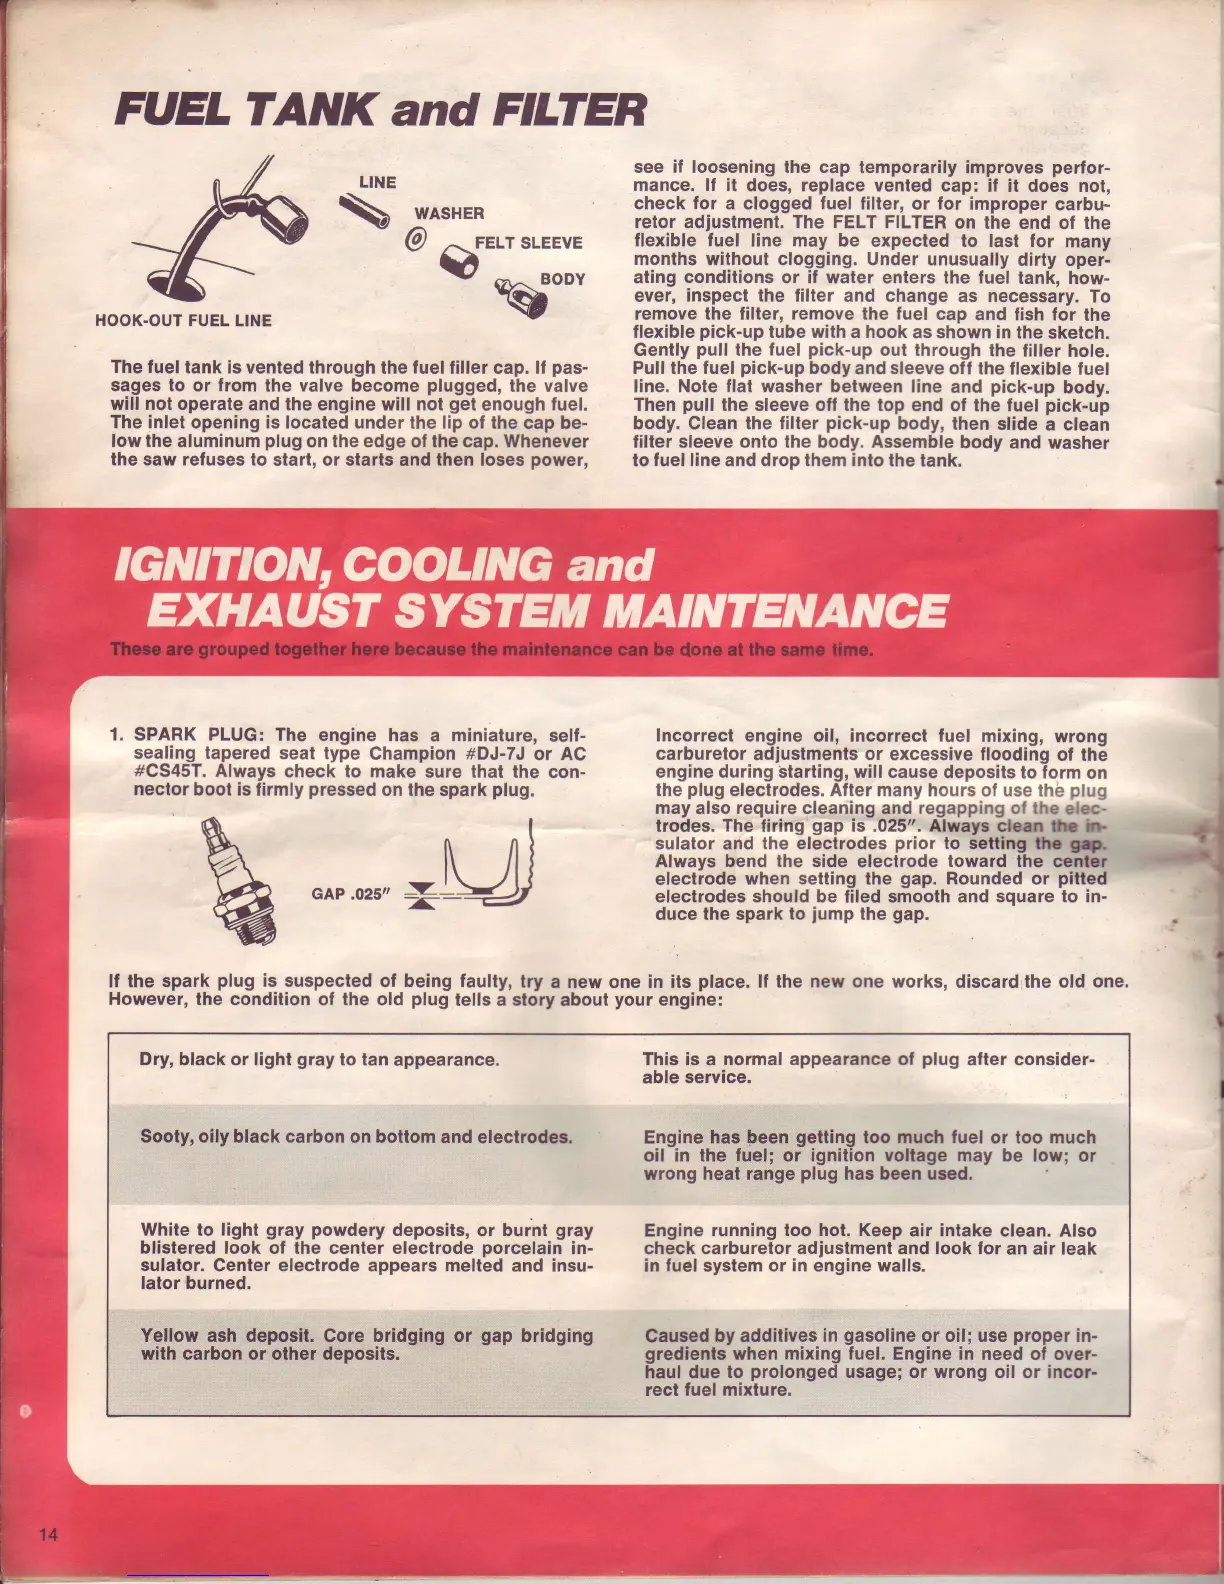
FUELTANK
and
FILTER
LINE
\
r,r/AsHER
(9)
--FELT
SLEEvE
V
-^
"oo,
q--
see if loosening the cap temporarily
improves
perfor-
mance. lf it
does, replace vented cap:
if it does not,
check
for
a clogged tuel filter,
or
for
improper
carbu-
retor
adjustment. The
FELT
FILTER
on the
end ol the
llexible fuel line may
be expected to last for
many
monlhs
withoul clogging. Under unusually
dirty oper-
ating
conditions
or if water enters the fuel
tank,
how-
ever,
inspecl the
filter and change
as
necessary.
To
remove the filler,
remove
the
fuel
cap
and fish for
the
llexible
pick-up
tube with a hook
as shown in
the sketch.
Gently
pull
the
fuel
pick-up
out through
the filler
hole.
Pull the fuel
pick-up
body and sleeve olf the
flexible fuel
line. Note
flat
washer between line
and
pick-up
body.
Then
pull
the sleeve off the top
end of the fuel
pick-up
body. Clean the filter
pick-up
body,
then slide
a clean
filter
sleeve onto the body. Assemble
body and
washer
to
fuel
line and drop them into the tank.
HOOK-OUT
FUEL LINE
The fuel
tank is vented
through the
fuel
filler cap. lf
pas-
sages to or from
the
valve
become
plugged,
the valve
will not operate
and the engine will not
get
enough
fuel.
The inlet opening is located under
the
lip
of the cap be-
low the
aluminum
plug
on the edge
of
the cap.
Whenever
the saw refuses to
start, or starts and then loses
power,
1. SPARK PLUG:
The engine
has a miniature,
self-
seafing tapered
seat type
Champion
#DJ-7J
or AC
#CS45T.
Always
check to make
sure that the con-
nector boot
is firmly
pressed
on
lhe spark
plug.
Incorrect engine
oil, incorrect fuel mixing,
wrong
carburetor
adjustments or excessive llooding
of the
engine during Starting, will cause
deposits to form
on
the
pluq
electrodes. After manv hours of use thb
pluq
.AP.O2'"=v,l
the
plug
electrodes. After many hours of use thb
plug
may
also
require cleaning and regapping ol
the
elec-
trodes. The liring
gap
is .025", Always
clc
b b
sulator and the electrodes
prior
to
settlng
it-lf$l
Always bend
the
side electrode
toward
the csl$
electrode
when setting the
gap.
Rounded or
pitted
electrodes should be filed smooth and square to in-
duce the spark lo
jump
the
gap.
t
lf the spark
plug
is suspected of
being
faulty,
lry
a new one
in its
place.
lf
the
new one works,
discard the
old one.
However, the condition
of the old
plug
tells a story about
your
engine:
Dry,
black or light
gray
to tan
appearance.
8ooly, oilyblack carbon on botlom
and electrode&
While to
light
gray powdery
deposits,
or burnt
gray
blistered look ol the center electrode
porcelain
in-
sulator.
Center electrode appears melted and insu-
lator burned.
Yellow
ash deposit. Core
bridging or
gap
bridging
with carbon or olher deposits.
This is
a
normal appearance of
plug
after consider-
able service.
Engine
has
peen
getting
too mueh fuel
or
too much
oil
in the fuel; or ignition voltage may be low;
or
wrong
heat range
plug
has been used.
Engine running too
hol. Keep
air intake clean.
Also
check carburetor
adjustment
and
look lor
an
air
leak
in
luel system or in engine walls.
Caused by
additives in
gasoline
or oil; use
proper
in-
gredients
when mixing
fuel.
Engine in need of over-
haul due to
prolonged
usage;
or
wrong
oil or incor-
rect fuel mixture.
 Loading...