YOUR PHYSICAL CONDITION
Work relaxed but stay alert. Take a break from work when-
serious ailments such as a heart condition, check with
ever you begin to tire. Never operate when tired or under
your doctor before doing any strenuous lifting, reaching,
the influence of alcohol or any drugs which may affect
pushing, chopping, shoveling, etc. Always do any lifting
your balance, coordination or judgement.
If
you have any
iob with vour leg muscles, not your back.
SECTION
1
-PREPARING YOUR NEW SAW
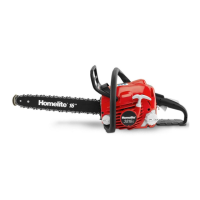
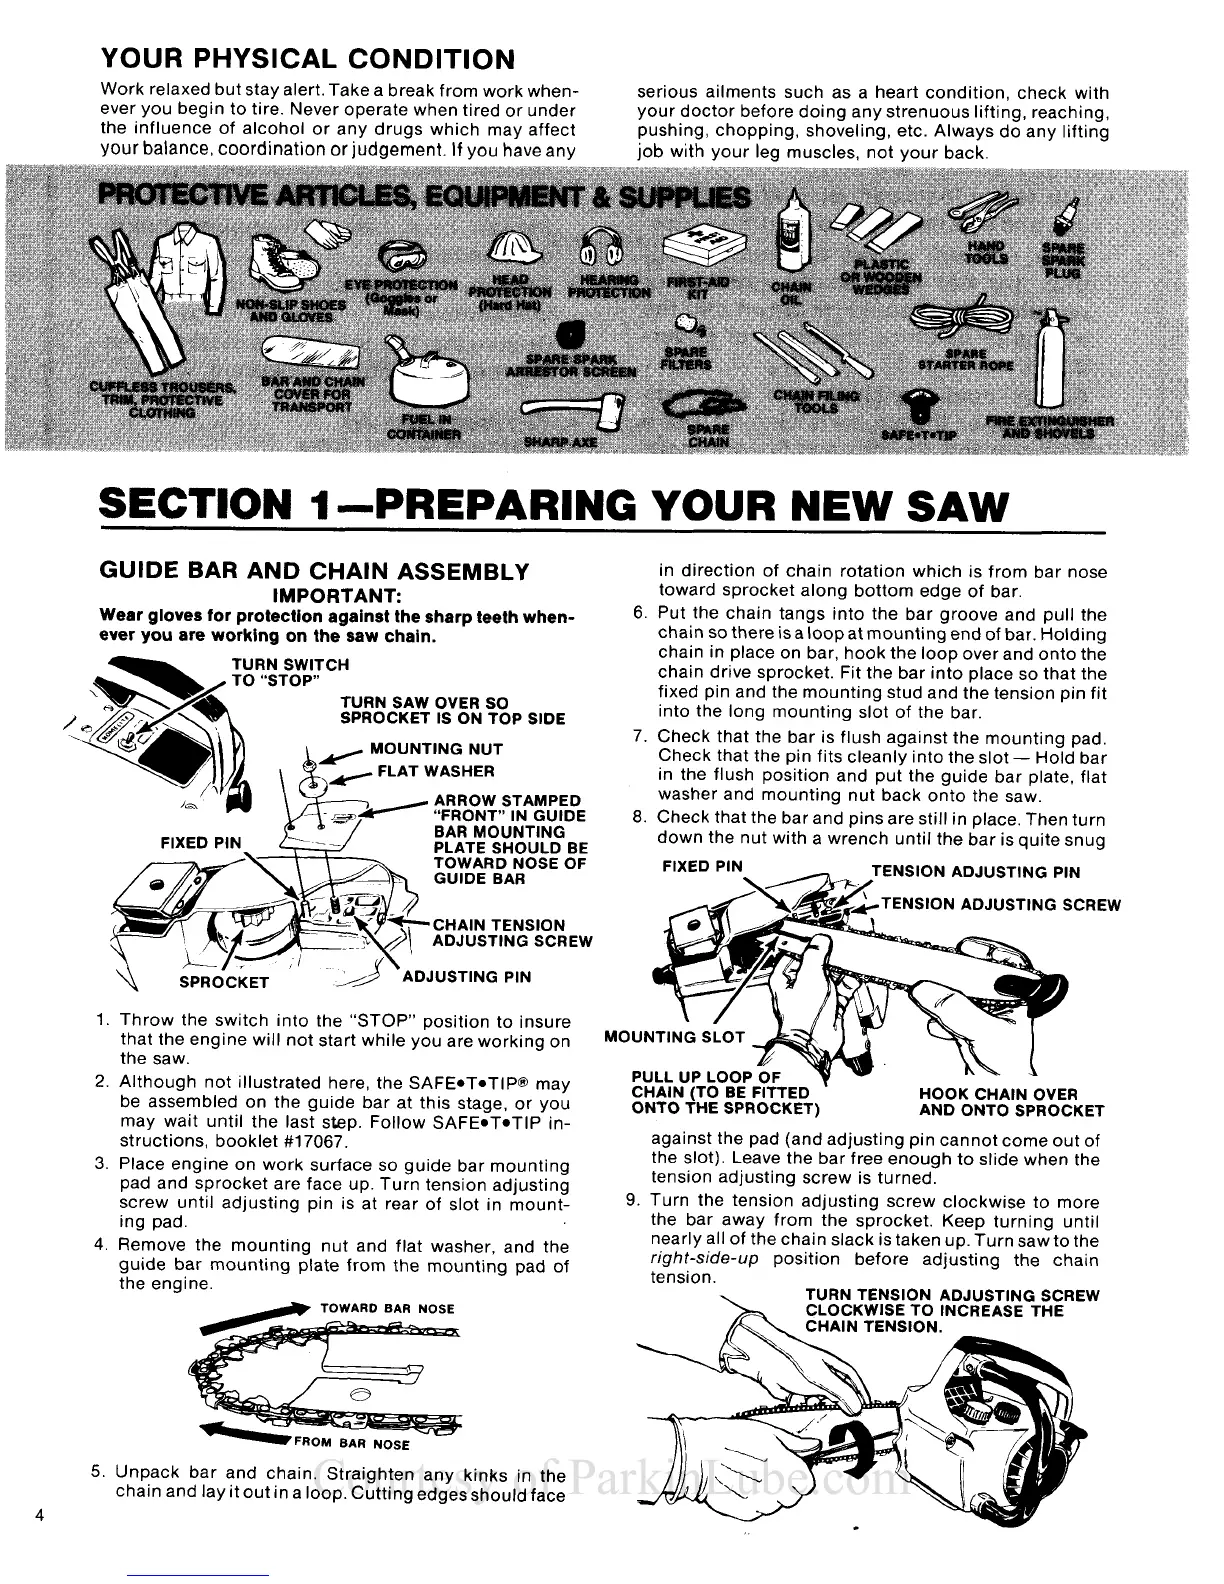
GUIDE BAR AND CHAIN ASSEMBLY
IMPORTANT:
Wear gloves for protection against the sharp teeth when-
ever you are working on
the
saw chain.
TURN SAW OVER SO
SPROCKET IS ON TOP SIDE
FLAT WASHER
ARROW STAMPED
"FRONT" IN GUIDE
BAR MOUNTING
PLATE SHOULD
BE
TOWARD NOSE OF
GUIDE BAR
CHAIN TENSION
ADJUSTING SCREW
ADJUSTING PIN
1. Throw the switch into the "STOP" position to insure
that the engine will not start while you are working on
the saw.
2.
Although not illustrated here, the SAFE*T.TlP@ may
be assembled on the guide bar at this stage, or you
may wait until the last step. Follow
SAFE.T*TIP in-
structions, booklet
#17067.
3.
Place engine on work surface so guide bar mounting
pad and sprocket are face up. Turn tension adjusting
screw until adjusting pin is at rear of slot in mount-
ing pad.
4.
Remove the mounting nut and flat washer, and the
guide bar mounting plate from the mounting pad of
the engine.
5.
Unpack bar and chain. Straighten any kinks in the
chain and lay it out in a loop. Cutting edgesshould face
in direction of chain rotation which is from bar nose
toward sprocket along bottom edge of bar.
6. Put the chain tangs into the bar groove and pull the
chain so there isa loop at mounting end of bar. Holding
chain in place on bar, hook the loop over and onto the
chain drive sprocket. Fit the bar into place so that the
fixed pin and the mounting stud and the tension pin fit
into the long mounting slot of the bar.
7. Check that the bar is flush against the mounting pad.
Check that the pin fits cleanly into the slot
-
Hold bar
in the flush position and put the guide bar plate, flat
washer and mounting nut back onto the saw.
8.
Check that the bar and pins are still in place. Then turn
down the nut with a wrench until the bar is quite snug
ENSION ADJUSTING PIN
TENSION ADJUSTING SCR
PULL UP LOOP
HOOK CHAIN OVER
ONTO THE SPROCKET)
AND ONTO SPROCKE
IEW
against the pad (and adjusting pin cannot come out of
the slot). Leave the bar free enough to slide when the
tension adjusting screw is turned.
9.
Turn the tension adjusting screw clockwise to more
the bar away from the sprocket. Keep turning until
nearly all of the chain slack is taken up. Turn saw to the
right-side-up
position before adjusting the chain
tension.
TURN TENSION ADJUSTING SCREW
CLOCKWISE TO INCREASE THE
h
CHAIN TENSION.
 Loading...