4
System setup
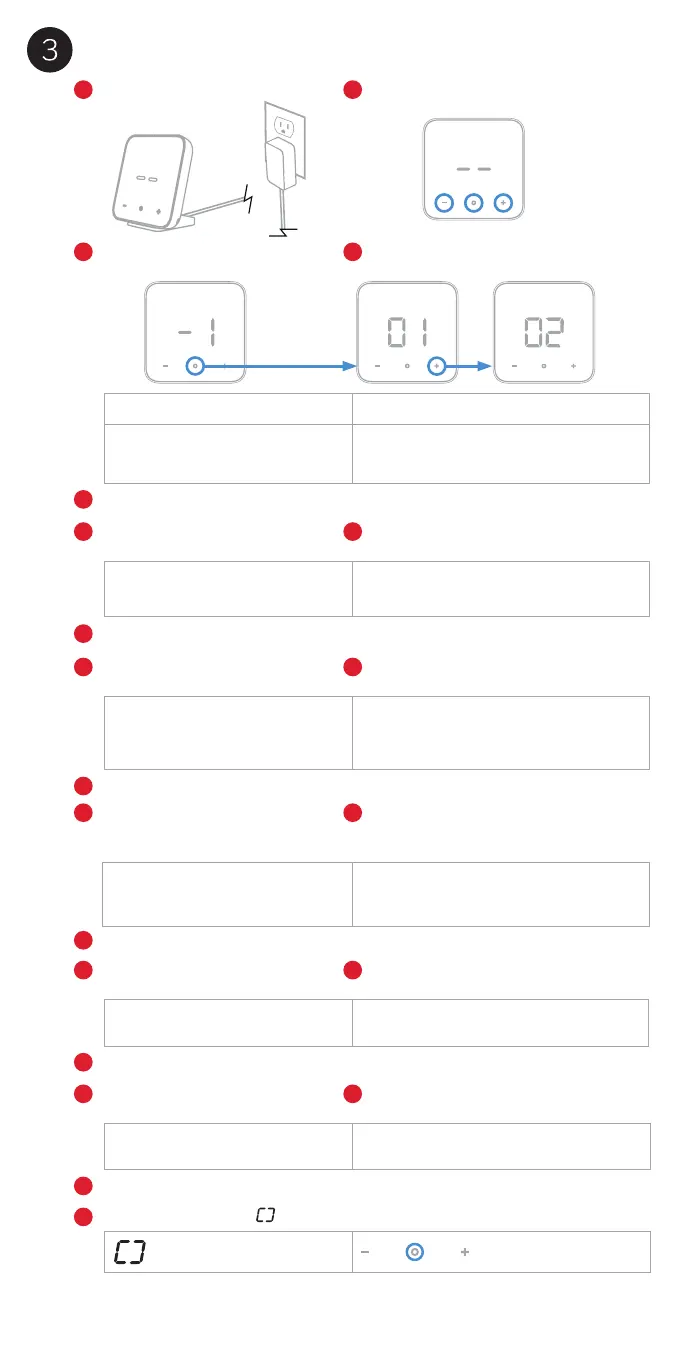
Connect the controller to power. Press any button to enter setup.
Press
o once. Display should
show
-1 (Controller Location).
Setting
-2 is displayed. Press o
to access options for setting
-2.
Setting
-3 is displayed. Press o
to access options for setting
-3.
Setting
-5 is displayed. Press o
to access options for setting
-5.
Setting
-6 is displayed. Press o
to access options for setting
-6.
Setting
-4 is displayed only if
setting
-3 is set to 02 - Multi. Press
o to access options for setting -4.
Press
o to select the option for setting -1.
Press
o to select the option for setting -2.
Press
o to select the option for setting -3.
Press
o to select the option for setting -5.
Press
o to select the option for setting -6.
Press
o to select the option for setting -4.
Press
+
until the display shows the
desired setting for the controller location.
Press
+
until the display shows the
desired setting for the temperature scale.
Press
+
until the display shows the
desired setting for outdoor unit.
Press
+
until the display shows
the desired brand ID.
Press
+
until the display shows
the desired model ID.
Press
+
to define the number of
the indoor unit this D6 controls.
The screen will display
. Press o to save and exit system setup.
Note: If you need to re-enter the set-up menu, press/hold the
+
,
-
and o buttons.
Setting Options (Default in bold)
-1
Controller Location 01 – Tabletop
02 – Wall mount
-4
Multi Outdoor Unit
Number
02 - 99 (One D6 per indoor unit. Set a different
number for each D6 when controlling a multi-
unit system. This is used for app control.)
Setup Complete
-2
Temperature Scale 01 – °F
02 – °C
-3
Outdoor Unit
Configuration
01 – Single
02 – Multi
(more than one indoor unit used
with the same outdoor unit)
-5
Ductless Unit Brand See page 19 for Ductless Unit Brand
ID
-6
Ductless Unit Model See page 19 for Ductless Unit Model
ID
3a
1
4a
5a
7a
8a
6a
2
3b
4b
5b
7b
8b
6b
3c
4c
5c
7c
8c
9
6c
 Loading...