User Security Codes
The system supports up to 16 security codes, which can each be assigned one of 4 authority levels.
The authority level determines the functions each code can perform as follows:
Authority Levels
(authority levels can be assigned to users 3-16 only; users 1 and 2 cannot be changed)
Level User No. Functions
Installer 01 (default=4112) perform all security functions except can disarm only if used to
arm; can enter program mode; can change System Master code; cannot assign any
other user codes
System 02 (default 1234) only one system master code per system; can perform all
Master security functions, add/delete users, change system master code, view event log, set
system clock, program keypad macro, program scheduled events, activate output
devices (triggers/relays)
0-User 03-16 perform security functions (arm, disarm, etc.) only; cannot add/delete
users, view event log, set system clock or program scheduled events
1-Arm Only see “user” arm system only
2-Guest see “user” can disarm the system only if it was used to arm the system
3-Duress see “user” performs security functions, but also silently sends a duress message to the central
station; reports as duress code user number.
Refer to the user guide for procedures on adding/deleting security codes and changing attributes.
The following is a brief description of how to add user codes.
Changing the System Master code...
Using Installer code: Installer code + [8] + 02 + new code
Using current System Master code: System Master code + [8] + 02 + new code + new code again
Adding a User Code: Master code + [8] + 2-digit user no. + user’s code
Deleting a User Code: Master code + [8] + 2-digit user no. + [#] [0]
Assigning Attributes: Master code + [8] + 2-digit user no. + [#] [attribute no.] + value
Attributes: Values
1 = Authority Level 0-3 (see Authority Level table above)
2 = Access Group 0-8 (0 = not assigned to a group)
3 = Not Used
4 = RF Zone No.;assigns user number to button type zone (keyfob) for arm/disarm.
(keyfob must be enrolled in system first; see Wireless Key Templates section)
5 = Open/Close Paging; 1 for yes, 0 for no
Setting the Real-Time Clock
1. +[#] + [6] [3]
(Security Code)
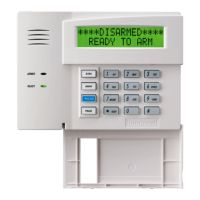
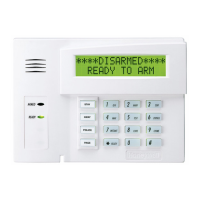
Alpha Display:
DISARMED
READY TO ARM
2. Press [∗] when the time/date is displayed.
A cursor appears under the first digit of the hour.
To move cursor ahead, press [
∗
]. To go back, press [#].
• Enter the 2-digit hour and 2-digit minute setting.
• Press [1] for PM or [2] for AM.
• Enter the last two digits of the current year.
• Enter the 2-digit month and 2-digit day setting.
3. To exit, press [∗] when cursor is at the last digit, or
wait 10 seconds.
TIME/DATE SAT
04:04PM 10/17/00
Current time display
TIME/DATE SAT
04:04P2000/10/17
Time/date editing display
Installation Instructions
6-4
 Loading...