Register the TCU keypad
Refer to the TCU installation instructions before starting this part of the process. Register the TCU
near to the panel so you can hear the audible feedback.
Note: If programming takes longer than 1 hour, replace the TCU battery before handing over
to the end user.
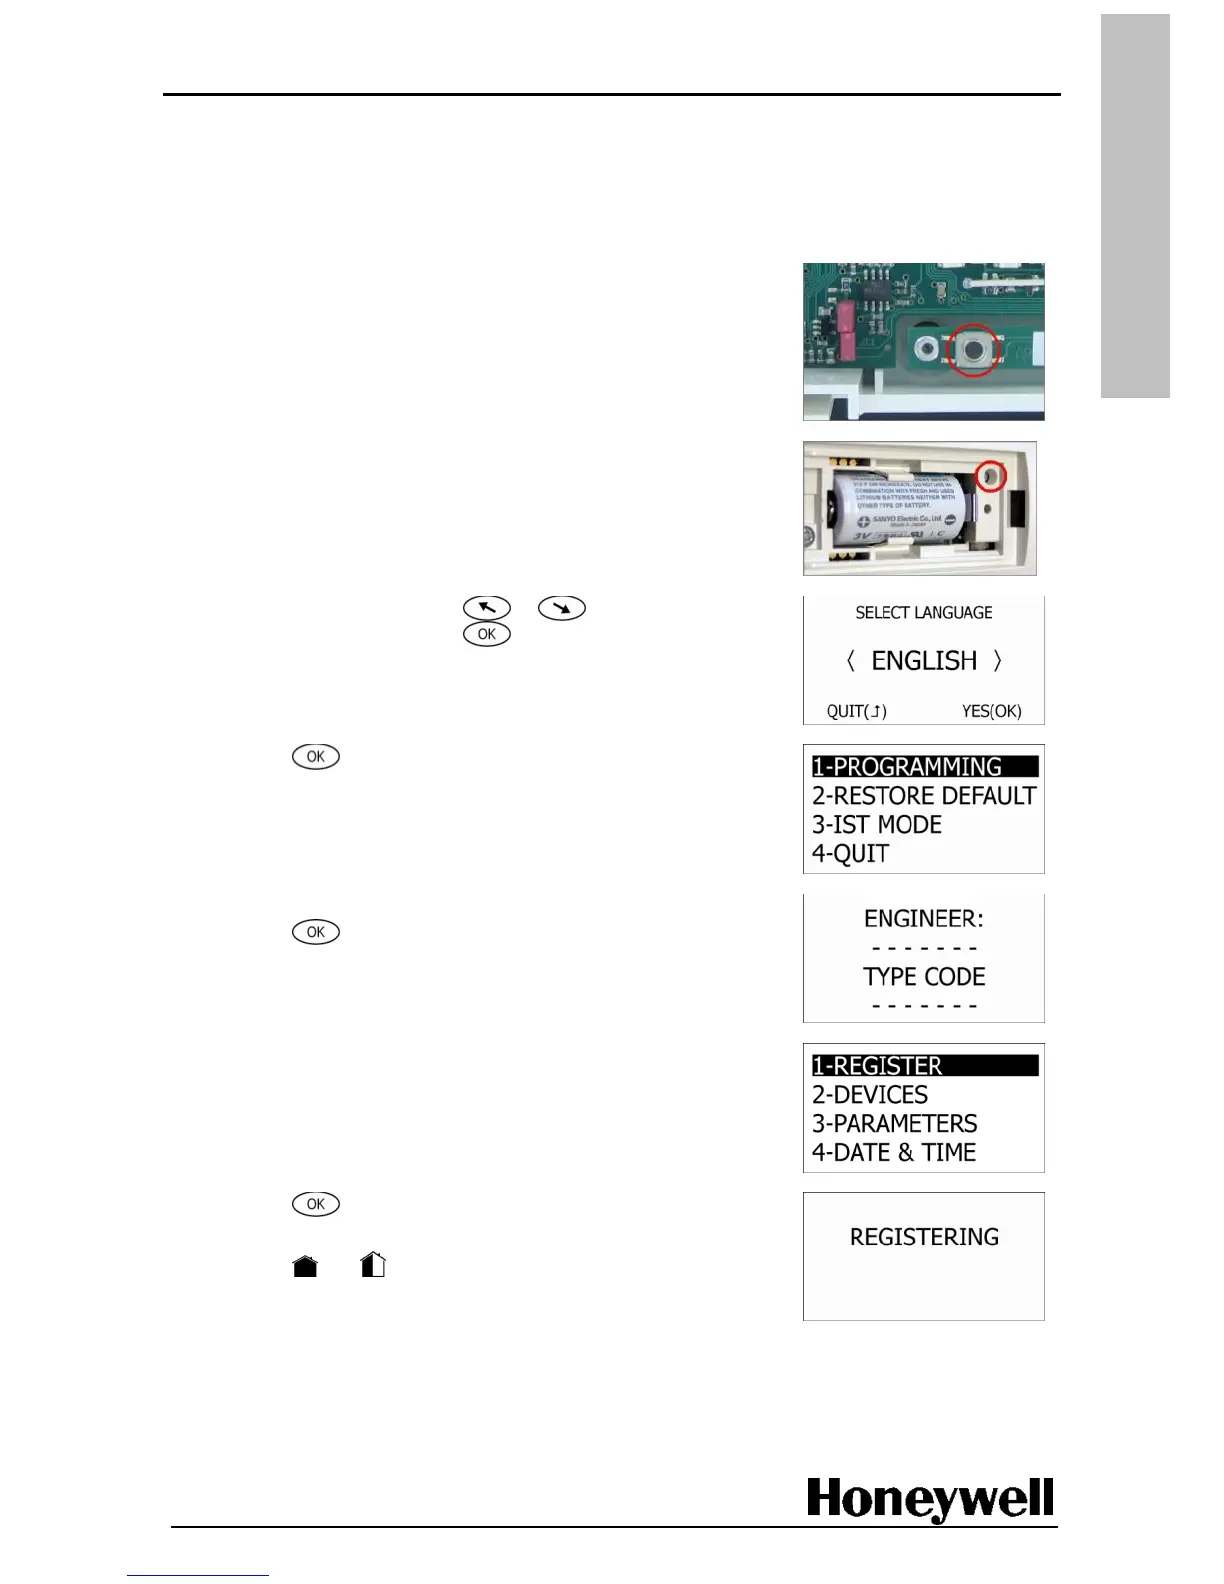
1. Press the tamper switch on the panel until you hear a click,
and then hold for 3 seconds. This places the panel in
programming mode.
2. Insert the battery into the TCU keypad.
3. Press P, the programming switch on the TCU keypad. The
panel will sound an audible beep if registration has been
successful. Replace the battery cover.
4. On the TCU keypad press or
to select your
language, and then press . The four main menu
options are displayed.
5. Press
to select the PROGRAMMING option.
The ENGINEER: TYPE CODE screen is displayed.
6. Using the keypad, type the engineer code, and then
press . By default the REGISTER option is highlighted.
Note: The code can be found in the list of codes (table
10-Access Codes) at the end of this manual.
Note: If you re-enter programming mode using a registered
TCU keypad, omit the following steps and start modifying
or adding devices.
7. Press to select REGISTER. The word REGISTERING is
displayed on the screen.
8. Press and together. The panel will sound an audible
beep if registration has been successful, and the VIEW
DEVICE screen is displayed.
9. Follow the next procedure to add devices to your system.
 Loading...