EasyManua.ls Logo

Honeywell PC300T - User Manual

Honeywell PC300T
74 pages
Print Icon
To Next Page IconTo Next Page
Loading...
User Guide

PC300T/PC310T
Desktop Printer

Table of Contents

Question and Answer IconNeed help?

Do you have a question about the Honeywell PC300T and is the answer not in the manual?

Overview

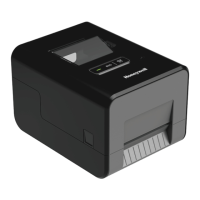
The Honeywell PC300T/PC310T is a lightweight desktop printer designed for printing labels and tags. It supports both direct thermal and thermal transfer media, with a media width range of 1 to 4.5 inches (25 to 114 mm). The printer is capable of printing up to 1500 labels a day and offers two print resolutions: 203 dpi (6 ips) or 300 dpi (5 ips).

Key Features and Specifications:

  • Printing Technology: Direct Thermal and Thermal Transfer.
  • Print Resolution: 203 dpi (6 ips) or 300 dpi (5 ips).
  • Media Compatibility: Labels, tags, and continuous (receipt and linered) media. Supports continuous, die-cut, notch, black mark, and fan-fold media types.
  • Media Width: 25.4 mm (1 in) to 114 mm (4.48 in).
  • Media Length (min.): 9.6 mm (0.38 in).
  • Maximum Print Width: 108 mm (4.25 in).
  • Maximum Print Length: 4826 mm (190 in) for 203dpi, 2159 mm (85 in) for 300dpi.
  • Media Thickness: 0.076 mm (3.0 mil) to 0.19 mm (7.48 mil).
  • Media Roll Diameter (max.): 127 mm (5 in).
  • Media Core Size: 25.4 mm (1 in) to 38 mm (1.5 in).
  • Ribbon Type: Wax, mid-range, resin.
  • Ribbon Direction: Coated out.
  • Ribbon Width: 25.4 mm (1 in) to 110 mm (4.3 in).
  • Ribbon Core Size: 12.7 mm (0.5 in) or 25.4 mm (1 in).
  • Print Sensors: Black Mark Sensors, Head Lift Sensor, Label Gap Sensor, Ribbon Low Sensor.
  • Connectivity: USB host port for connecting storage devices, scanners, or keyboards; USB device port for connecting to a desktop PC; Optional Ethernet interface; Optional Bluetooth module; Optional Bluetooth/Wi-Fi module.
  • Command Languages: Autosense, Direct PDF Printing, Direct Protocol, DPL, ESim, Fingerprint, IPL, ZSim.
  • Fonts: Resident fonts (Andale Mono, Century Schoolbook Roman, CG Times, Dutch 801 Roman, Honeywell Sans TT Bold, Letter Gothic, MHeiGB18030C-Medium, Monospace 821, OCR A, OCR B, Univers), Downloadable fonts (Angsana New Regular, Helvetica World, HYGothic-Medium, MSung HK Medium, MSung PRC Medium, NarkisClassicMF, TBMinPro-Light, WorldType Collection J, K, S, T).
  • Supported Font Types: TrueType, OpenType, Bitmap.
  • Printed Barcode Symbologies:
    • 1D: Codabar, Code 11, Code 39, Code 93, Code 128, DUN-14/16, EAN (EAN-8, EAN-8 Composite with CC-A or CC-B, EAN-13, EAN-13 Composite with CC-A or CC-B, EAN128, EAN128 subset A, B, C, EAN.UCC 128 Composite with CC-A or CC-B, C), HIBC 39, HIBC 128, Industrial 2 of 5, Interleaved 2 of 5, ISBT-128, Matrix 2 of 5, Straight 2 of 5, UPC (UPC-5 digits Add-On Code, UPC-D1, D2, D3, D4, D5, UPC Shipping Container Code), MSI (modified Plessey), PDF417, Planet Code, Plessey Code, Postnet, QR Code, RSS-14, USPS 4-State Customer barcode.
    • 2D: Aztec, Code 16K, Code 49, Data Matrix, DotCode, Grid Matrix, MaxiCode, MicroPDF417.
  • Graphic File Types: PCX, PNG, GIF, BMP.

Usage Features:

  • Print Button: Used for various functions including printing media, calibrating the media sensor, printing configuration labels, canceling print jobs, and resuming printing.
  • ECO Mode Button: When green (on), fast media calibration is active, using a minimal length of labels to conserve media. When blank (off), slow media calibration is active, using multiple labels to identify gaps or marks.
  • Status LED: Indicates printer status (off, idle, memory error, starting up, printing paused, communicating, peel-off mode, printhead too hot, firmware upgrading, font error, error mode, hardware issue).
  • Loading Media: The manual provides detailed steps for loading tear-off media and external media, including adjusting media hubs and sensors.
  • Loading Ribbon: Instructions are provided for loading thermal transfer ribbon, including adjusting ribbon core switches and turnplates.
  • Connecting to Power: Connects to AC power using the supplied adapter.
  • Printer Command Language Configuration: Can be set using the Print button, the printer's web page, or PrintSet 5 software.
  • Test Labels: Can be printed when the printer is turned on or when it is ready to print to verify print quality and configuration.
  • Printer Drivers: Honeywell Windows drivers (InterDriver) are available for download from the Honeywell Technical Support Downloads portal.
  • Connecting to PC: Supports USB cable and USB-to-Serial cable connections.
  • Connecting to Network: Supports Ethernet and Wi-Fi connections. Wi-Fi module is optional. Network settings can be configured from the printer's web page or PrintSet 5.
  • Bluetooth Communication: Can be configured from the printer's web page or PrintSet 5.
  • USB Host Port: Allows connection of USB keyboards, barcode scanners, and USB storage devices for various functions like sending commands, data input, loading applications, configuration files, fonts, images, and firmware upgrades. USB storage devices must be FAT16 or FAT32 formatted with a single partition.
  • Firmware Upgrade: Firmware updates can be downloaded from the Honeywell website and upgraded via the printer's web page, PrintSet 5, or a USB storage device.
  • Default Settings: The printer can be restored to factory default settings using the Print button, the printer's web page, or PrintSet 5.
  • INPrint Page: Features sample web forms for printing single labels using Fingerprint or Direct Protocol Language. Users can print predefined or custom label formats.
  • Optional Accessories:
    • Cutter Module: Allows cutting non-adhesive media into individual labels. Installation involves removing the tear bar, inserting the module cable, sliding tabs into slots, lifting the module into place, and pushing down to secure it.
    • Peel-Off Module: Allows removal of labels from the liner. Installation involves removing the tear bar, inserting the module cable, lifting the module into place, opening the module door, inserting fastening screws, loading media, and closing the module door.
    • Bluetooth Module / Bluetooth/Wi-Fi Module: Enables Bluetooth or Wi-Fi connectivity. Installation involves removing a screw from the module door, inserting the module, inserting fastening screws, attaching the antenna, and replacing the module door.

Maintenance Features:

  • Troubleshooting: The manual provides solutions for common problems such as partial labels, poor print quality, no printing, printing stops with red status LED, and continuous printing/feeding.
  • Cleaning the Printhead: Regular cleaning is recommended for print quality and longevity. Involves turning off the printer, opening the print mechanism, using a cleaning card, and cleaning residue from the platen roller.
  • Replacing the Printhead: Detailed steps are provided for replacing the printhead, including disconnecting cables, removing screws, and installing a new printhead. Caution is advised not to touch the printhead surface area.
  • Cleaning the Platen Roller: Involves removing the platen roller and cleaning any adhesive residue with isopropyl alcohol.
  • Cleaning the Interior: Ensures the media path is clean and sensor mylar covers are free of fingerprints, oil, dirt, and dust.
  • Cleaning the Exterior: Use a soft cloth moistened with water or mild detergent to clean the printer exterior, reducing dust and foreign particles.

Honeywell PC300T Specifications

General IconGeneral
BrandHoneywell
ModelPC300T
CategoryPrinter
LanguageEnglish

Related product manuals