69-2715EF—07 4
Installing your thermostat
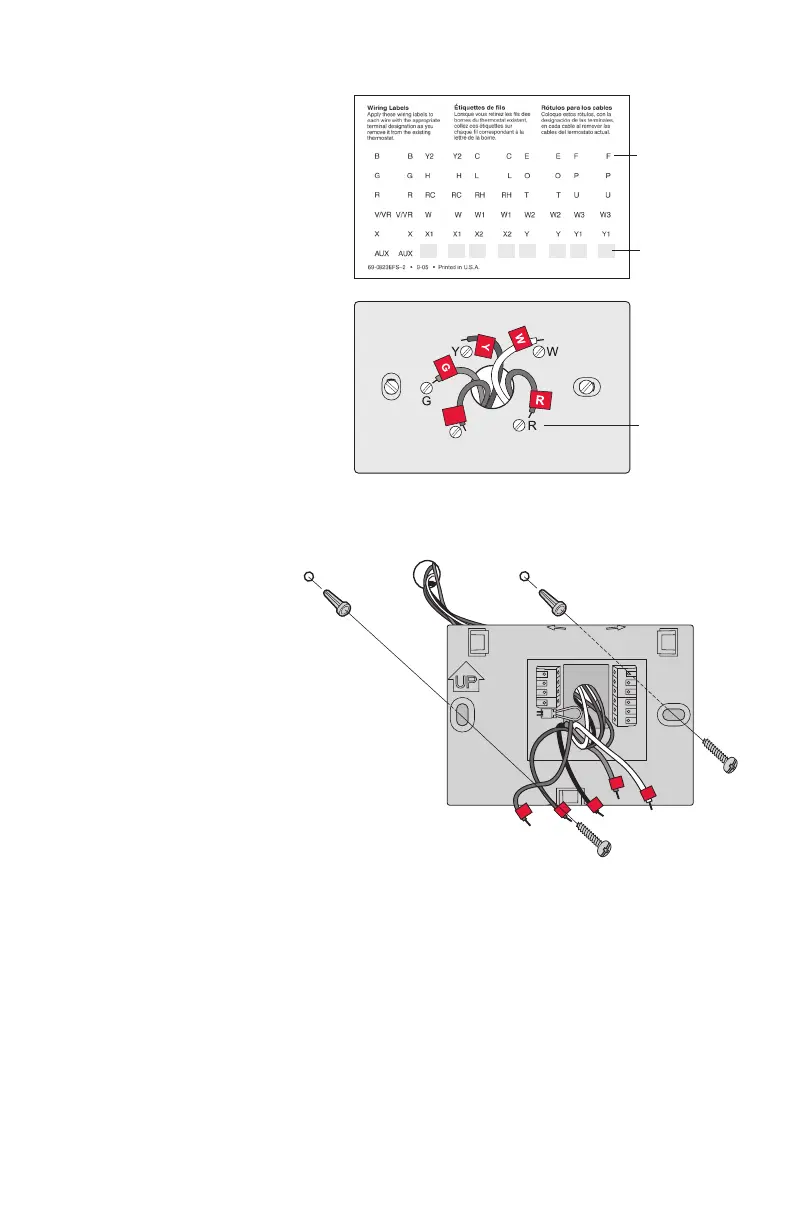
3 Label the wires.
Use the supplied sticky tags
to label each wire as you
disconnect it. Label wires
according to the old thermostat
terminal designations, not by
wire colour.
Note: If no tag matches a
terminal designation, write the
appropriate letter on a blank
sticky tag.
4 Remove wallplate.
Remove the old wallplate from
the wall after all wires have been
labelled and disconnected.
Blank tags
Sticky tag
Terminal
designation
C
C
Note: Wrap the wires around
a pencil to prevent them from
falling back into the wall.
LEVEL
HERE
R
Y
C
W
G
MCR34499
C
K
Rc
R
W-
O/B
Y
G
W2-
Aux/E
Y2
L
5 Mount wallplate for Wi-Fi
thermostat.
Mount your new wallplate
using screws and anchors
included with the thermostat.
If necessary:
Drill 4.5mm holes for drywall.
Drill 5.5mm holes for plaster.
Note: You may be able to use
your existing wall anchors. Hold
the wallplate up to the existing
anchors to check for alignment.
Wallplate
 Loading...