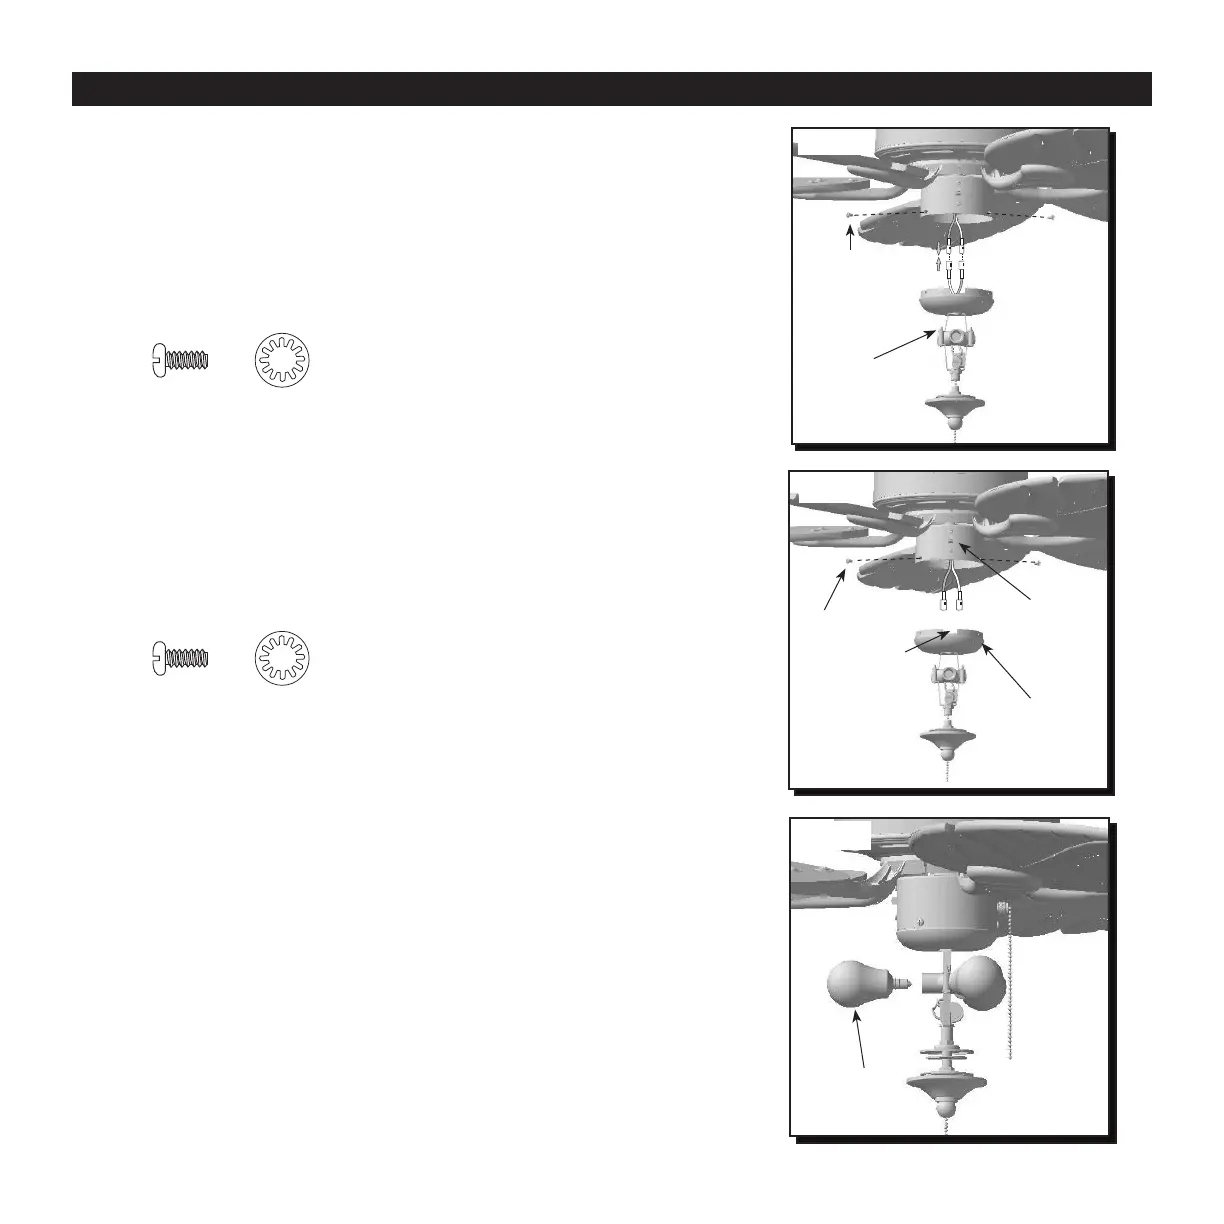
LIGHT KIT INSTALLATION
Fig. 22
Screw
Washer
To install the fan without a light kit, skip to Step 28.
22. Remove screws and washers from switch housing.
Then connect the single pin connectors from the
switch housing to the single pin connectors from
the light kit -- black to black and white to white.
Ensure the plugs connect tightly (Fig. 22).
14
Light Kit
Screw and
Washer
Bulb
24. Install each bulb (Fig. 24).
Important: When replacing the bulb, allow bulb and
light kit to cool before touching.
Fig. 24
23. Align the notch in the switch housing cap with
the reverse switch. Then lift the switch housing
cap and re-insert the three screws and washers
that were previously removed. Use a Phillips
screwdriver (not included) to secure all screws.
(Fig. 23).
Fig. 23
Screw
Switch
Housing
Cap
Reverse
Switch
Screw
Washer
Notch
 Loading...