VISTA-128BP/VISTA-250BP Installation and Setup Guide
3-32
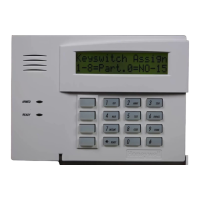
NOTE: The keypad connected to the TeleSmart
module must be the 6139T.
U
L
TeleSmart is not permitted in UL installations.
Mounting the Telesmart Module
The TeleSmart Module should be mounted in the
security system’s control cabinet if space is available,
or within a grounded metal enclosure to provide proper
ESD protection.
Mounting Inside the Control’s Cabinet: Use
double-sided tape to attach the module to the interior
surface of the cabinet, or hang it on two screws. Do not
mount it on the cabinet door or attach it to the
control’s PC board.
Mounting Outside the Cabinet: Use the screw
holes at the rear of the module. Wires can be brought
out from the side or back (use the round breakout on
the back).
Affix the Summary of Connections label to the
module’s inside cover or to the inside of the cabinet
door.
Wiring Connections
Before making connections, power down the
control panel.
To wire the TeleSmart, perform the following steps:
Step Action
1
Use a standard RJ31X phone jack (CA38A in
Canada) and direct-connect cord.
Connect the direct-connect cord’s red and
green wires to the control’s incoming phone
line terminals as described in the control’s
instructions. (Figure 3-37)
2
Connect the direct-connect cord’s brown and
gray wires to TeleSmart’s “Home Phones”
terminals, disconnecting them from the
control’s premises phone terminals, if
previously connected.
3
Connect the control’s local phone TIP and
RING terminals to TeleSmart’s “From
Control” terminals (wires not supplied).
4
Connect an 8-Ohm speaker to TeleSmart’s
speaker terminals. (Figure 3-38)
5
Disconnect those keypads intended to be
used with TeleSmart from the control’s
terminals, if previously connected.
Step Action
Connect keypad wiring as shown in (Figure
3-39) (see the chart below for the maximum
wire run length for wire gauge you are
using).
NOTE: Run audio cable in separate 2-
conductor twisted-pair cable (22AWG
recommended). This cable should be kept at
least 6 inches from other types of cables
carrying potentially interfering signals, such
as AC power, telephone, and polling loop
cables.
WIRE RUN LENGTHS
Gauge 150mA 300mA 500mA 600mA 750mA
22 AWG 160ft 80ft 50ft 42ft 32ft
20 AWG 260mA 130mA 80mA 67mA 52mA
18 AWG 410mA 220mA 130mA 115mA 83mA
16 AWG 650mA 330mA 200mA 170mA 130mA
6
7
Set the keypad address, tamper option, and
playback volume setting by pressing and
holding the [1] and [3] keys at the same time
for 3 seconds, then follows the prompts. You
must press these keys within 60 seconds of
power-up to set the address and/or tamper
option; you can set the volume at any time
after power-up. Refer to the instructions
included with the keypad for additional
details.
You must set TeleSmart keypads to
addresses 0-7 only.
8 TeleSmart Plus is powered from the control’s
+12VDC keypad terminal. Connect the
control’s keypad terminals to the TeleSmart
Plus Control terminals as shown. (Figure 3-
41)
IMPORTANT: You must program the
TeleSmart module as device address 24
when programming the control.
9 This connection is used to drive the
TeleSmart internal clock. Connect either
terminal of the control’s AC input terminals
to the TeleSmart RTC terminal. (Figure 3-
40)
10 Connect the TeleSmart ground terminal to a
good earth ground. (Figure 3-40)
WWW.DIYALARMFORUM.COM
WWW.DIYALARMFORUM.COM
 Loading...