Do you have a question about the HOOKII Neomow S and is the answer not in the manual?
The Neomow S is a robotic mower designed for maintaining lawns, offering a blend of automated operation, safety features, and user-friendly maintenance. It is designed to mow grass in ground areas where the slope is less than 18 degrees, providing a convenient and hands-free solution for lawn care.
The Neomow S is a robotic mower that automatically cuts grass, serving as a natural fertilizer by collecting fine grass clippings. It is designed for carefree mowing and aims to keep a perfectly maintained lawn. The mower operates with minimal noise and is emission-free, making it environmentally friendly. It can be controlled via an app, allowing for easy installation and management. The device is capable of navigating slopes up to a maximum of 33% or 18 degrees incline or decline. It uses a boundary wire system to define the mowing area and a charging station for automatic recharging.
Basic Information:
Mower Parameters:
Connectivity & Power:
Battery Pack:
Power Adapter:
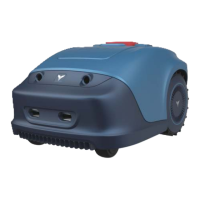
The Neomow S is equipped with ultrasonic sensors, a rear wheel, a battery compartment, a start button, a control panel, and a terminal for perimeter wire. It also features a charging port, blade disc, handle, stop button, ON/OFF switch, charging pins, and a docking station control panel. The cutting height can be adjusted by rotating a knob, with a range of 20-55mm.
Installation: The installation process involves ensuring the lawn is clean of stones, sticks, wires, bones, and other foreign objects. The mower can navigate slopes up to 33% (18° incline or decline), and objects taller than 100mm should be removed or marked.
App Installation: Users can download the HOOKII app from the Google Play Store (Android) or the Apple App Store (iOS) by scanning a QR code. The app provides guidelines for installation and offers two ways to connect the mower.
Connectivity:
Charging Station Installation: The charging station should be installed on a soft and flat surface, not on a slope or at the bottom of a furrow. The ideal inclination is within 5 degrees. The charging station is confirmed and the main electrical connection is laid out before connecting the charging station to the power supply. The layout of the boundary wire is critical for the charging station to connect to the boundary. After testing, auto-charge successfully indicates a suitable position. The mower automatically returns to the charging station counter-clockwise and receives direct sunlight for a prolonged period, which helps battery life.
Boundary Wire Pegging: The boundary wire should be pegged in a clockwise direction. It is recommended to mow the grass to 60mm or less before laying out the boundary wire. The recommended distance between two pegs is about 80cm in straight lines. The pegs' hook and wire slit should always face the outside of the boundary. The wire should be planted firmly into the ground. A boundary wire distance gauge can be used to set the correct distance between the wire and the border of the lawn (20-30cm). Obstacles like roots, ponds, flowerbeds, landscape stone, etc., should be encircled to prevent the robotic mower from colliding with them. Pools should be excluded from the cutting area, and a fence should be placed around the pool for safety.
Crossing Driveways and Roads: If a driveway and lawn are at the same level, the boundary wire can be used to create a corridor, allowing the robotic mower to cross the driveway and reach the opposite lawn. If a neighbor uses the same mower, a distance of 0.5m should be kept away from the neighbor's boundary wires to prevent interference. The charging station should be positioned at least 10m away from the neighbor's boundary wires.
Connecting the Charging Station to the Boundary Wire: The docking station is placed at the end of the boundary wire, ensuring the wire runs lengthwise below the middle of the docking station. The left (black) connector marked "F" (front) and the right (red) connector marked "B" (back) are connected. P1 or P2 LED confirms a successful connection.
Operation: The control panel features several buttons and indicators:
Basic Operation:
Charging and Testing: After successful connection of the charging station and boundary wire, the robotic mower's function is tested. If the mower is too power-low to start, it should be placed in the charging station. The charging is successful if the LED regularly flashes. The LED should be checked to ensure the boundary wire has not affected the connection and signal shows P1 on the charging station. The mower is placed in the working area, a few meters beside the docking station, and the main power switch is set to "ON". Pressing the HOME and OK buttons simultaneously will make the mower automatically return to the charging station by locating and following the boundary wire in an anti-clockwise direction. If the mower fails to dock correctly, it should be moved to a more suitable location. Successful docking and charging indicate a suitable position for the docking station, and the fixing pegs can be driven into the ground.
Signal Selection: Two signals, P1 and P2, can be selected. If a neighbor uses the same mower, different signals should be used to prevent interference. The section "Signal setting" in the order to select signal P1 or P2 for installation should be referred to.
General Maintenance: Regularly check and clean the robotic mower and replace worn parts if necessary. Use a dry brush, a damp cloth, or a sharpened wooden piece for cleaning. Avoid flushing with water.
Battery Life: For proper storage of the Li-ion battery, ensure it is fully charged and kept in a cool, dry place. The life span of the battery depends on various factors. Technical Data should be referred to for more details.
Winter Storage: During winter, the mower, docking station, and power supply should be kept in a dry place, preferably a shed, garage, or indoors. The device should be prepared for winter storage by fully recharging the battery, setting the mains power switch to "OFF", deeply cleaning the robotic mower, unplugging the power supply from the mains outlet, disconnecting the power supply from the charging station, and disconnecting the boundary wire from the charging station. The boundary wire can remain outside. If the wire is imperative to protect from wire form corrosion, a water-free grease or suitable sealing tape is recommended. If available, the product can be repacked in the original packaging. A service centre offers a winter service, including a check-up guide and a software upgrade.
Preparing for Spring: After winter storage, clean the charging contacts on both the mower and the docking station. Use a fine abrasion paper or a brass brush to achieve the best charging efficiency and avoid any charging interference.
Cleaning the Mower:
Reversing or Replacing the Blades: The robotic mower should be completely shut off for any adjustment or replacement of the blades. Always wear protective gloves. To ensure maximum cutting efficiency and safety, original blades and screws should always be used when replacing. The robotic mower has three blades, fixed to the blades disk. Unless damaged by hard obstacles, these blades can last for up to five months of everyday use. Weekly inspection of the blades and the fixing screws is advised. If the blades become blunt, loosen the screw and turn the blade upside down and re-fix. Check that the blade can move freely. A set of spare blades is included with the package, and more blades are available to purchase via customer support or online store. To ensure the best performance, all three blades should be replaced at the same time. Only use spare parts recommended by the manufacturer.
Software Update: If a software update is needed, contact the customer service team for more information.
Recycling and End-of-life Disposal: This product should not be disposed of as domestic waste. For recycling information, contact the local domestic waste service, the local municipality, or the point of sale. This product should not be disposed of in a landfill, by incineration, or by mixing with household trash. Danger or serious injury can occur because of the electrical components.
Insurance: Insurance policies may not provide coverage for accidents involving the use of this product. To determine if coverage is provided, contact your insurance company or agent.
| Brand | HOOKII |
|---|---|
| Model | Neomow S |
| Category | Lawn Mower |
| Language | English |