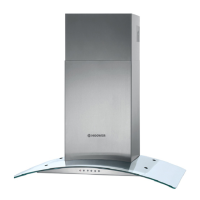
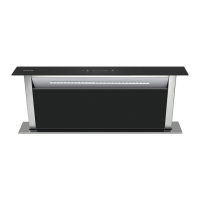
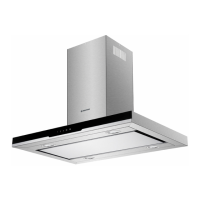
This document is an instruction manual for the HGM910NX Cooker Hood, providing essential information for its installation, operation, maintenance, and safety.
Function Description:
The HGM910NX Cooker Hood is designed to extract fumes and odors from the kitchen during cooking, ensuring proper ventilation and a cleaner air environment. It operates by drawing air through grease filters and, if applicable, carbon filters, before discharging it outside or recirculating it within the room. The hood is intended for domestic use and helps to prevent the build-up of grease and steam in the kitchen.
Important Technical Specifications:
- Minimum Installation Distance:
- Above gas cookers: 75 cm
- Above electric cookers: 65 cm
- Above coal or oil cookers: 75 cm
- The manual also states a general minimum distance of 65 cm from the supporting surface for cooking vessels to the lowest part of the cooker hood when located above a gas appliance.
- Ducting Diameter: Interior diameter of 150mm for extraction duct (enamel, aluminum, flexible pipe, or inflammable material).
- Safety Vents: Two safety vents positioned on the back housing, with a diameter of 6mm.
- LED Lights:
- ILCOS D code: DBR-2/65-H-64
- Type: LED modules, self-ballasted, round lamp
- Max wattage: 2 W (for each light)
- Voltage range: AC 220-240V
- Dimensions: 64mm diameter, 20.5mm height
Usage Features:
- Electronic Button Control: The cooker hood features electronic buttons for controlling fan speed and lighting.
- "Low" button: Activates the motor at low speed. Pressing again stops the motor.
- "Mid" button: Activates the motor at medium speed. Pressing again stops the motor.
- "High" button: Activates the motor at high speed. Pressing again stops the motor.
- "Light" button: Turns the lights on and off.
- Extraction Mode: The hood removes odors from the room. When in extraction mode, adequate room ventilation must be ensured, especially when other gas-burning appliances are in use, to prevent negative pressure exceeding 4 Pa (4 x 10⁻⁵ bar).
- V-Flap Mounting: Instructions are provided for mounting the V-flap, which is crucial for proper air discharge.
- Glass Installation: The manual details how to install the glass component of the hood using screws, gaskets, and wall plugs.
- Chimney Installation: Clear steps are given for installing both the outside and inside chimney brackets, ensuring the inside chimney can move freely for height adjustment.
- Expansion Pipe: The expansion pipe should be kept short, straight, and taut to maximize efficiency and minimize noise. Bends should not be sharper than 90 degrees, and the pipe should be directed horizontally or upwards to an outer wall.
- Carbon Filter (Optional): For models not vented outside, activated carbon filters can be used to trap odors. These filters typically need to be changed every three to six months, depending on cooking habits. The manual provides instructions for installing and replacing these filters.
Maintenance Features:
- General Cleaning:
- Always disconnect the power supply before maintenance or cleaning.
- Clean the appliance when cold.
- Avoid alkaline or acid substances (e.g., lemon juice, vinegar) on surfaces.
- Regular cleaning is recommended to prevent grease collection and maintain performance.
- Stainless Steel Cleaning:
- Clean regularly (e.g., weekly) with a clean, soft cloth.
- A specialized stainless steel cleaning fluid can be used.
- Wipe along the grain of the stainless steel to prevent scratches.
- Control Panel Surface Cleaning:
- Clean with warm soapy water using a clean, well-wrung cloth.
- Dry with a soft cloth to remove excess moisture.
- Use neutral detergents and avoid harsh chemicals or abrasives to prevent damage to the panel and printing.
- Grease Mesh Filters Cleaning:
- Can be cleaned by hand.
- Soak for about 3 minutes in water with a grease-loosening detergent.
- Brush gently with a soft brush, avoiding excessive pressure.
- Allow to dry naturally, away from direct sunlight.
- Wash separately from crockery and kitchen utensils; rinse aid is not advisable.
- Carbon Filter Replacement:
- Activated carbon filters should be changed every three to six months.
- Instructions include removing power, pressing the filter lock, removing the mesh filter, turning the carbon filter anti-clockwise, replacing with new filters, and then re-placing the mesh filter.
- Bulb Replacement:
- The bulb must be replaced by the manufacturer, service agent, or similarly qualified persons.
- Always switch off the electricity supply and allow the bulb to cool down before handling.
- Use a cloth or gloves when handling globes to prevent perspiration from reducing their lifespan.
- Instructions detail how to remove the front part with a screwdriver, pull out the LED light, and replace it with the same type and rated LED light (2*2W LSD-B1 LED light).
Safety Instructions (Key Highlights):
- Always switch off electricity during installation and maintenance.
- Installation must be carried out by a competent person or qualified electrician.
- Do not use without grease filters or with excessively greasy filters.
- Do not install above a cooker with a high-level grill.
- Do not leave frying pans unattended.
- Never leave naked flames under the hood.
- Accessible parts may become hot during operation; avoid touching heating elements.
- Ensure adequate room ventilation when the hood is used with other fuel-burning appliances.
- Clean periodically to prevent fire risk.
- Use only recommended fixing screws to avoid electrical hazards.
- Children aged 8 and above, and persons with reduced capabilities, can use the appliance under supervision and with instruction. Children should not play with or clean the appliance without supervision.
- If the supply cord is damaged, it must be replaced by the manufacturer or a qualified person.
- Do not store items on cooking surfaces.
- A steam cleaner is not to be used.
- Never try to extinguish a fire with water; switch off the appliance and cover the flame.


 To Next Page
 General