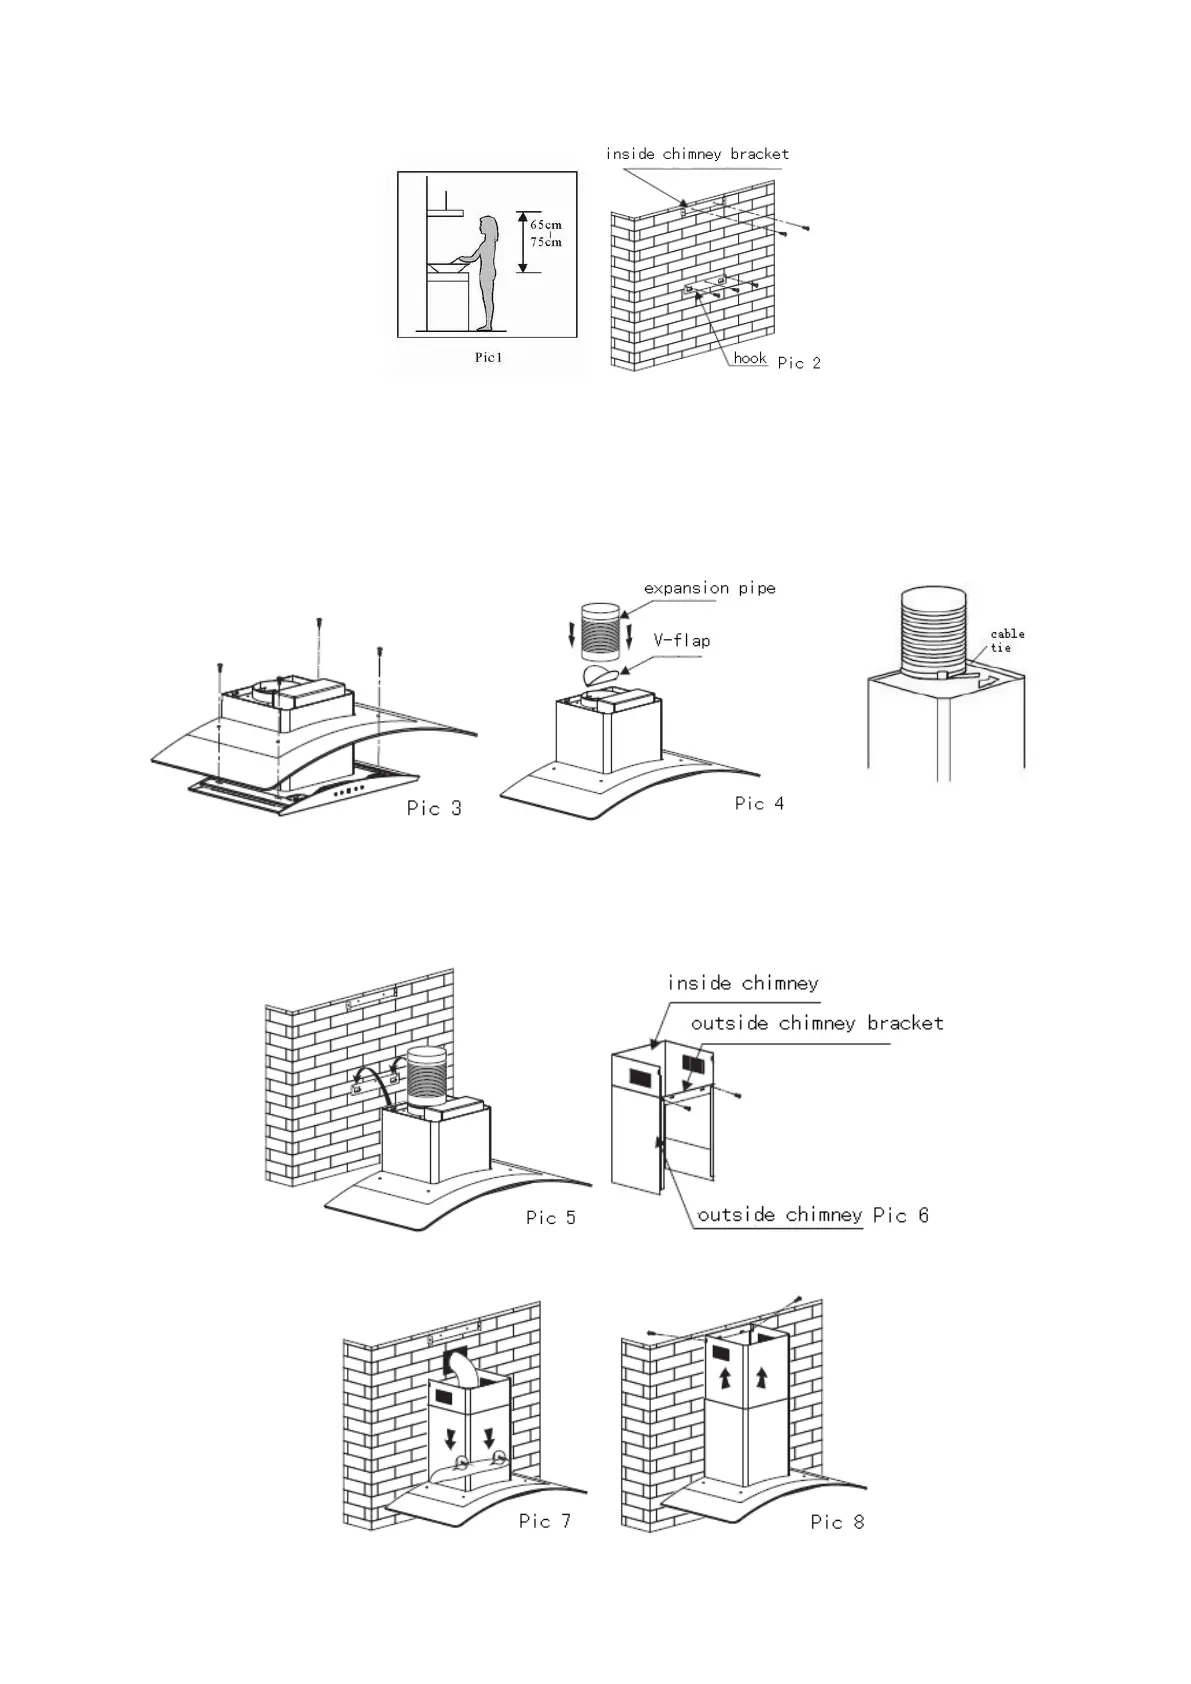
6
3. Install the hook on a suitable place once the installation height is fixed, and keep it
in line. The fixed position of the inside chimney bracket is the place of chimney. See
pic 2.
4. Put the glass according to the lead direction and way on the cooker hood, and then
use 4pcs screws + gasket + wall plugs to fix the glass.See pic 3.
5. Equip the v-flap and expansion pipe,fix the expansion pipe with cable tie.See pic 4.
And then put the cooker hood on the hook. See pic 5.
6. Install the outside chimney bracket onto the outside chimney with 2pcs ST4*8mm
screws, here should be sure the inside chimney can be moved inside freely.See pic 6.
After adjust the height,fix the body with 2 pcs ST4*30mm safety screws. Then put the
two chimneys together onto the cooker hood body, also lead the expansion pipe
outside of the room. See Pic 7.
7. Adjust the height of the inside chimney into the suitable height, and fix the inside
chimney to the inside chimney bracket by 2pcs ST4*8mm screws. See Pic 8.
 Loading...