EasyManua.ls Logo

horiba LAQUAtwin-Na-11 User Manual

horiba LAQUAtwin-Na-11
5 pages
To Next Page IconTo Next Page
Page #1 background imageLoading...
Page #1 background image
CODE: GZ0000460286
March, 2017
LAQUAtwin series (Na
+
) Operation 1 2017 HORIBA Advanced Techno Co., Ltd.
Instruction Manual (Operation)
COMPACT WATER QUALITY METER
LAQUAtwin-Na-11
Specifications
Items in package
Consumable parts sold separately
Part Names
Note
Press the switches 0.5 seconds or more unless
otherwise specified.
Initial Setup
Attaching/detaching the sensor
Note
Be careful not to twist the waterproof gasket.
Inserting/removing batteries
Electrode conditioning
Note
Before using the sensor for the first time or
after several days of disuse, perform electrode
conditioning.
Perform calibration after electrode condition-
ing.
1. Place some drops of 2000 ppm standard
solution to the flat sensor.
2. Wait a few hours before use.
There is no need to switch the meter ON.
3. Clean the flat sensor with running water.
Model LAQUAtwin-Na-11
Target Sodium ion (Na
+
)
Measurement principle ISE method
Minimum sample volume More than 0.3 mL
*1
Measure-
ment range
2 to 9900 [unit: ppm or mg/L]
Resolution
(default)
Display range: Resolution
2 to 99: 1
100 to 990: 10
1000 to 9900: 100
[unit: ppm or mg/L]
Calibration Up to 2 points
Default: 150 ppm and 2000 ppm
Accuracy
*2
±10% of reading value
Waterproof IP67 (no failure when immersed in
water at a depth of 1 m for 30 min)
*3
Display Custom (monochrome) digital LCD
with backlight
Operating
environment
Temperature: 5C to 40C
Humidity: 85% relative humidity or
less (no condensation)
Power CR2032 batteries (2)
Battery life Approx. 400 h continuous operation
(backlight off mode)
*4
Material ABS epoxy (main material)
Dimensions 164 29 20 mm (excluding projec-
tions)
Mass Approx. 50 g (excluding batteries)
*1 0.05 mL or more if sampling sheet B (sold sepa-
rately) is used.
*2 The closeness of agreement between a mea-
sured value and an actual value of standard solu-
tion after two-point calibration using 150 ppm and
2000 ppm standard solutions.
The standard solution used for the later cali-
bration was measured after two-point calibra-
tion at 150 ppm and 2000 ppm.
The calibration and measurement are per-
formed at the same temperature.
The error of standard solutions and rounding
error (1 digit) are not included.
*3 The meter cannot be used underwater.
*4 When the backlight is used, battery life will
shorten.
Items Quantity
Sensor S022 1
Meter 1
Storage case 1
Batteries CR2032 2
Standard solution 150 ppm 1
2000 ppm 1
Pipette 1
Sampling sheet B (5 sheet-pack) 1
Instruction manual (Operation) 1
Instruction manual (Before use) 1
Items Specifications Part No.
Sensor
S022, Na
+
3200459867
Standard
solution
Y022L, Na
+
150 ppm 3200457724
Y022H, Na
+
2000 ppm 3200457723
Sampling
sheet B
Y046, 100 sheet-pack 3200053858
1 Flat sensor
2 Light shield cover
3 Liquid junction
4 Response mem-
brane
5 Lithium batteries
6 MEAS switch
7 ON/OFF switch
8 CAL switch
9 Waterproof gasket
10 Strap eyelet
Attaching the sensor
1. Power OFF the meter.
2. Confirm that the waterproofing gasket is
clean and undamaged.
3. Slide the sensor
onto the meter so
that catch "A" on the
back of the meter fits
into hole "a" on the
sensor tongue as
shown.
1
2
3
4
5
6
7
10
8
9
a
A
Waterproof
gasket
Detaching the sensor
1. Power OFF the meter.
2. Lift the sensor tongue
tip and slide the sensor
a little away from the
meter.
3. Pull out the sensor all the way from the
meter.
Inserting the batteries
1. Power OFF the meter.
2. Slide both batteries into
the battery case as
shown.
Be sure to use two
CR2032 batteries, and put
them with the plus sides
(+) upwards.
Removing the batteries
1. Power OFF the meter.
2. Use a ball-point pen or
other tool to pry the batter-
ies out from the clips as
shown.
Battery
Battery clip
Question and Answer IconNeed help?

Do you have a question about the horiba LAQUAtwin-Na-11 and is the answer not in the manual?

horiba LAQUAtwin-Na-11 Specifications

General IconGeneral
Power Supply2 x AAA batteries
DisplayLCD
Automatic Temperature CompensationYes
Measurement MethodIon-selective electrode method
Measurement Range0 to 1000 mg/L Na+
Resolution1 mg/L
Sample Volume0.3 mL or more
Operating Temperature5 to 40°C

Summary

Specifications

Model

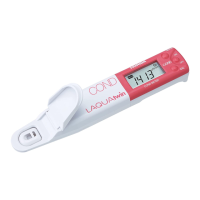
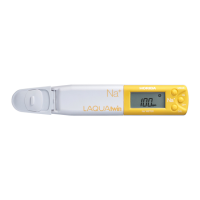
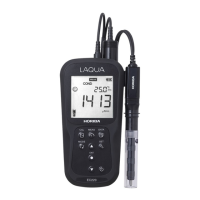
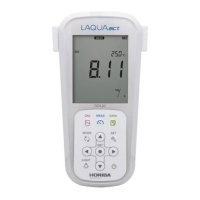
Model name of the compact water quality meter.

Target

Identifies the ion being measured, e.g., Sodium ion (Na+).

Measurement principle

The method used for measurement, e.g., ISE method.

Minimum sample volume

The required amount of sample for accurate measurement.

Measurement range

The concentration range the meter can measure.

Resolution

The precision of the displayed measurements.

Calibration

Number of calibration points supported by the meter.

Display

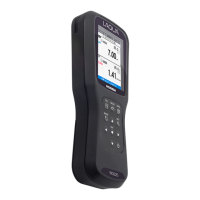
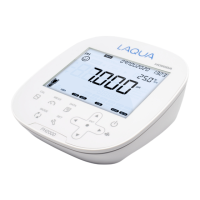
Type of display and backlight information.

Operating environment

Recommended temperature and humidity for operation.

Power

Battery type and estimated battery life.

Material

Construction material of the meter's main body.

Dimensions

Physical size of the water quality meter.

Mass

Weight of the meter, excluding batteries.

Consumable parts sold separately

Sensor S022, Na+

Replacement sensor unit for sodium ion measurement.

Standard solution Y022L, Na+ 150 ppm

150 ppm standard solution for calibration.

Standard solution Y022H, Na+ 2000 ppm

2000 ppm standard solution for calibration.

Sampling sheet B

Disposable sheets for handling small sample volumes.

Basic Operation

Power ON

Steps to turn the meter on and initial display.

Power OFF

Steps to turn the meter off.

Calibration

Calibration points

Number of calibration points supported.

Multi-point calibration

Procedure for performing multi-point calibration.

Calibration error

Handling and interpreting calibration error codes.

Measurement

Sample setting

How to apply the sample to the sensor.

Measurement mode change

Switching between AS and AH measurement modes.

Auto stable (AS) mode

Mode for stable readings with an indicator.

Auto hold (AH) mode

Mode that locks the reading after stabilization.

Sampling sheet

For a minute sample

Using sampling sheet for small sample volumes.

Measurement display change

Measurement display change

How to switch between concentration, temperature, and voltage displays.

Maintenance

Storage

Proper procedure for storing the meter.

Temperature sensor adjustment

Calibrating the meter's temperature sensor.

Initializing calibration data

Initializing calibration data

Resetting the meter's calibration data to default.

Initializing the settings

Initializing the settings

Resetting all meter settings to factory defaults.

Appendix

Interfering ions

Ions that may affect measurement accuracy.

Frequently asked questions

Sensor condition check

Methods to verify the sensor's integrity.

Temperature measurement limits

Limitations for sample temperature measurement.

Locked measurement value

Troubleshooting a stuck measurement reading.

Blinking "Or"/"Ur"

Interpretation of range indicator blinks.

Blinking °C

Meaning of a blinking temperature indicator.

Meter not powering on

Troubleshooting steps for power issues.

Calibration error codes

Understanding and resolving calibration error messages.

Factors interfering measurement

Conditions that can affect measurement accuracy.

Preparing standard solutions

Guidance on preparing custom calibration solutions.

Setup Mode

Unit setting

Changing measurement units (ppm, mg/L).

Measurement mode change

Selecting AS or AH measurement modes.

Multiplying compensation setting

Adjusting a compensation coefficient.

Backlight setting

Turning the display backlight on or off.

1st calibration point setting

Setting the concentration for the first calibration point.

2nd calibration point setting

Setting the concentration for the second calibration point.

Setup completion

Finalizing and saving setup mode changes.

Related product manuals