34
E Console PCB and Button Assemblies
1. Remove the console panel (D).
2. Remove wiring plug - taking note of position.
3. Remove three securing clips and lift away from the console.
F Pressure Switch
1. Remove the table top (A).
2. Disconnect the wiring connection block and pressure hose.
3. Carefully unclip bracket from cabinet side and then unclip switch from bracket.
G Door Seal & Restraint:
1. Door Seal to Front Panel Fixing
The door seal is fixed to the cabinet front panel by a wire clamp and a small spring. The spring is
normally at the bottom of the door.
Carefully place a small screwdriver into one of the lugs of the spring and by stretching the spring
the wire band can be removed.
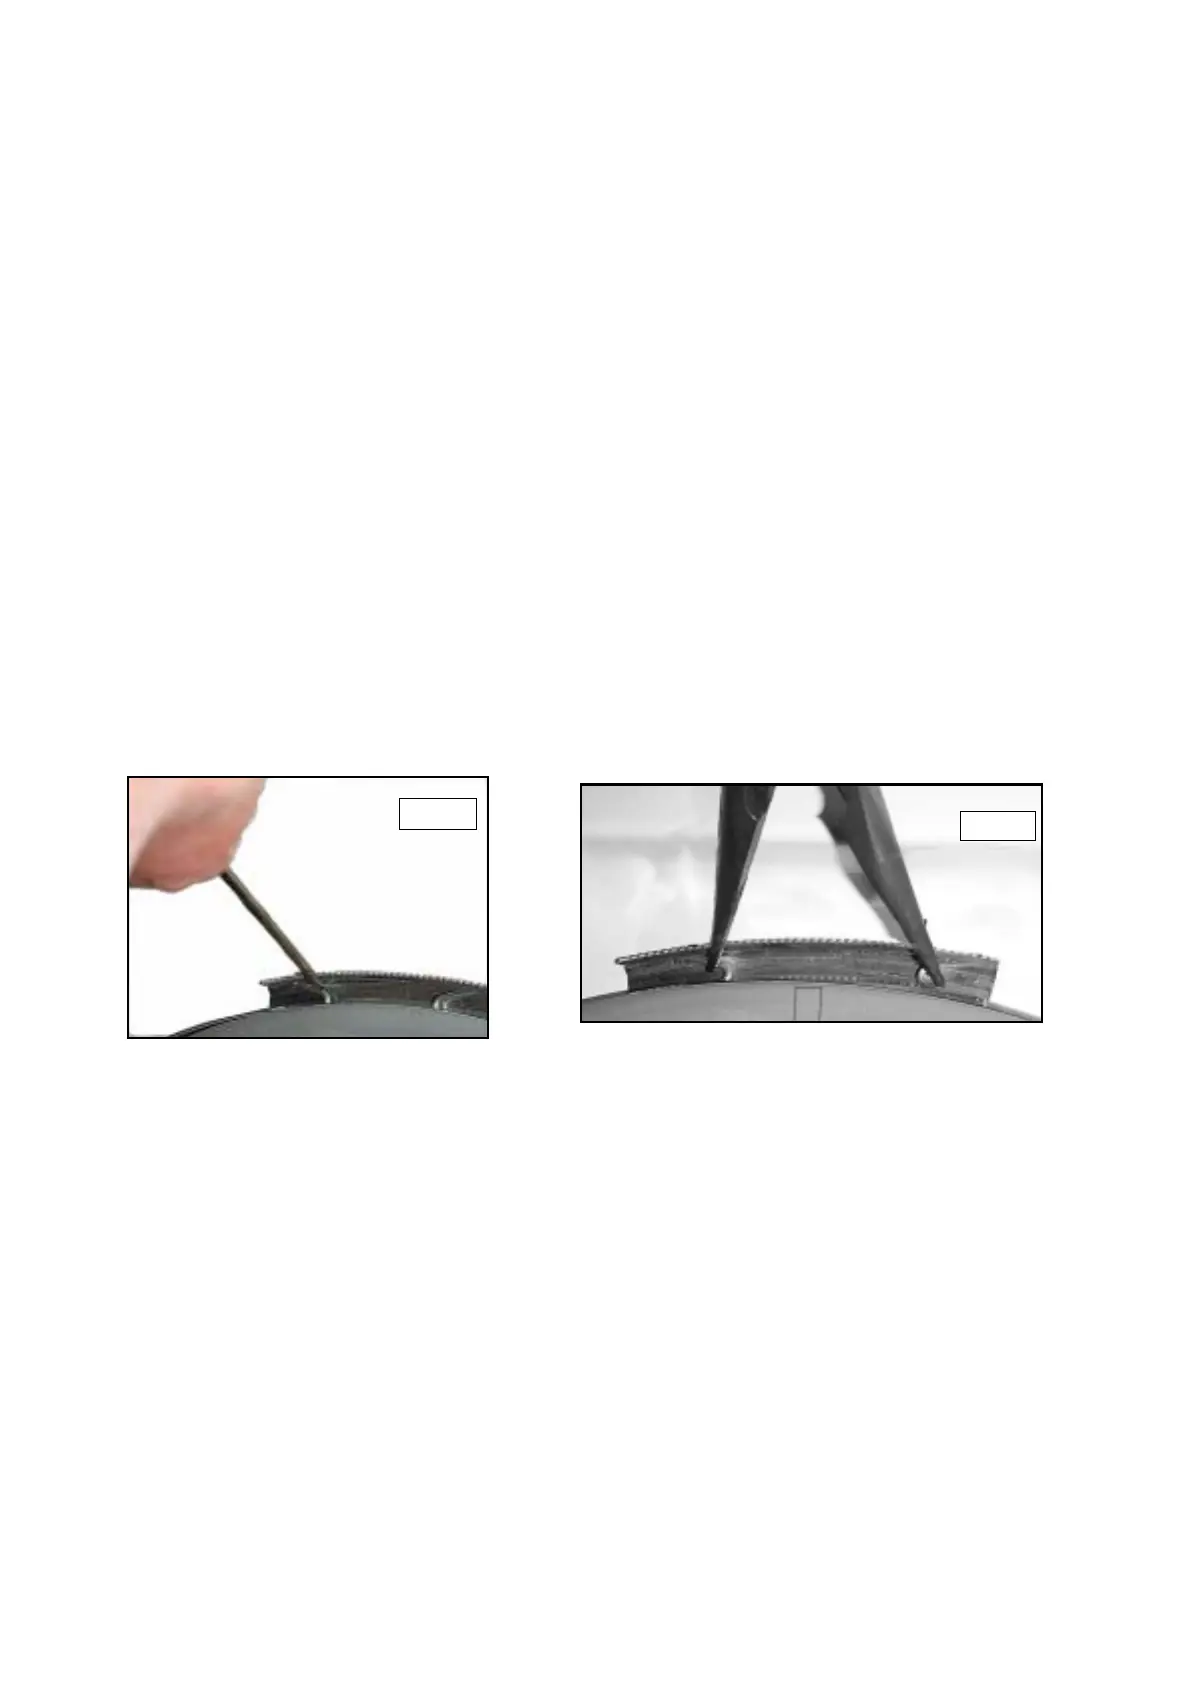
2. Drum Fixing
The door seal is fixed to the drum with a zipper retainer. After removing the front panel (J)
remove the zipper as shown in Fig. 3 below.
On refitting place the strap around the door seal and tighten as shown in Fig. 4. Observe correct
seal and zipper fixing positions as shown in Fig. 5 overleaf
Fig. 3
Fig. 4
 Loading...