40 of 43
Service Manual UK
Whirlpool UK Appliances Ltd
English
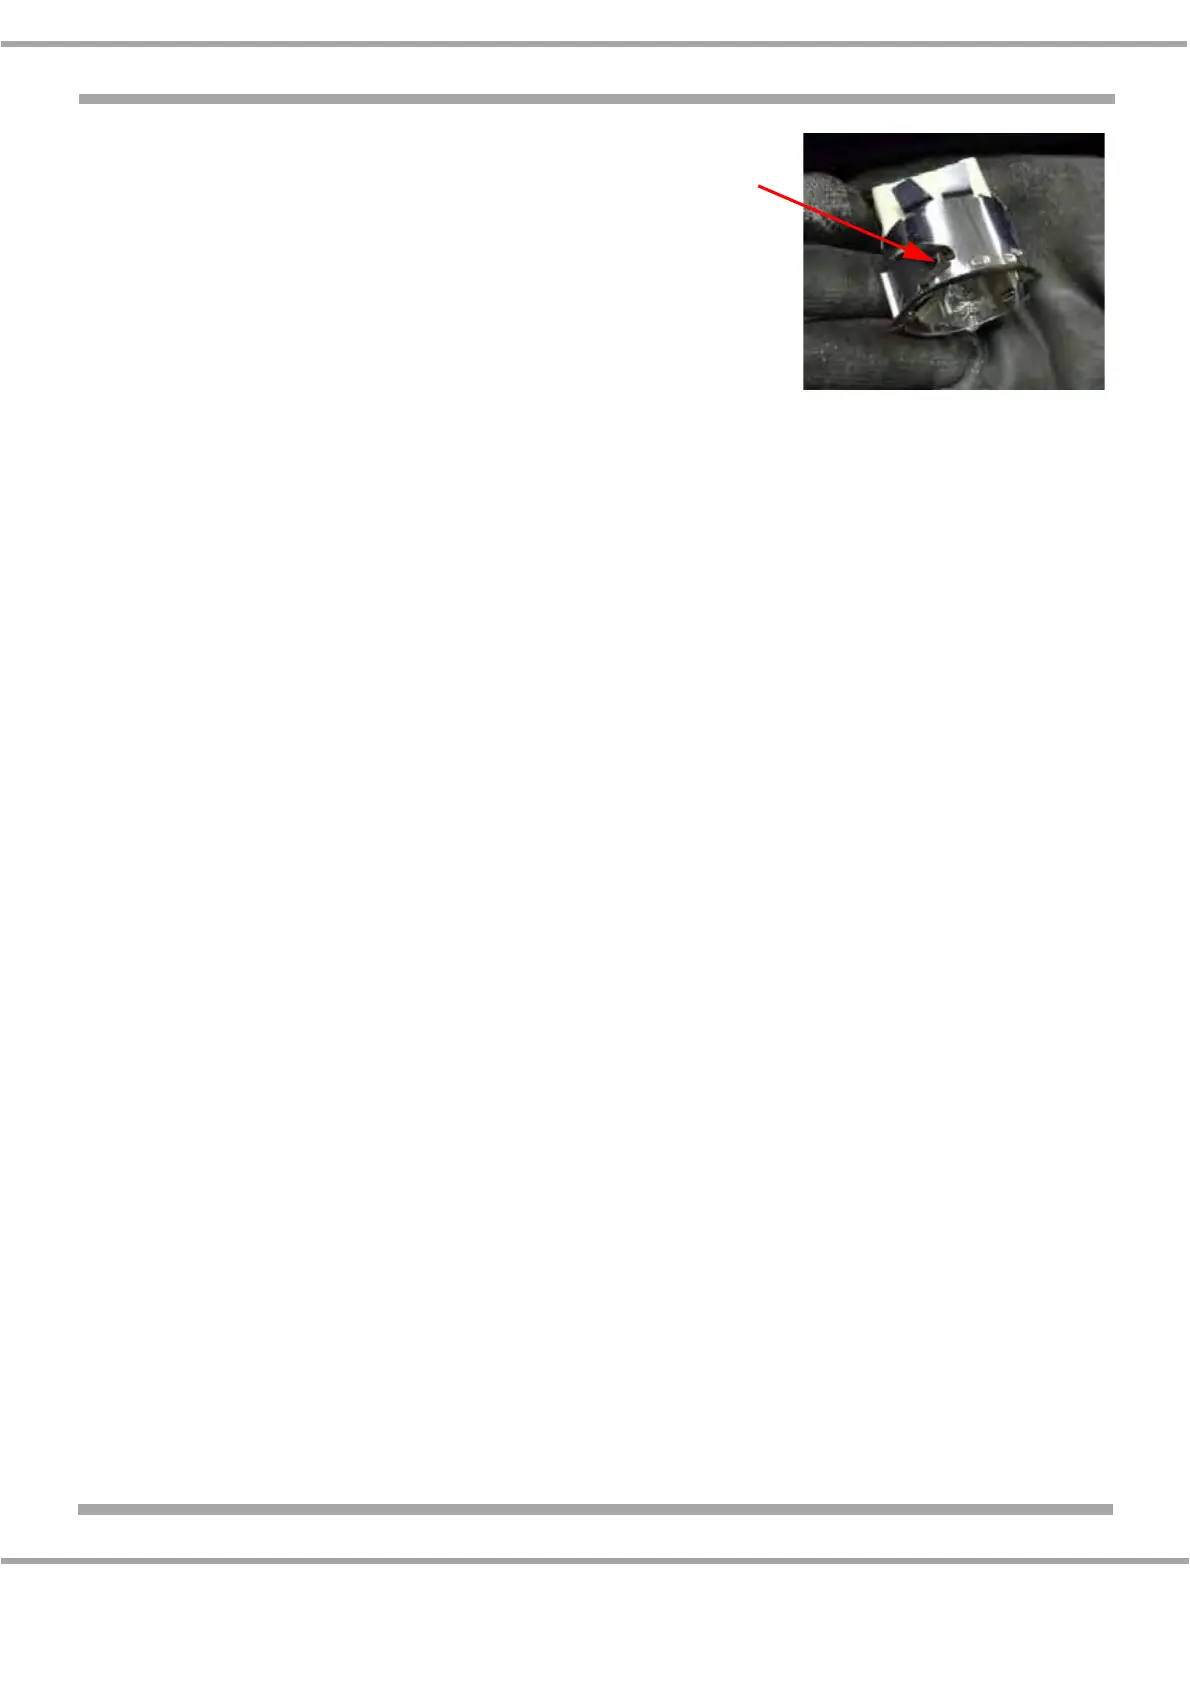
9) Oven Lamp Assembly
a) Remove the oven from the cabinet (see 2).
b) Remove the top panel, (4 screws).
c) Remove the rear panel (4 screws).
d) From inside the oven cavity, remove the glass lamp
cover and lamp (do not touch the lamp with fingers).
e) From the rear of the oven cavity, carefully manoeuvre
the fibre glass wrapping away from the lamp housing.
f) Using a small flat bladed screwdriver, push in the
3 securing wings in turn to release the lamp assembly into the oven cavity (Fig. 3).
g) Disconnect the wiring.
h) Reassemble in reverse order.
10) Oven Fan & Motor Assembly
a) Remove the oven from its housing (see 2).
b) Remove the oven furniture.
c) Remove the top panel (4 screws).
d) Remove the rear panel (4 screws).
e) From inside the oven cavity, remove the two screws from the inner fan cover and lower down.
f) Remove the single nut (10 mm) securing the oven fan (clockwise thread) and lift the fan clear.
g) From the rear of the oven, disconnect the wiring to the fan motor.
h) Grasp the fan motor assembly and rotate anticlockwise to release.
i) Reassemble in reverse order.
11) Circular Oven Element
a) Remove the oven from its housing (see 2).
b) Remove the oven furniture.
c) Remove the top panel (4 screws).
d) From inside the oven cavity, remove the two screws from the inner fan cover and lower down.
e) Remove the screw securing the oven element.
f) Pull the element forward and draw the wires through into the oven cavity. Disconnect the wires from
the oven element, ensuring that they do not slip back into the rear panel void.
NOTE: - Should the wiring not be accessible using the above method of replacement or it drops
down into the rear panel void, it will be necessary to remove the oven from its housing and remove
the rear panel of the product to gain access to the wiring.
f) Reassemble in reverse order.
Securing
Wing
Fig. 3