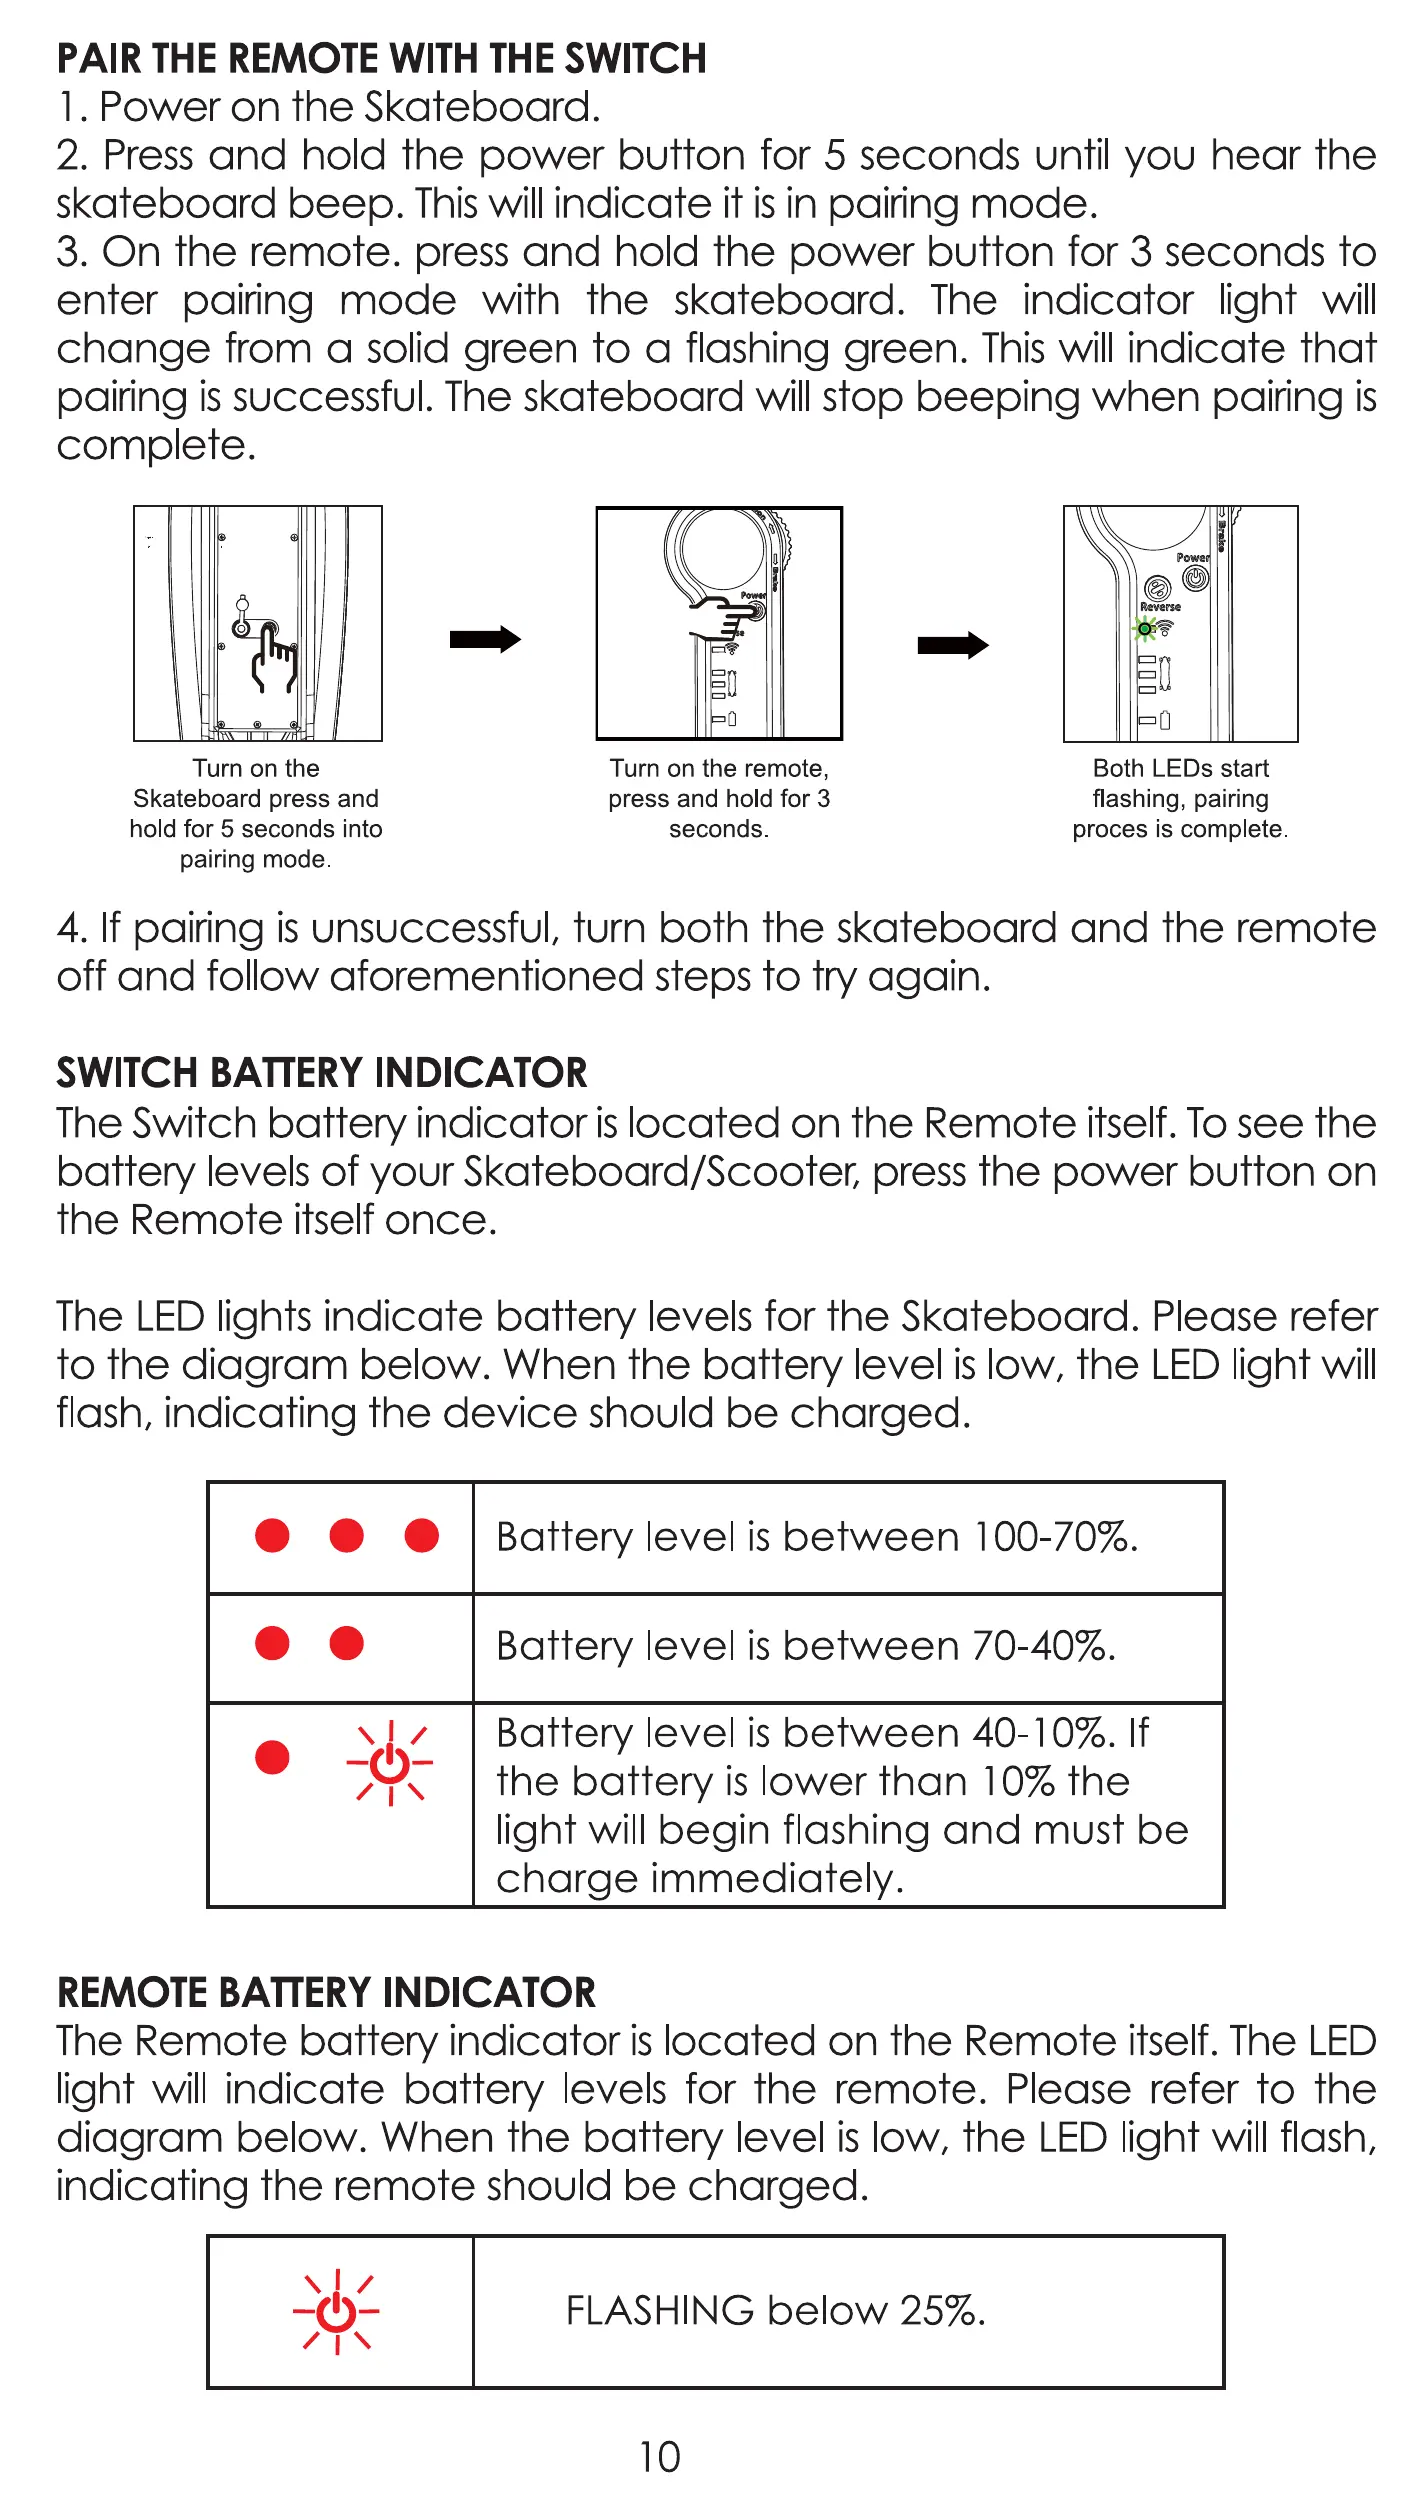
PAIR THE REMOTE WITH THE SWITCH
I . Power on the Skateboard.
2. Press and hold the power button for 5 seconds until you hear the
skateboard beep. This will indicate it is in pairing mode.
3. On the remote. press and hold the power button for 3 seconds to
enter pairing mode with the skateboard. The indicator light will
change from a solid green to a flashing green. This will indicate that
pairing is SUCCeSSfUI.The skateboard will stop beeping when pairing is
complete.
Turn on the
Skateboard press and
hold for 5 seconds into
pairing mode.
Turn on the remote,
press and hold for 3
seconds.
Reverse
Both LEDs start
flashing, pairing
proces is complete.
4. If pairing is unsuccessfUI, turn both the skateboard and the remote
off and follow aforementioned steps to try again.
SWITCH BATTERY INDICATOR
The Switch battery indicator is located on the Remote itself. To see the
battery levels of your Skateboard/Scooter, press the power button on
the Remote itself once.
The LED lights indicate battery levels for the Skateboard. Please refer
to the diagram below. When the battery level is low, the LED light will
flash, indicating the device should be charged.
O O
Battery level is between 100-70%.
Battery level is between 70-40%.
Battery level is between 40-10%. If
the battery is lower than 10% the
light will begin flashing and must be
charge immediately.
REMOTE BATTERY INDICATOR
The Remote battery indicator is located on the Remote itself. The LED
light will indicate battery levels for the remote. Please refer to the
diagram below. When the battery level is low, the LED light will flash,
indicating the remote ShOUId be charged.
FLASHING below 25%.
10