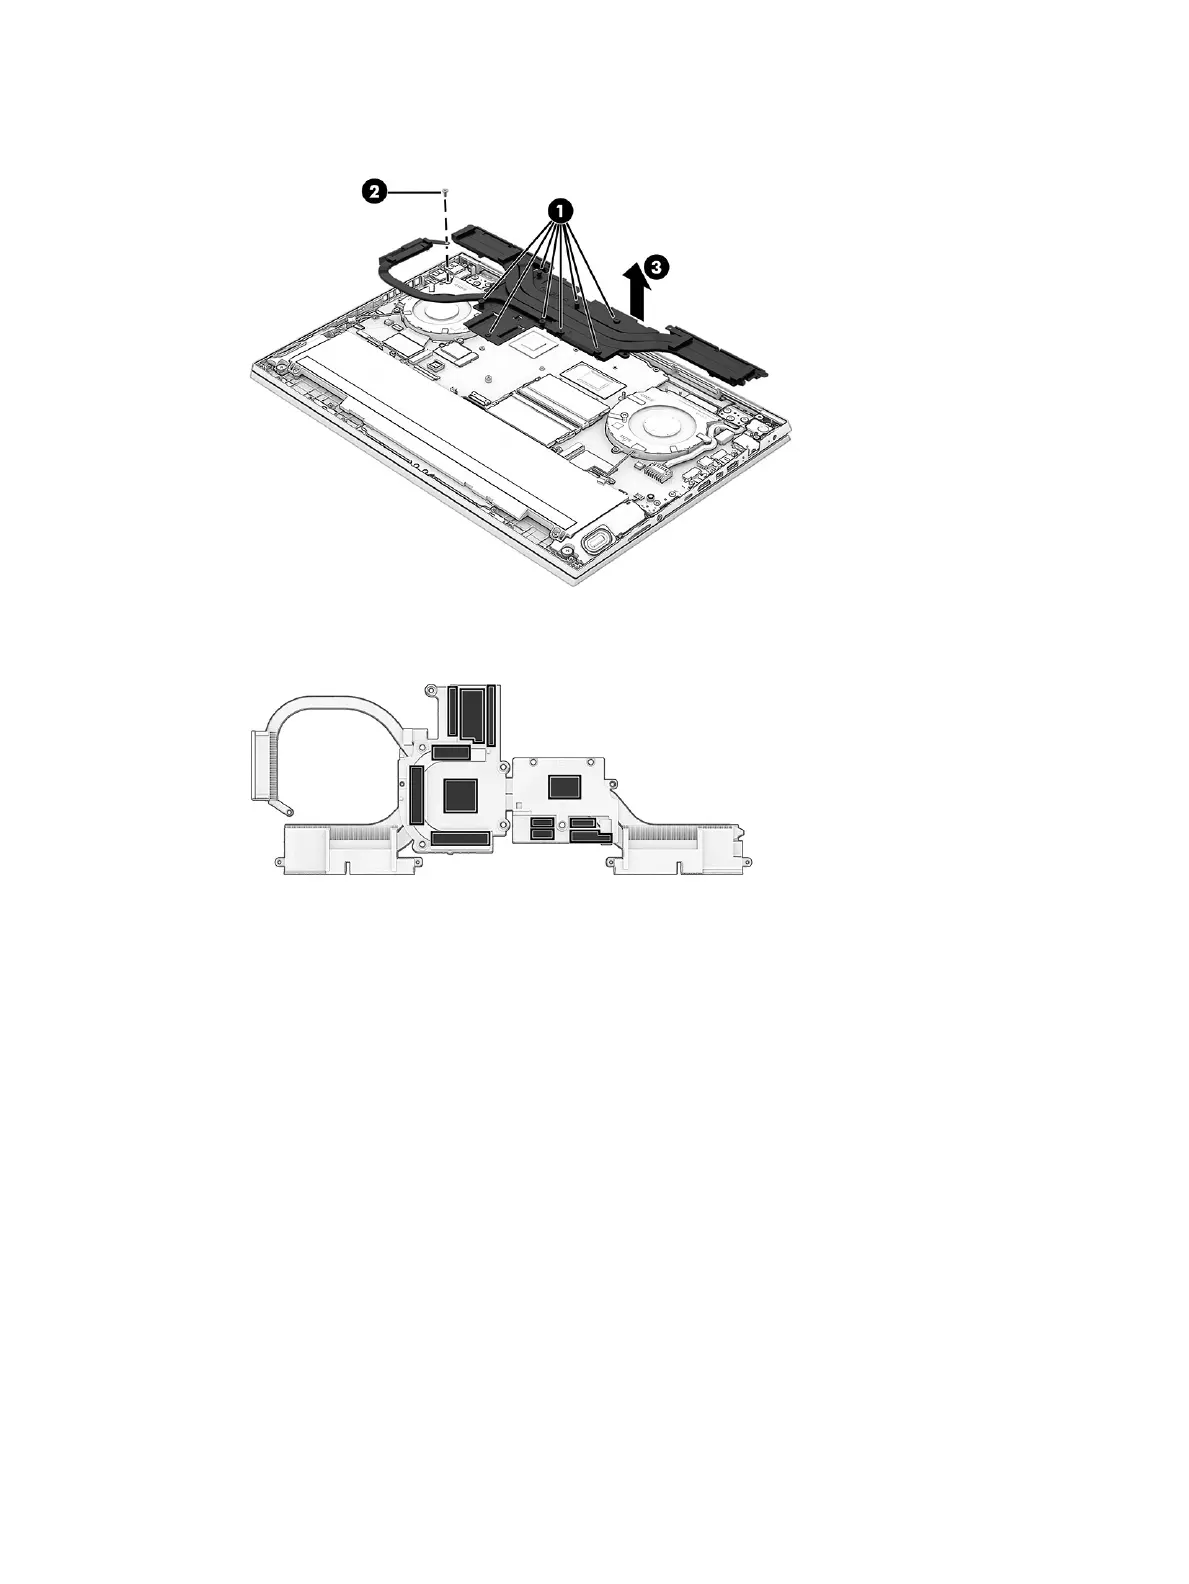
3. Remove the heat sink (3).
4. The following illustration shows thermal material locations on the bottom of the heat sink.
Please note the following information for correctly applying thermal gel:
● CLG-3500 white thermal gel has better thermal performance than thermal pads used between the
thermal module and system board on video RAM chip, MOSFET, and choke components. The
thermal grease used on CPUs and GPUs is dierent than CLG-3500 thermal gel in color and cannot
be mismatched.
● Heat sink (thermal module) replacement: (1) Clean the thermal gel residue from the system
board with alcohol after removing the thermal module. (2) Install the new thermal module onto
the system board (thermal gel is preapplied on the thermal module).
● System board replacement: Do not clean the thermal gel residue from the thermal module after
removing it from the system board. A thermal gel syringe is provided with the system board. (1)
After replacing the system board, squeeze two rows of thermal gel slowly and evenly out of the
syringe onto the video RAM ICs. Apply one row of thermal gel onto the chokes and power MOSFET
components. The areas to apply thermal gel are noted by small square brackets in white on the
board. (2) Reinstall the thermal module onto the system board.
● Part replacement that requires thermal module or system board removal and reassembly: Do
not clean thermal gel residue from the thermal module after removal from the system board. (1)
Clean thermal gel residue from the system board with alcohol after the thermal module is
removed. A thermal gel syringe is provided with the system board. (2) After replacing the system
board, squeeze two rows of thermal gel slowly and evenly out of the syringe onto the video RAM
ICs. Apply one row of thermal gel onto the chokes and power MOSFET components. The areas to
40 Chapter 5 Removal and replacement procedures for authorized service provider parts
 Loading...