EasyManuals Logo
Home>HP>Cables and connectors>175X - JetDirect Print Server

HP 175X - JetDirect Print Server User Manual

HP 175X - JetDirect Print Server
142 pages
To Next Page IconTo Next Page
To Previous Page IconTo Previous Page
Page #52 background imageLoading...
Page #52 background image
Steps to install the print server hardware
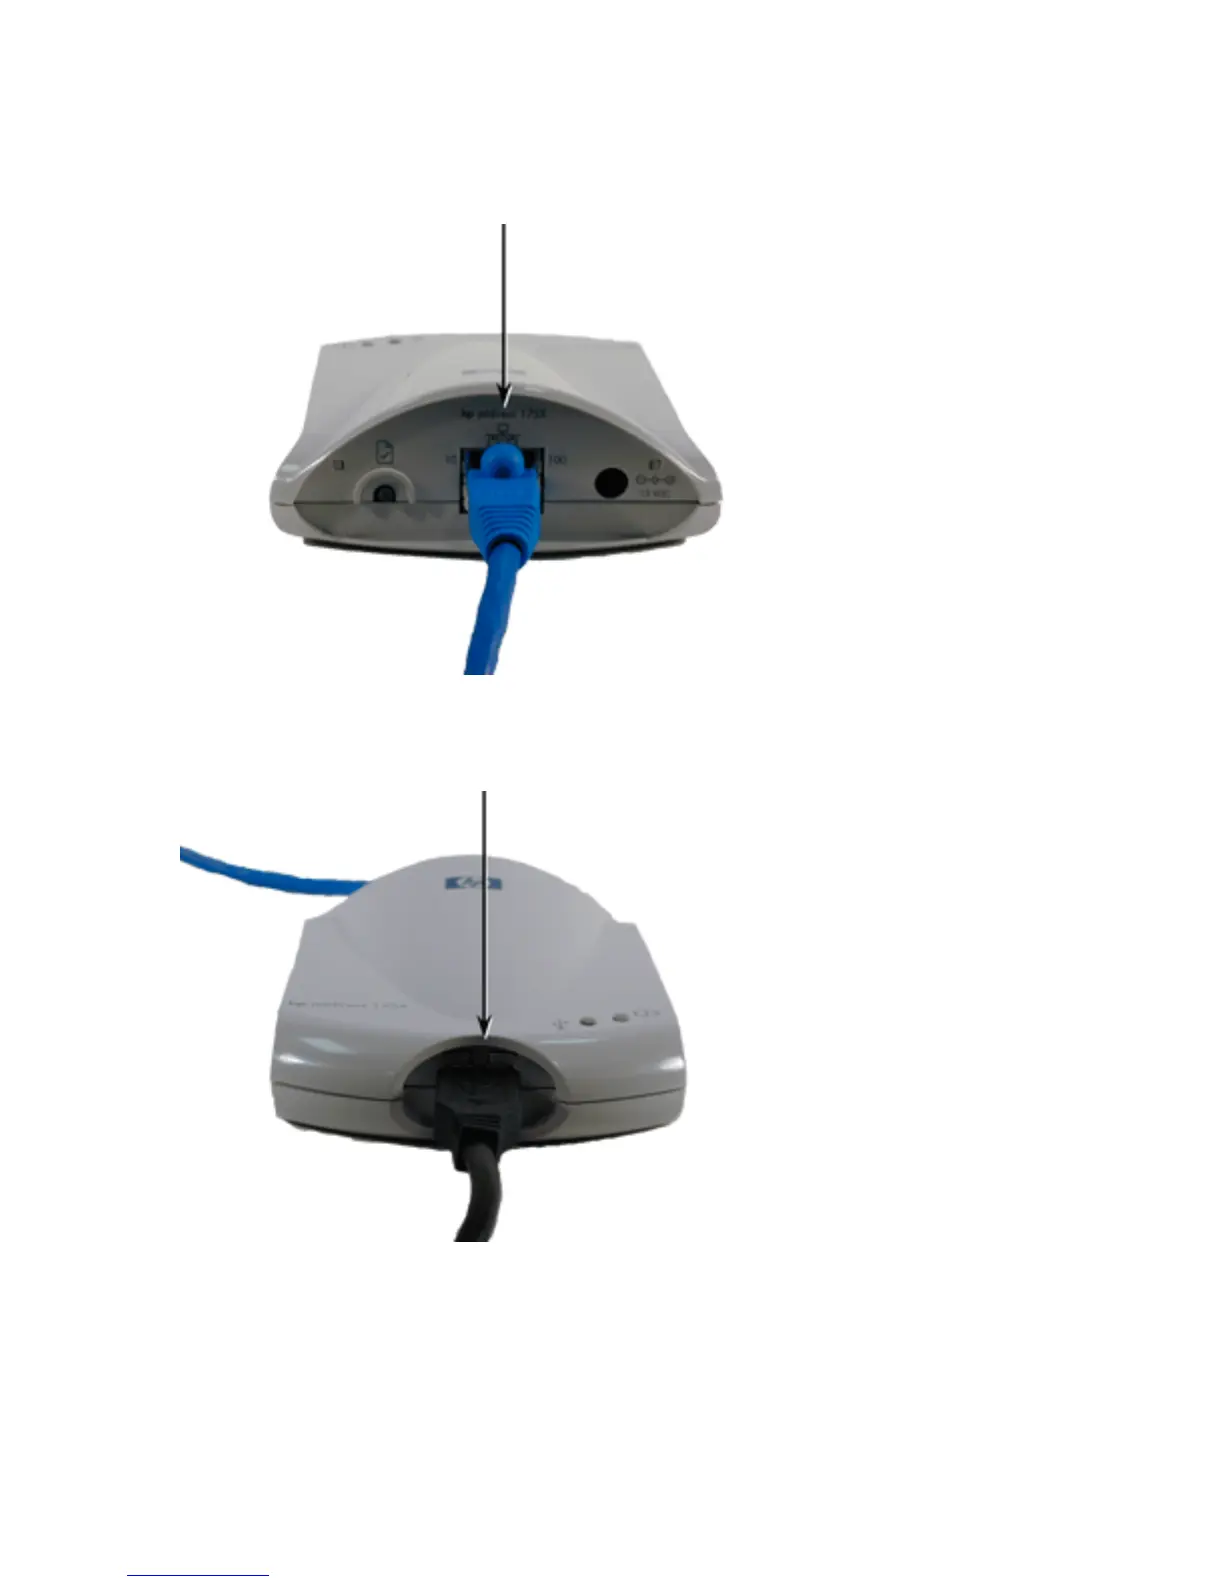
1. Attach the print server to a 10Base-T (Ethernet) or 100Base-TX (Fast Ethernet) local area
network by plugging a network cable into the RJ-45 connector on the rear end of the print server.
2. Attach the print server to the printer by plugging the Universal Serial Bus (USB) cable—shipped
with the print server—into the USB connector on the front end of the print server and into the
USB connector on the printer.
Caution! Unsupported USB Devices:
HP 4135A Jetdirect Connectivity Card
any USB hub
any USB-to-parallel converter
any USB cable extender

Questions and Answers:

Question and Answer IconNeed help?

Do you have a question about the HP 175X - JetDirect Print Server and is the answer not in the manual?

HP 175X - JetDirect Print Server Specifications

General IconGeneral
BrandHP
Model175X - JetDirect Print Server
CategoryCables and connectors
LanguageEnglish

Related product manuals