NOTE: When replacing the system board, be sure that the following components are removed from the
defective system board and installed on the replacement system board:
●
WLAN module (see WLAN module on page 34)
●
Memory modules (see Memory module on page 36)
●
RTC battery (see RTC battery on page 61)
●
Heat sink (see Heat sink on page 57)
●
Fan (see Fan on page 60)
Remove the system board:
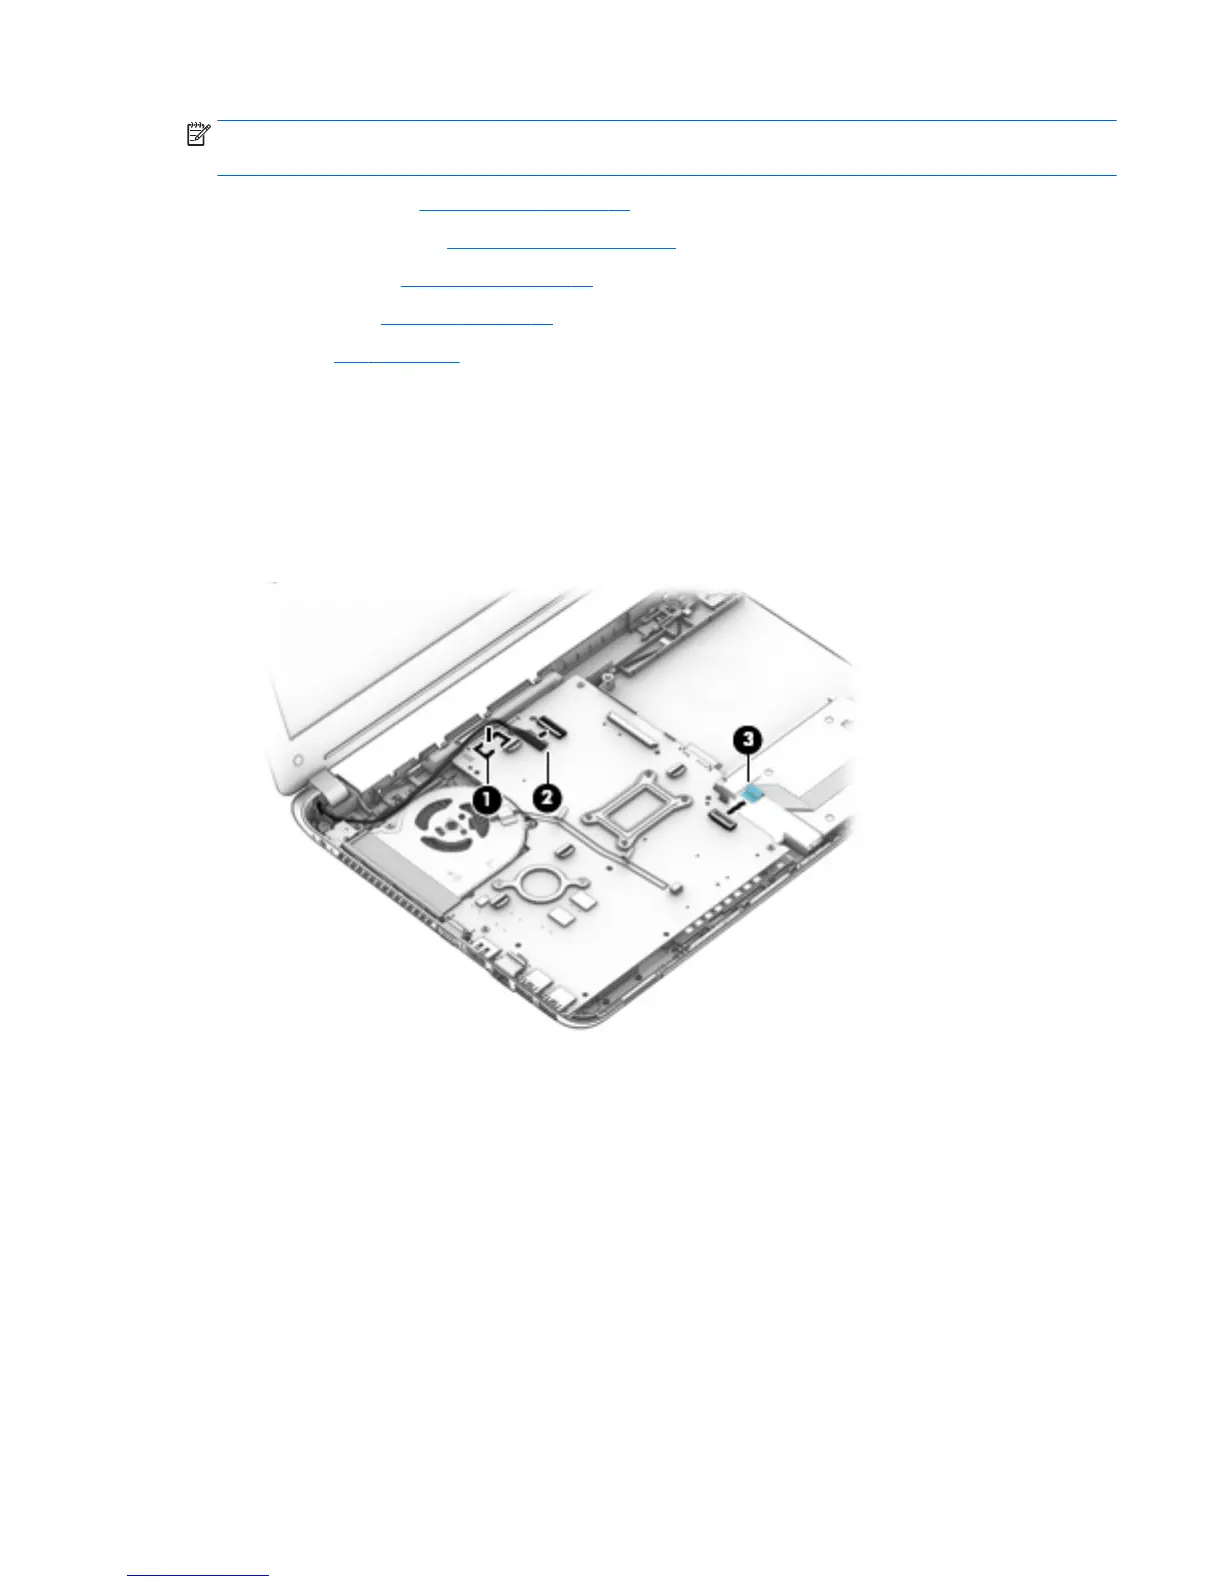
1. Release the ground tape (1) that secures the display panel cable to the system board.
2. Release the ZIF connector (2) to which the display panel cable is attached, and then disconnect the
display panel cable from the system board.
3. Release the ZIF connector (3) to which the audio/USB board cable is attached, and then disconnect the
audio/USB board cable from the system board.
4. Remove the fan cowling material (1) that forms a seal between the base enclosure and the fan.
5. Remove the two Philllips PM2.0×5.5 screws (2) that secure the system board to the base enclosure.
Component replacement procedures 55