Chapter 1 Performance Tests
HP 53131A/132A/181A Operational Verification
1-8 Assembly-Level Service Guide
1
Run Self Test
1 Disconnect the input signals from the Counter.
2 Power down (turn off the Counter), press and hold Recall (Utility)
key, then press POWER key.
3Press Recall key until
TEST: ALL ?
is displayed.
4Press Enter key.
Observe that
ALL: PASS
is displayed after the self test is completed.
If
ALL: FAIL
is displayed or a failure is indicated, refer to the
troubleshooting section in Chapter 2, “Service,” of this guide.
5 For HP 53131A/132A, mark Pass or Fail in the HP 53131A/132A
Performance Test Record on page 1-41, Test 4.
5’ For HP 53181A, mark Pass or Fail in the HP 53181A Performance
Test Record on page 1-71, Test 3.
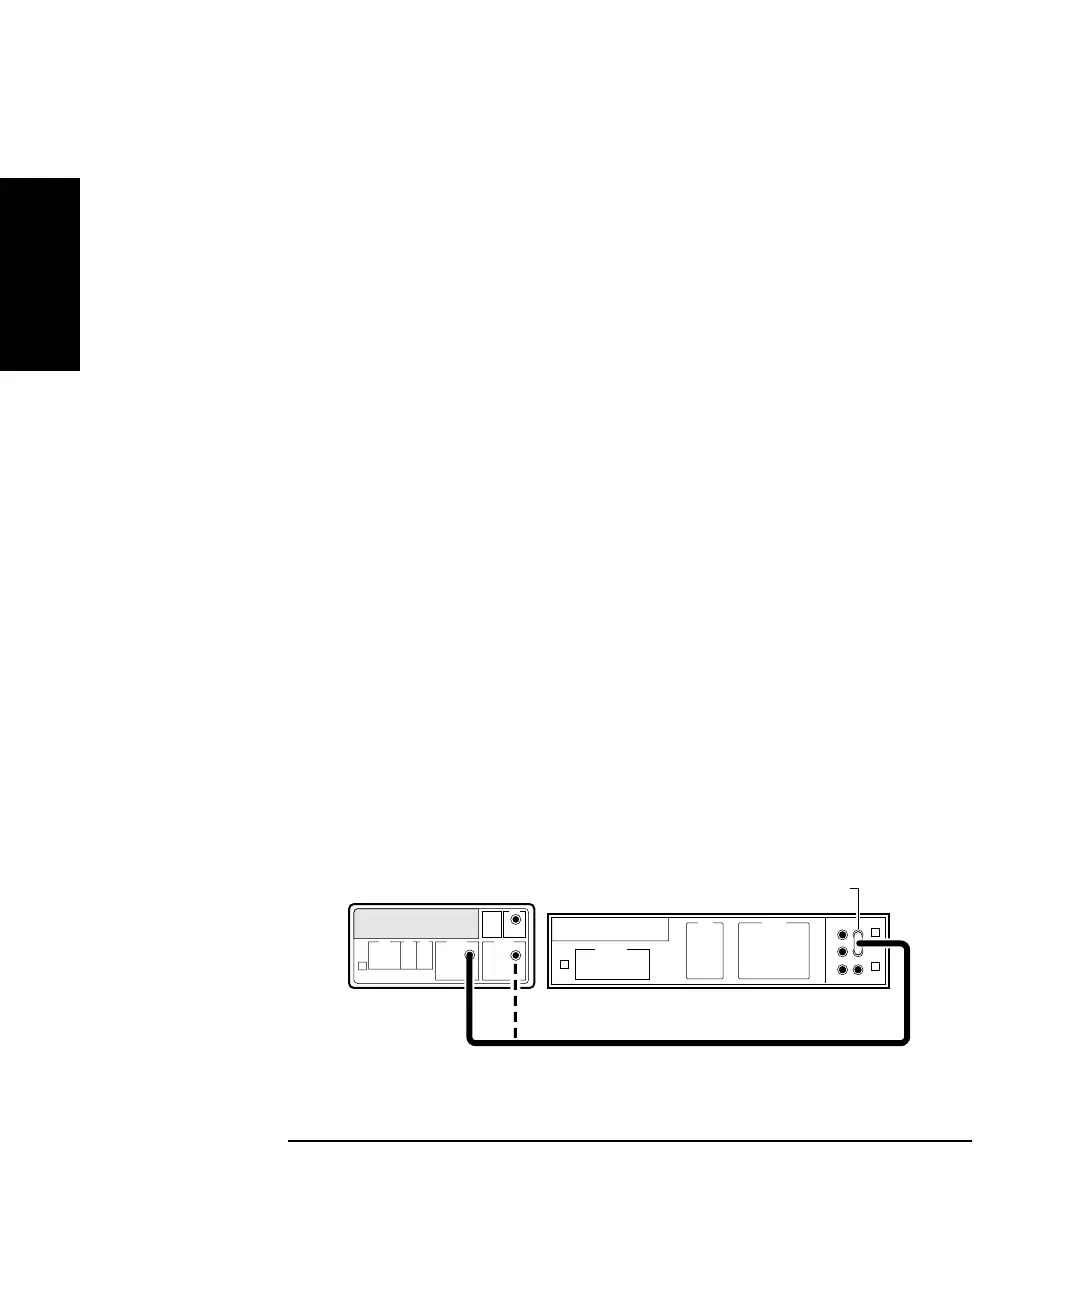
Termination Check
1Cycle the POWER key to preset the Counter.
2 Connect a digital voltmeter (DVM) to CHANNEL 1 as shown in
Figure 1-2, and set it to measure ohms (set DVM to appropriate
Ω
range).
HP 53131A/132A is shown in above figure. This setup for the HP 53181A requires a connection to Channel 1 only.
Figure 1-2. Termination Check Setup
Counter
HP 3458A
Digital Multimeter
BNC - to - Dual
Banana Plug