7. Move the probe cable to A2J202. Press SOFT KEY
#I
and wait 5 seconds.
8.
Press
SDFT
KEY #4 . The results should be sent to the printer.
9. If a failure is indicated in any of these tests, the fault lies on the A2 controller assembly.
To obtain more information:
a. Press the step down key,
a
one less time than the test number. (For example, press it
twice for the third test on the list.)
b. Press SOFT KEY
#a,
then SWT KEY
#4,
and when the printout is complete,
SflFT
KEY
#f3.
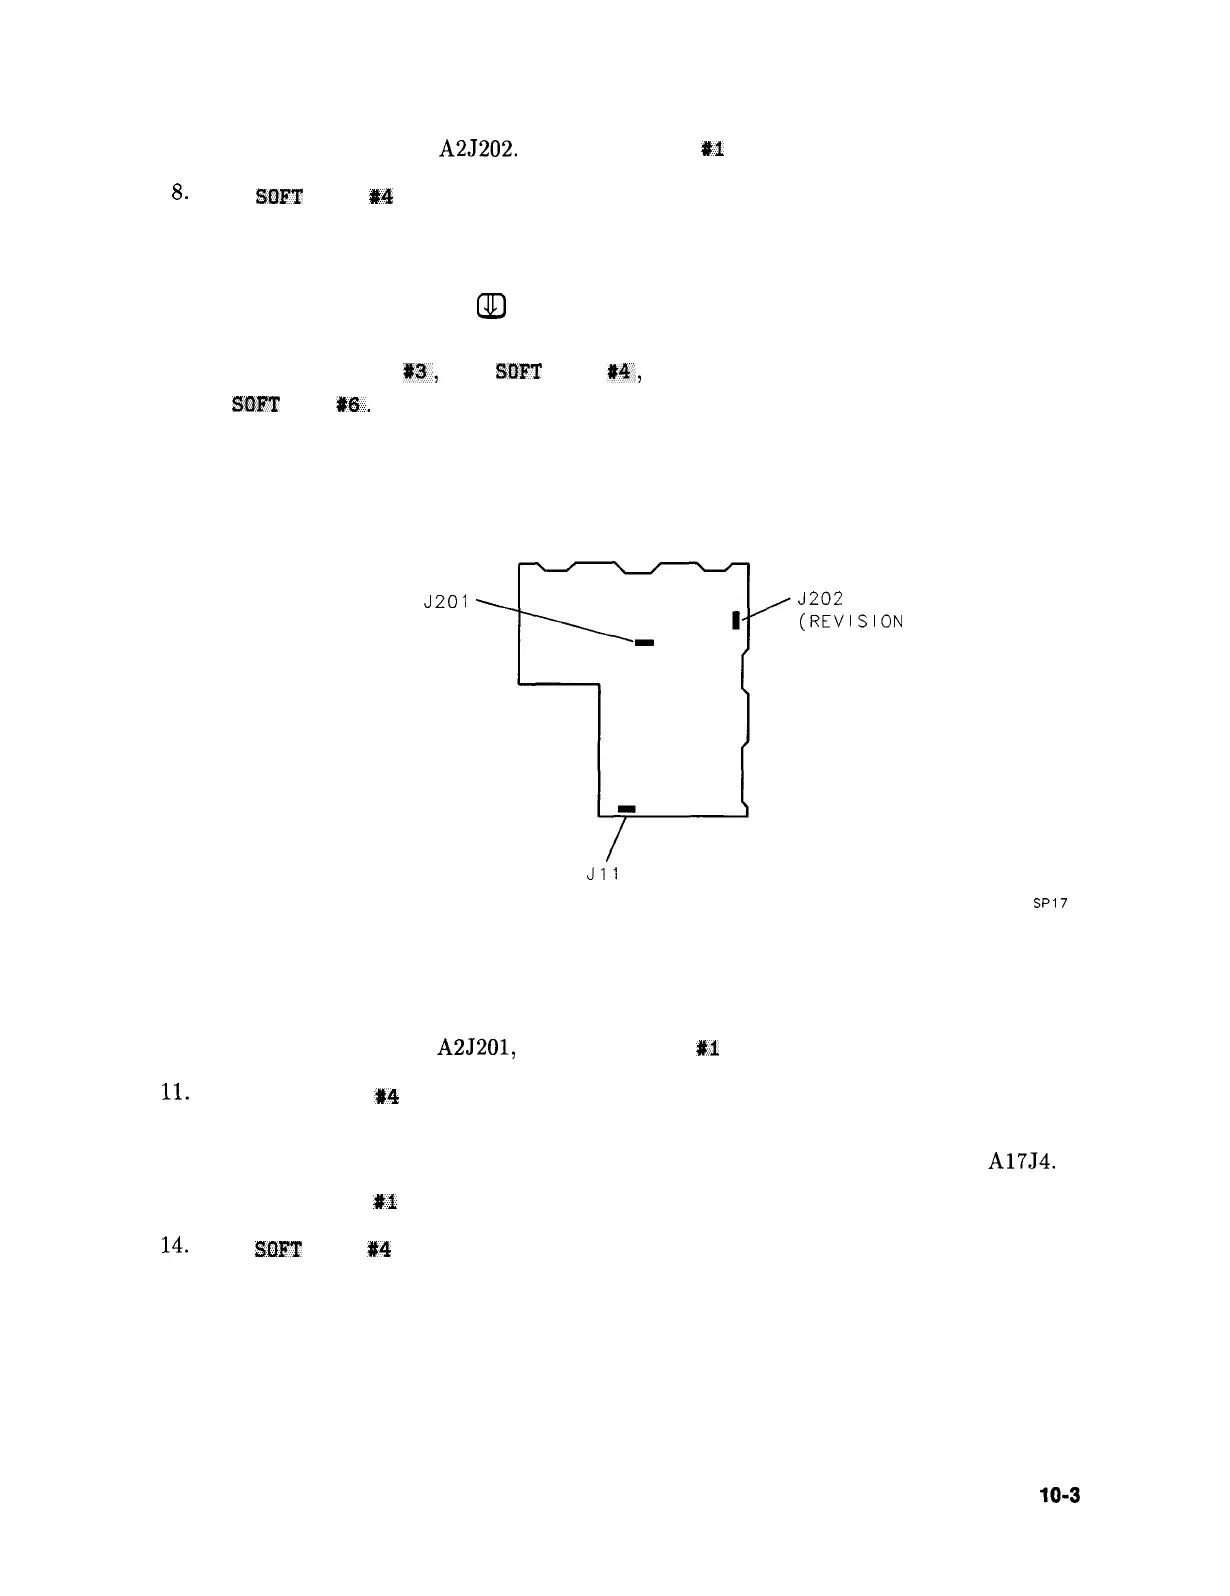
A2
CONTROLLER
J201
J202
(REVISION
CONNECTOR)
Jll
(TAM TEST
CONNECTOR)
Figure 10-l. A2 Test Connectors
SP17
10. Move the probe cable to A2J201, press SOFT KEY
#I
and wait 5 seconds.
11.
Press SOFT KEY
t4
. The results will be sent to the printer. Follow the procedure in
step 9 to obtain more information on any of the tests.
12. If no failures were indicated in testing the A2 controller, move the probe cable to A17J4.
13. Press SOFT KEY
#I
and wait 5 seconds.
14.
Press
SOFT
KEY P4 . The results will be sent to the printer.
15. If no failure is indicated in the printout, refer to “High Voltage Supplies” in Chapter 13,
“Display/Power Supply Section.”
Controller Section
10-3