For
HP
Internal Use
Only
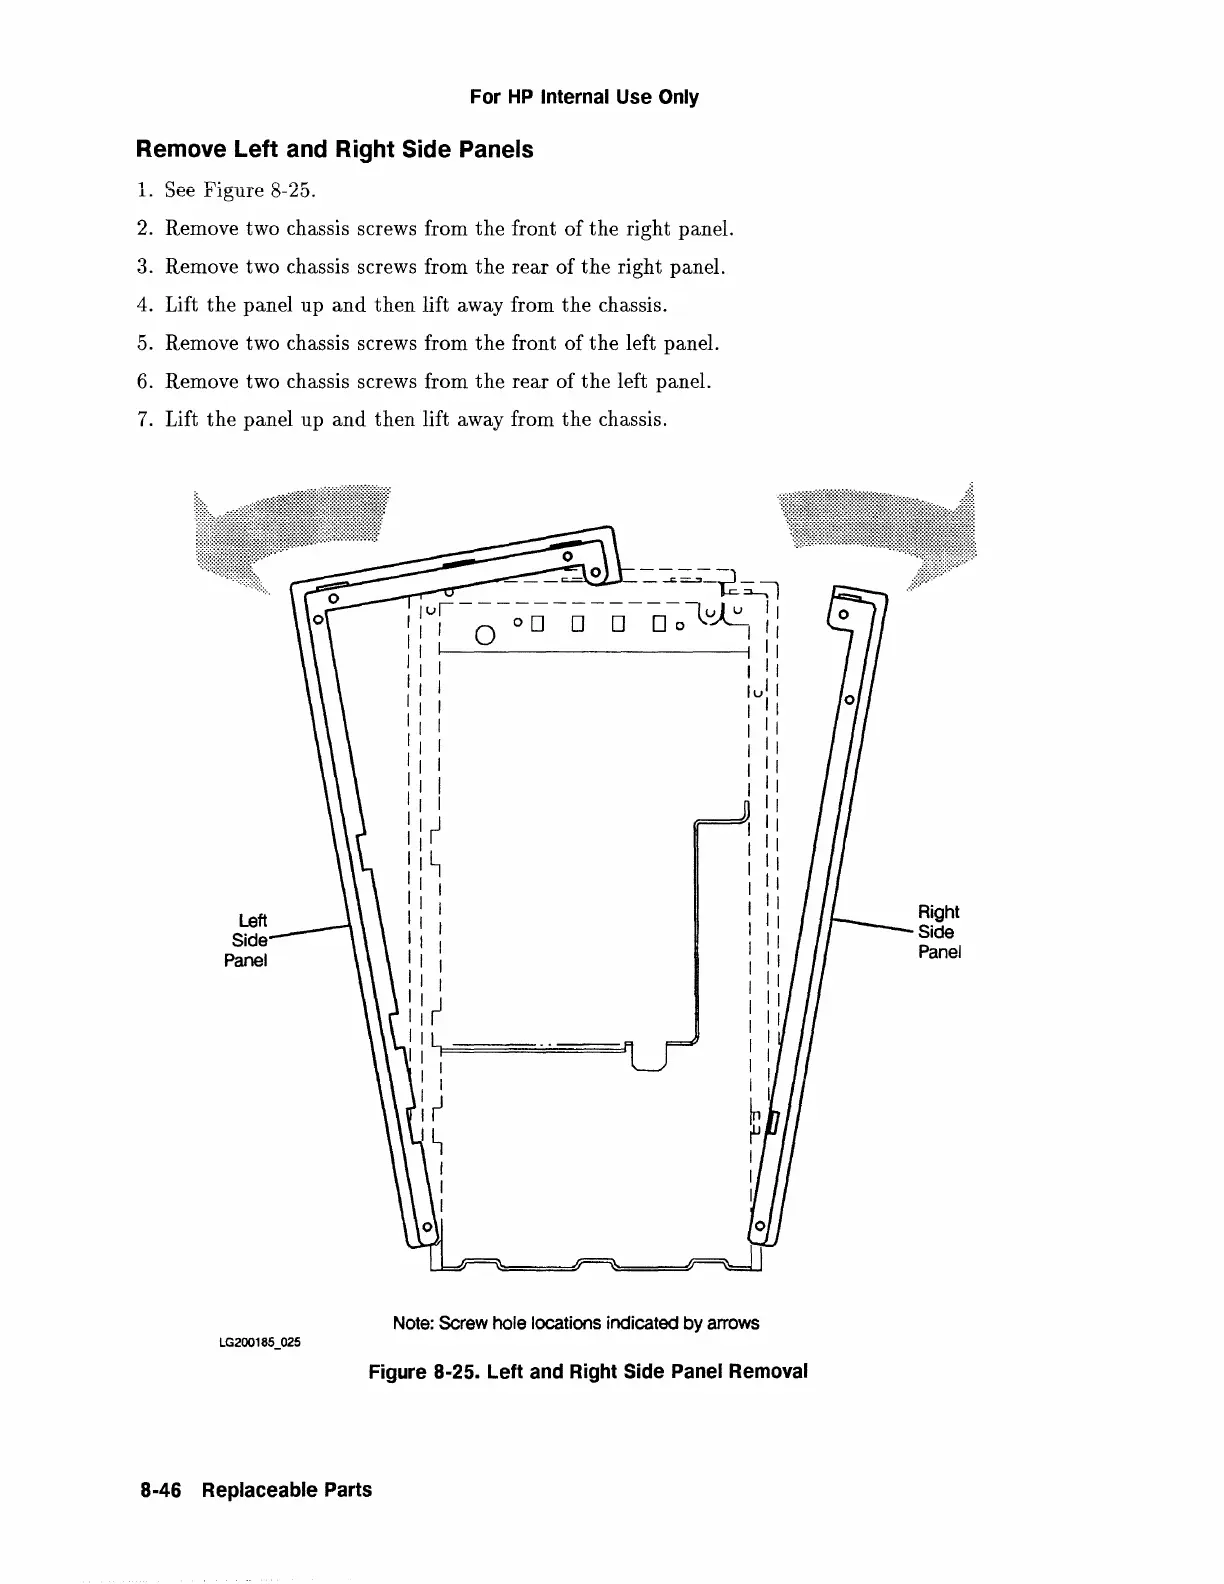
Remove Left and Right Side Panels
1.
See Figure 8-25.
2.
Remove two chassis screws from
the
front
of
the
right panel.
3. Remove two chassis screws from
the
rear
of
the
right panel.
4. Lift
the
panel up
and
then
lift away from
the
chassis.
5. Remove two chassis screws from
the
front
of
the
left panel.
6.
Remove two chassis screws from
the
rear of
the
left panel.
7.
Lift
the
panel up
and
then
lift away from
the
chassis.
Left
Side
Panel
LG200185
_
025
----=-~~-=-~~I
Jur------------~~
''
1
1
,
0°0000o
1
1
1
II
II
I I I
1
1
:I
lull
I I
11
I I I
1
1
I I I
1
1
I I I
1
1
I I I I
1
1
I I I
II
II
J
II
II
r
II
II~
,,
II
I
II
IJ
I
II
II
I
II
IJ
I
II
I I I
II
I I I
II
II
J
II
I I I
II
I 1 I I
I I I I
I : I I
:~
~I
~~
~
I
I
I
Note:
Screw
hole
locations
indicated
by
arrows
Figure 8-25. Left and Right Side Panel Removal
8-46 Replaceable Parts
Right
Side
Panel
 Loading...