Appendix C
Remove/Replace DAT Drives
Replacing the DAT Drive
92
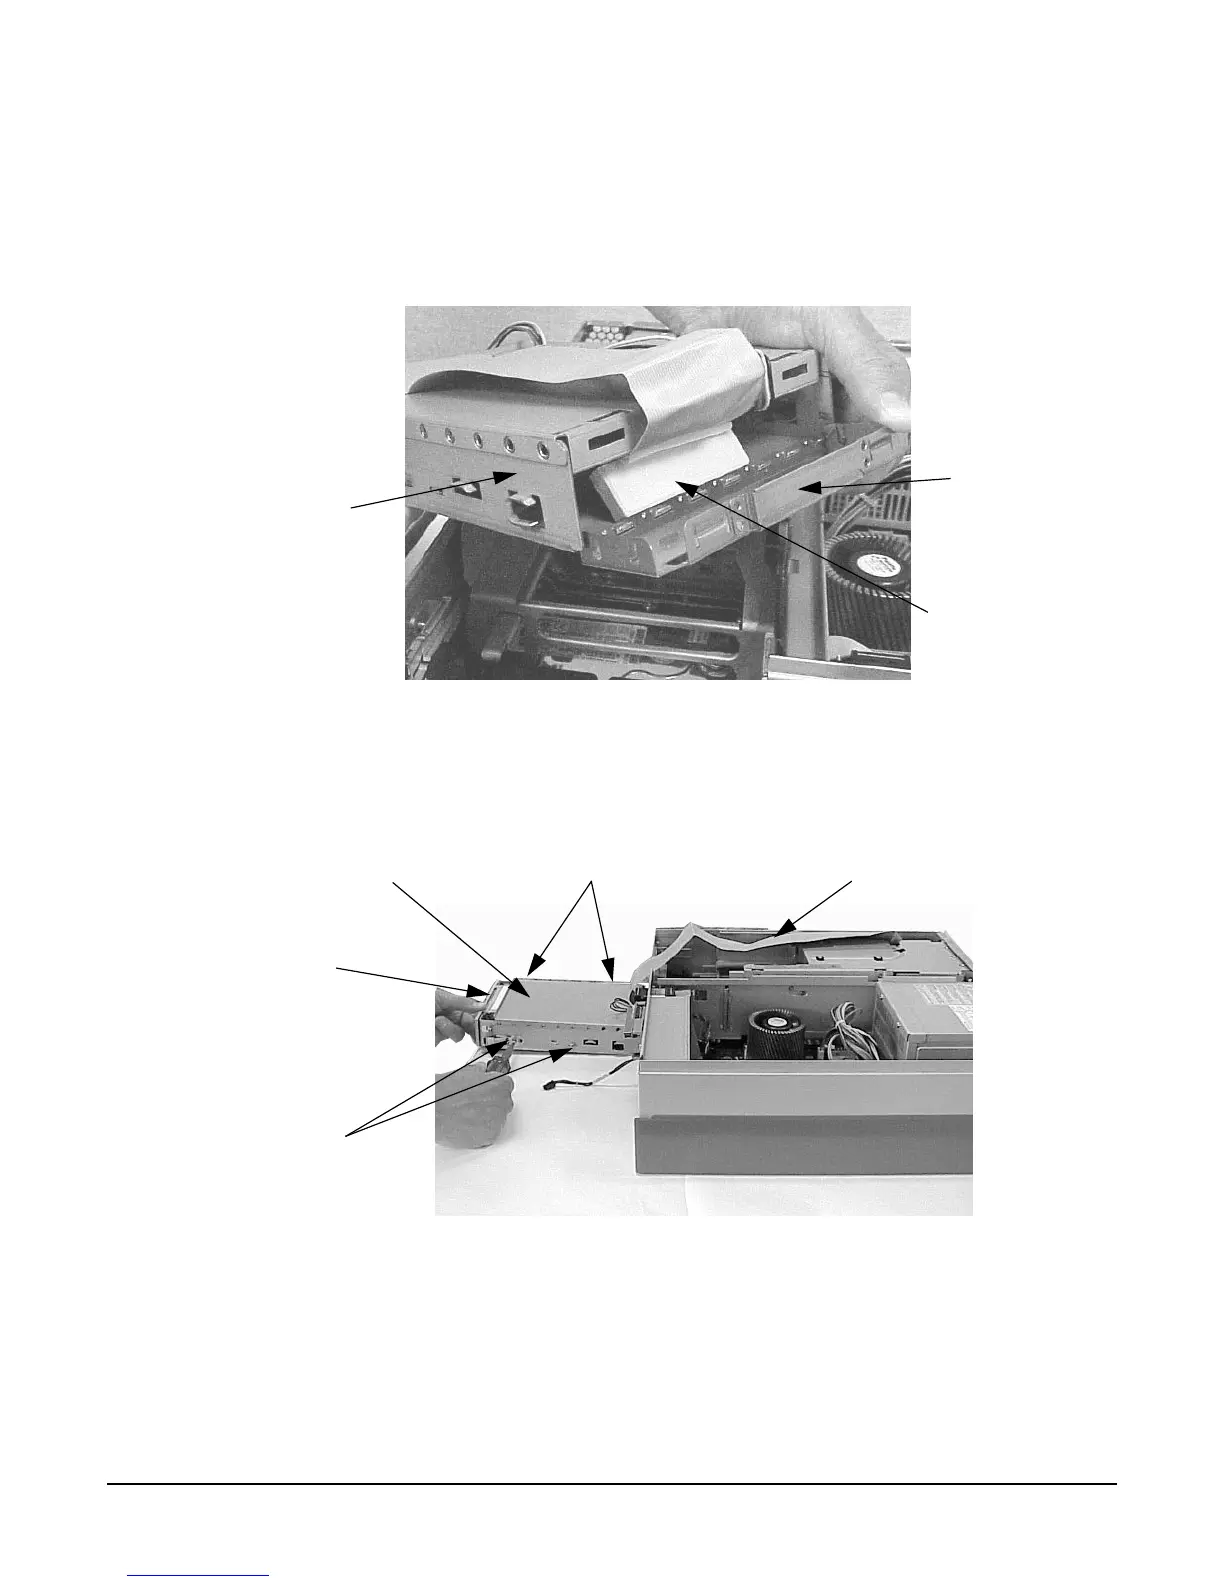
4. Replace the DAT drive bay’s back cover. Note that this back cover snaps onto the DAT drive bay.
See
Figure C-11. Also, note that the audio, power and control cables must be neatly fed through
the raised opening in the DAT drive bay’s back cover to avoid pinching them.
Figure C-11 Replacing the DAT Drive Bay’s Back Cover
5. Align the DAT drive bay’s mounting screw holes with the threaded holes on both sides of the
DAT drive and screw in the four mounting screws. See
Figure C-12.
Figure C-12 Removing the DAT Drive Bay and DAT Drive
DAT Drive
Bay’s Back
Cover
DAT Drive
Bay
SCSI Terminator
Mounting Screws
Mounting
Screws
SCSI Cable
DAT Drive Bay
DAT Drive
 Loading...