Display assembly
To remove and disassemble the display assembly, use these procedures and illustrations.
Before removing the display panel, follow these steps:
1. Prepare the computer for disassembly (Preparation for disassembly on page 22).
2. Remove the bottom cover (Bottom cover on page 22).
3. Remove the battery (see Battery on page 23).
4. Remove the heat sink (see Heat sink on page 29).
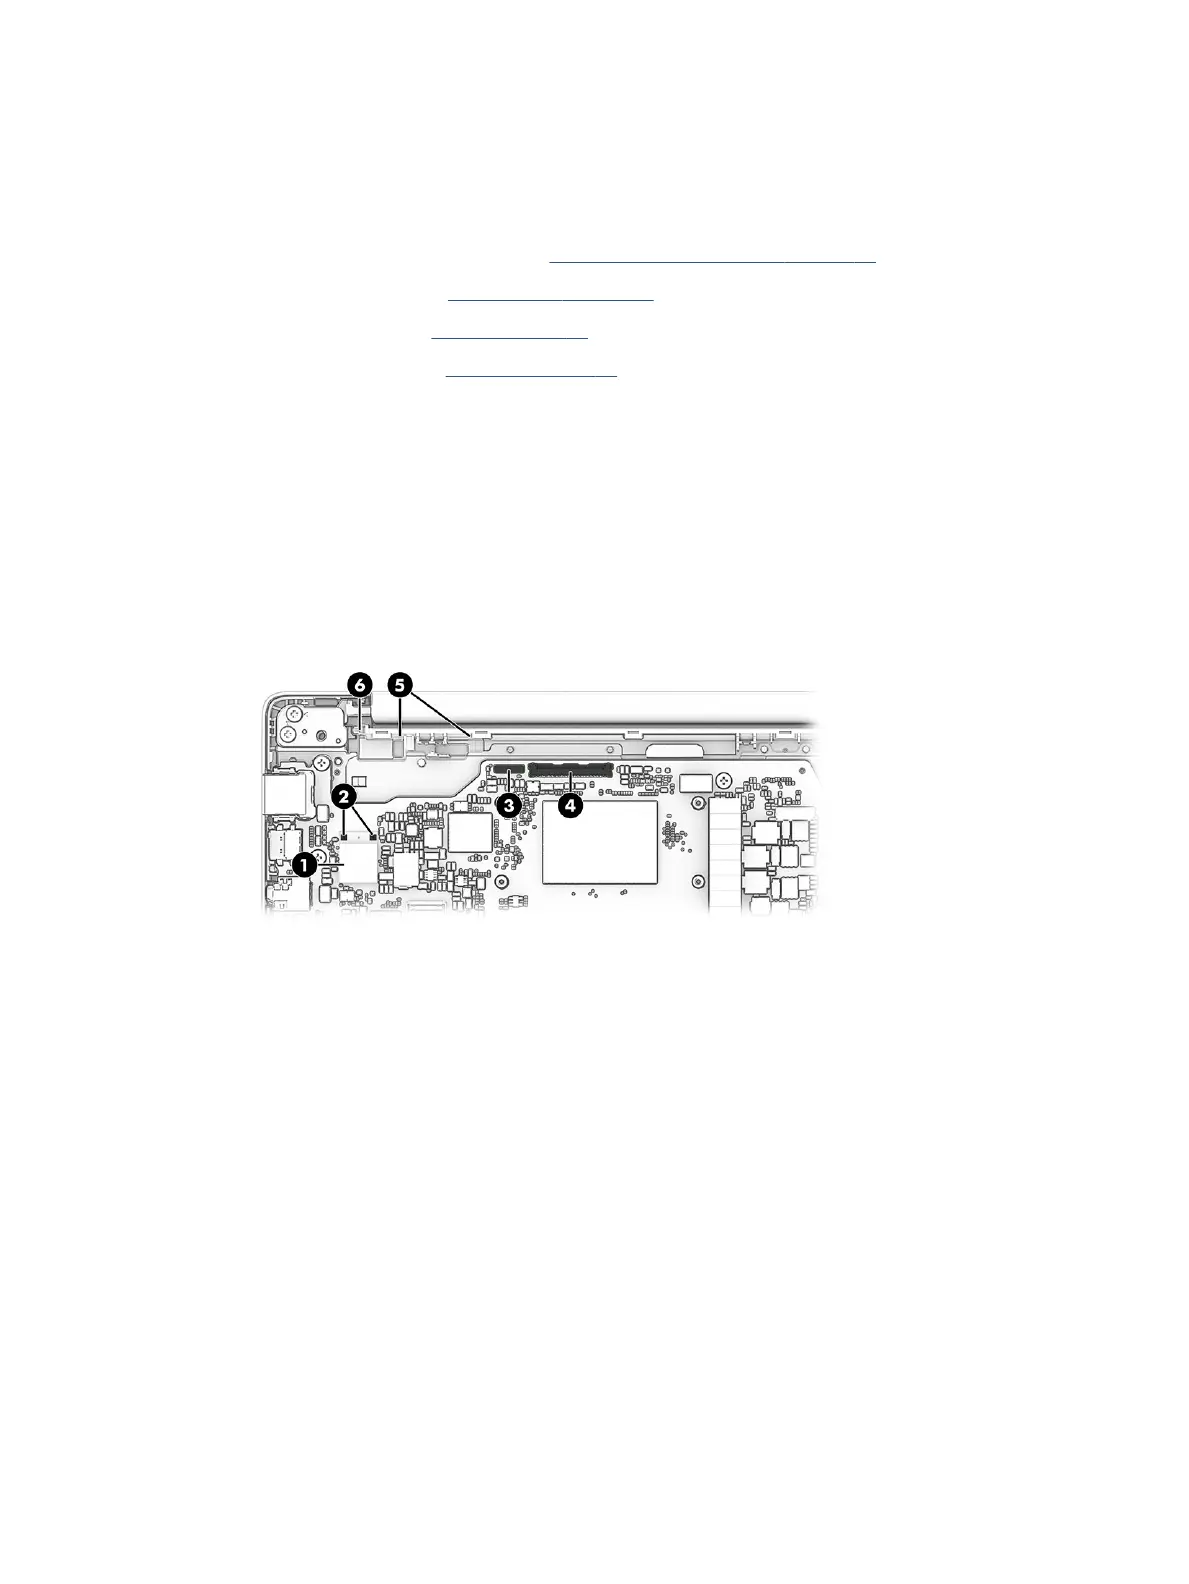
Remove the display assembly:
1. Remove the plastic that covers the integrated WLAN module (1), and then disconnect the antennas from
the module (2).
2. Disconnect the camera cable (3).
3. Disconnect the display cable (4).
4. Remove the display cable from the clip at the top of the chassis (5).
5. Remove the camera cable and one antenna cable from their routing at the top of the chassis (6).
6. Remove the four Phillips M2.5 × 4.5 screws (1) that secure the display to the computer.
7. Open the computer to open the hinges (2).
36 Chapter 5 Removal and replacement procedures for authorized service provider parts
 Loading...