WARNING: To reduce the risk of electric shock, fire, and
damage to the equipment, this product must be installed in
accordance with the following guidelines:
• This power supply is intended only for installation in
HPE servers located in a restricted access location.
• This power supply is not intended for direct connection
to the DC supply branch circuit. It should only be
connected to a power distribution unit (PDU) that
provides an independent overcurrent-protected output
for each DC power supply. Each output overcurrent-
protected device in the PDU must be suitable for
interrupting fault current available from the DC power
source and must be rated no more than 80A.
• The HPE Synergy 12000 Frame must be connected to
a suitable ground/earth terminal. This terminal must be
connected to a suitable building ground/earth terminal
in accordance with local/regional electric codes/
regulations. Do not rely on the rack or cabinet chassis
to provide adequate ground/earth continuity.
Installing the power supply
Two lugs ship in the kit with the -48V DC power supply. The two-
hole lug specification is as follows:
• Width – 0.41 in (10.41 mm)
• Bolt hole size – 0.20 in (5.08 mm)
• Hole spacing – 0.63 in (16.00 mm)
Procedure
1.
Remove the power supply blank, or unplug the power cord
and remove the power supply from the frame.
2.
Ensure a ground connection to the HPE Synergy 12000
Frame has been properly installed according to HPE
Synergy 12000 Frame Ground Bond Assembly Installation
Instructions.
3. Place the power supply on a flat surface
4. Open the input connector on the new power supply by
lifting the input connector cover.
5. Remove the bags of hardware and set aside for immediate
use.
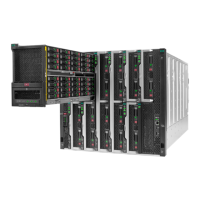
6. Crimp a two-hole lug onto the -48V DC cable.
7. Insert the two-hole lug through the aperture labeled "-48V"
on the power supply input connector.
8. Secure the two-hole lug to the -48V DC input connector
terminal with two screws.
9. Using a torque-controlled T25 screwdriver, tighten both
screws to 15lb-in of torque.
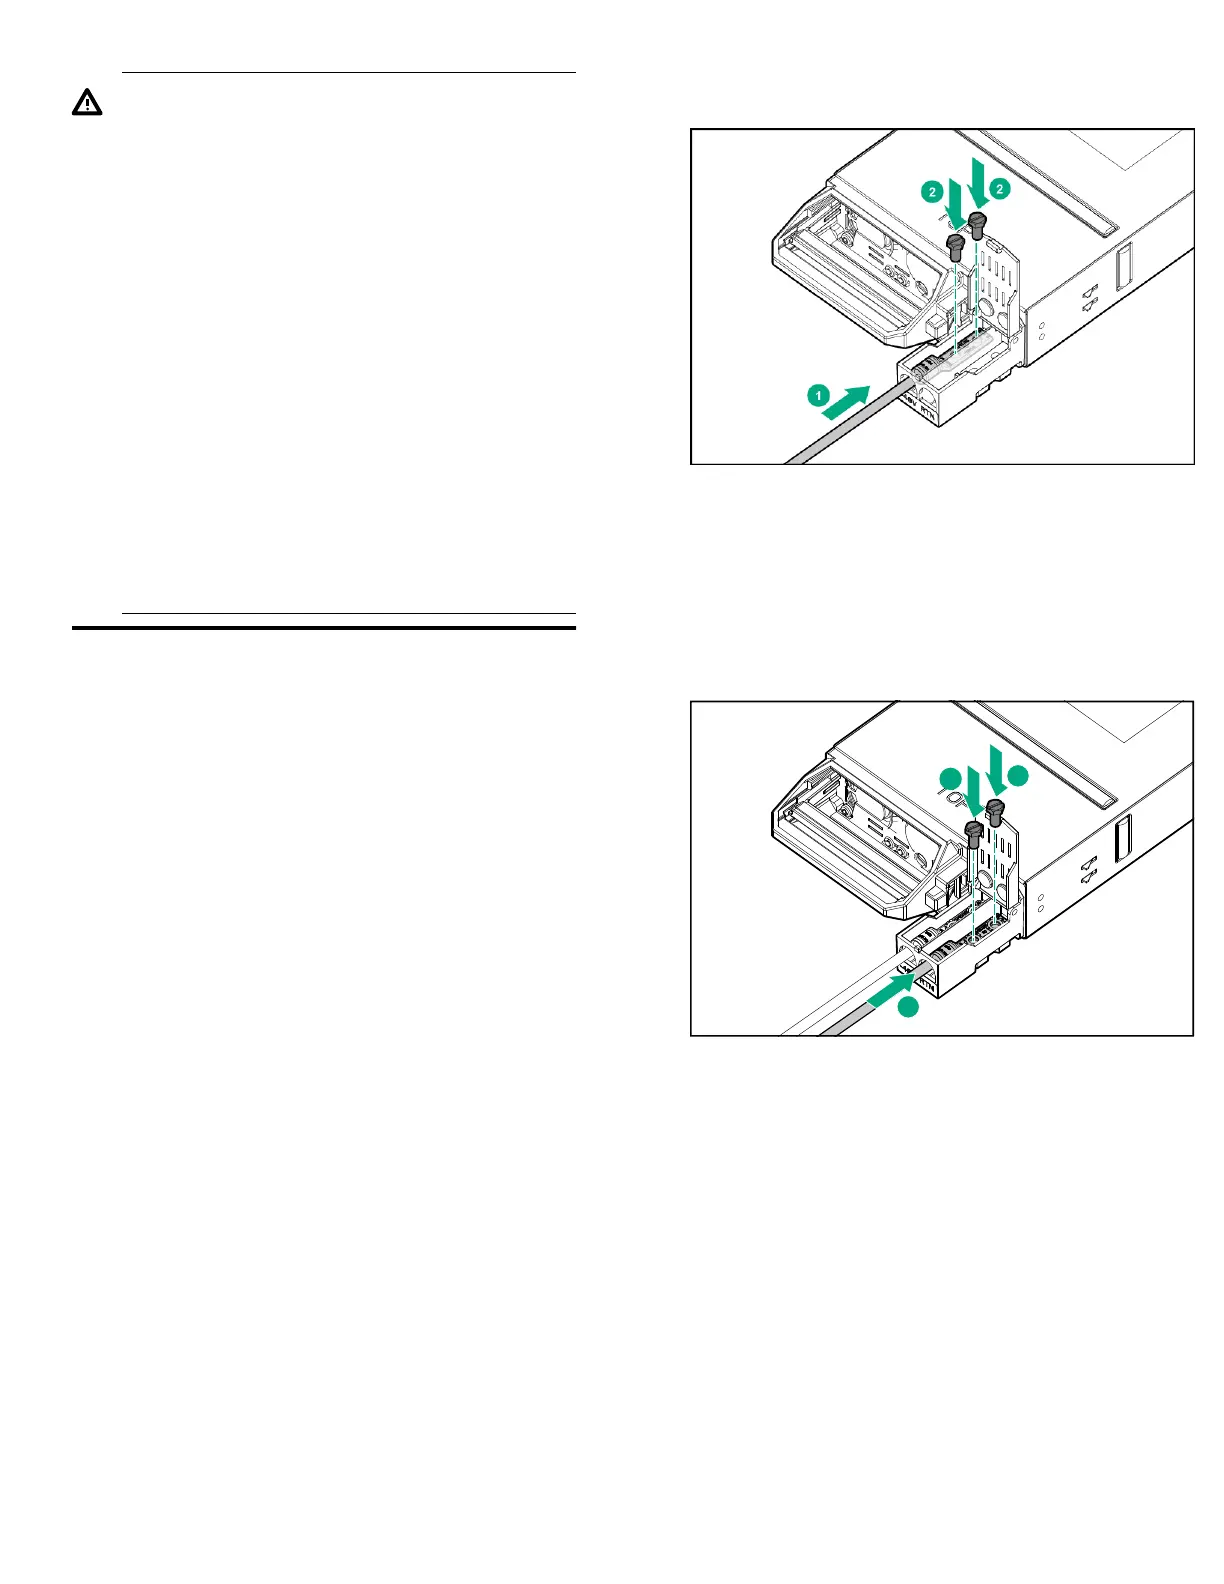
10. Crimp a two-hole lug onto the return cable.
11.
Insert the two-hole lug through the aperture labeled "RTN"
on the power supply input connector.
12.
Secure the two-hole lug to the RTN input connector
terminal with two screws.
13.
Using a torque-controlled T25 screwdriver, tighten both
screws to 15lb-in of torque.
14. Close the input connector cover.
Page 2
 Loading...