2 Installation
Mounting on a wall
1. Using the supplied wall anchors and screws, attach the mounting bracket vertically to a wall
with the flange at the bottom. Use at least two opposing screw holes. Leave enough space
above the AP for cable access and antenna flap extension.
Mounting Bracket
4: Lock tab1: Retention tabs
5: Retention screw hole2: Mounting holes
6: Cable lock3: Flange
2. Hold the AP about 2.5 cm (an inch) above the flange, then slide the AP into the bracket so
that it rests on the flange and its feet are held in place by the retention tabs.
3. Using the retention screw, secure the AP to the bracket. Optionally, you also can use a cable
lock.
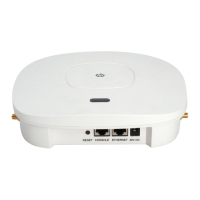
4. Connect the Ethernet cable to the AP Ethernet port.
Mounting on a suspended ceiling
The AP can be mounted on a suspended ceiling using the mounting bracket (supplied) and T-bar
clips (supplied only with rev B US J9358B and WW J9359B).
1. As illustrated, place one nut on the threaded post of each clip before the clip is mounted on
the bracket.
Bottom view
1: Nut
2: Bracket
3: T-bar clip
2. Attach two T-bar clips to the suspended ceiling T-bar at the desired mounting position, either
9.2 cm (3 5/8 inches) or 13 cm (5 1/8 inches) apart on center.
10 Installation
 Loading...