Do you have a question about the HP OMEN 27qs and is the answer not in the manual?
Provides crucial safety guidelines for service personnel to minimize risks during product maintenance.
Details essential information and precautions for professional service technicians performing repairs.
Explains RoHS compliance requirements for electronic components and replacement parts.
Provides a general overview of the manual's content and service levels.
Information on how and where to find firmware updates for the monitor.
Outlines post-repair checks, including AC leakage current, before returning the product.
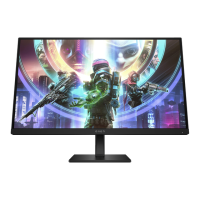
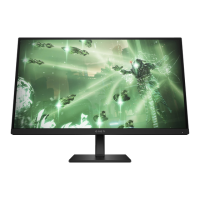
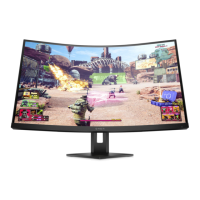
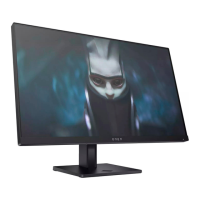
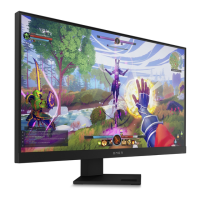
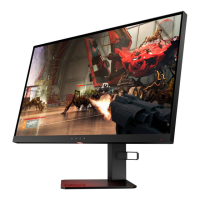
Details the various display and functional features of the OMEN 27qs monitor model.
Identifies and describes the components located on the rear of the monitor.
Guides users on preparing the workspace and gathering necessary tools before disassembling the monitor.
Step-by-step instructions for removing the rear cover of the monitor.
Procedure for removing and identifying the power board, including part numbers and warnings.
Details the repair process for various connectors like HDMI, DP, and USB on the main board.
This document serves as a Maintenance and Service Guide for the OMEN 27qs monitor, providing comprehensive information for trained service personnel. It outlines procedures for spare parts, removal and replacement of components, diagnostic tests, and problem troubleshooting, ensuring safe and effective servicing of the device.
The monitor itself is designed with a focus on high-performance display and user convenience. Its primary function is to provide a visual interface for computers and other source devices, offering a high-resolution display for various applications, from gaming to professional work.
The OMEN 27qs monitor boasts a 68.6 cm (27-inch) screen with a resolution of 2560 x 1440, supporting full-screen display for lower resolutions while maintaining the original aspect ratio through custom scaling. It utilizes a liquid crystal display (LCD) with an active matrix and in-plane switching (IPS) technology, ensuring wide viewing angles and consistent color reproduction. Select models may also feature VA panel technology. The monitor offers a wide color gamut, providing coverage for sRGB and DCI-P3 color spaces, which is crucial for color-accurate work and vibrant media consumption. A nonglare panel with an LED backlight enhances viewing comfort by reducing reflections.
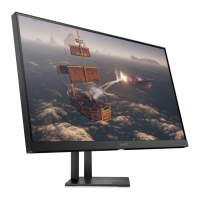
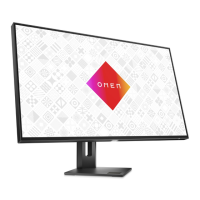
For ergonomic flexibility, the monitor includes tilt, swivel, and height adjustment capabilities. Select models also offer pivot capability, allowing the monitor head to rotate from landscape to portrait orientation, which can be beneficial for document viewing or specific professional tasks.
Advanced display functionalities include Dual Picture in Picture (PiP) and Picture beside Picture (PbP), enabling simultaneous viewing of inputs from DisplayPort™ and High-Definition Multimedia Interface® (HDMI) sources on different halves of the screen. On-screen display (OSD) adjustments are available in multiple languages, facilitating easy setup and screen optimization. A dedicated Keyboard Video Mouse (KVM) button is present on select models for convenient selection of the source device connected to the monitor. The monitor also incorporates an energy saver feature to comply with reduced power consumption requirements. Cable management features are included to help organize cables and cords, contributing to a tidy workspace.
Connectivity options are robust, featuring a DisplayPort video input (with an included cable), HDMI video input, and an audio-out (headphone) jack. For USB connectivity, select models include a USB hub with one USB Type-B port for upstream connection to a computer and two USB ports for downstream connection to USB devices. Alternatively, some models offer a USB hub with one USB Type-C® port for upstream connection and two USB ports for downstream USB devices. The monitor comes with either a USB Type-B to USB Type-A cable or a USB Type-C-to-USB Type-C cable, depending on the model. Select models also include an HDMI 2.1 cable. The monitor supports Plug and Play functionality, if supported by the operating system.
The monitor stand is designed for versatility, being removable to allow for flexible monitor head mounting solutions. It features an HP Quick Release 2 device for easy attachment and removal of the monitor head from the stand. Additionally, a VESA® mounting bracket (100 × 100 mm) is integrated for attaching the monitor head to a wall-mount device or swing arm, and it supports a mounting bracket for attaching the monitor to a workstation.
This guide emphasizes the importance of safety and proper procedures for maintenance and service. It explicitly states that only trained service personnel familiar with the product should perform service, and they must read "Important Safety Information" before any maintenance. The document highlights that repair must be performed by professional service technicians in a repair center, and end users should not attempt these procedures.
Key precautions include ensuring a dry and clean working environment, using proper safety devices, and always disconnecting power before opening the product's cabinet. Modules containing electrical components are sensitive to electrostatic discharge (ESD), necessitating adherence to ESD safety procedures. The guide also warns about multiple batteries in some products and the risks associated with disassembling or exposing them to high temperatures. Information on government requirements for battery recycling and disposal is also provided.
The monitor meets RoHS (Restriction of Hazardous Substance) requirements, and service personnel are instructed to use lead-free solder wire when soldering. When replacing capacitors, it is crucial to match polarity, specification, part number, and location, and to insert new parts carefully to avoid short circuits. Preventing the board from getting wet is also critical to avoid short circuits and malfunctions. Quick soldering techniques are recommended to prevent overheating the circuit board, and the soldering iron tip must be kept clean and well-tinned. After any repair, a close inspection of the circuit board and a function test are mandatory to confirm proper operation and power supply functionality.
The guide outlines two levels of service: Level 1 for cosmetic/appearance/alignment service and Level 2 for circuit board or standard parts replacement. Firmware updates, if available, can be found on support.hp.com. Before returning a repaired product to the customer, an AC leakage current check on exposed metallic parts is required to ensure electrical safety.
The document provides a detailed illustrated parts catalog, listing major components such as the panel, middle frame, speakers, various screws, converter board, adapter board, main board, mainframe, connector board, key board, rear cover, VESA bracket, VESA cover, stand assembly, stand clamp, and base assembly, along with their quantities.
Instructions for ordering parts are provided, including HP spare part numbers for power boards and references to EU distributors like RS Component and Farnell for capacitors and connectors. Specific component descriptions, locations, and distributor part numbers are listed for HDMI, DP, USB B, USB 3.0 A, and Phone Jack connectors. It notes that rear cover and chassis modifications might be necessary to accommodate connectors and that connectors may need modification to meet functional, regulatory, and safety requirements if not an exact match. Cables and internal/external power supplies can be purchased from the HP part store and EET, respectively.
Detailed removal and replacement procedures are provided for various components, starting with preparation for disassembly. This involves reading safety information, cleaning the disassembly room, identifying the disassembly area, preparing for material flow, and having necessary equipment such as a press fixture, working table, screwdriver, knife, gloves, cleaning cloth, ESD protection, and a scraper bar of specified dimensions.
Specific steps are given for removing the Rear Cover, including detaching the Stand-Base Assy, removing screws, splitting the left and right sides of the middle frame and rear case using fingers and a scraper bar tool, and disconnecting connectors and speakers. Procedures for removing the Connector board, taking off tapes, removing screws to detach the middle frame and panel, removing Mylar, disassembling screws from boards, and disconnecting all wires are also detailed.
The guide includes a dedicated section for power board removal, specifying part numbers for both 1st and 2nd sources. It includes a warning about charged capacitors after unplugging the power supply and provides instructions for locating the part number on the board.
Connector repair procedures are extensively covered for HDMI, DisplayPort, Phone Jack, and USB connectors on the main board. The guide lists connector identifiers and their locations. For each connector, the repair process involves using a soldering iron and de-soldering pump to remove solder, using a hot air gun to melt solder on pins, lifting the old connector, placing the new component, ensuring it matches the circuit board footprint, and soldering the new component.
A "Function test" section ensures that all functions are working after repair. This includes tests for HDMI, DP, USB-C, and Audio, with descriptions of expected operation and tools to be used (e.g., computer, DVD player, USB-C player, speaker).
Finally, a "Support and troubleshooting" table lists common issues, possible causes, and recommended solutions, such as connecting power cords, pressing the power button, connecting video cables properly, inactivating screen blanking utilities, selecting input in OSD, replacing video cards, adjusting brightness, changing display resolutions, enabling auto-sleep, and disabling OSD Lockout or Power Button Lockout functions.
| Depth | 52.2 mm |
|---|---|
| Width | 613.6 mm |
| Height | 364.3 mm |
| Weight | 7900 g |
| Package depth | 160 mm |
| Package width | 699 mm |
| Package height | 446 mm |
| Package weight | 11260 g |
| Pixel pitch | 0.23 x 0.23 mm |
| Screen shape | Flat |
| Pixel density | 109 ppi |
| Display diagonal | 27 \ |
| Surface hardness | 3H |
| Anti-glare screen | Yes |
| Display technology | - |
| Native aspect ratio | 16:9 |
| Maximum refresh rate | 240 Hz |
| Contrast ratio (typical) | 1000:1 |
| Display number of colors | 16.7 million colors |
| Display diagonal (metric) | 68.6 cm |
| Display brightness (typical) | 400 cd/m² |
| Supported graphics resolutions | 1280 x 1024 (SXGA), 720 x 400, 1280 x 800, 800 x 600 (SVGA), 1440 x 900 (WXGA+), 1600 x 900, 1024 x 768 (XGA), 1680 x 1050 (WSXGA+), 640 x 480 (VGA), 1920 x 1080 (HD 1080), 1280 x 720 (HD 720) |
| AC input voltage | 100 - 240 V |
| Power supply type | Internal |
| AC input frequency | 50/60 Hz |
| Power consumption (max) | 106 W |
| Power consumption (standby) | 0.5 W |
| Power consumption (typical) | 54 W |
| Built-in camera | No |
| RMS rated power | 3 W |
| Number of speakers | 2 |
| Product color | Black |
| Country of origin | China |
| Market positioning | Gaming |
| Operating temperature (T-T) | 5 - 35 °C |
| Storage relative humidity (H-H) | 20 - 80 % |
| Operating relative humidity (H-H) | 5 - 95 % |
| DisplayPort version | 1.4 |
| AMD FreeSync type | FreeSync Premium |
| Pivot angle | -90 - 90 ° |
| Tilt angle range | -5 - 20 ° |
| Panel mounting interface | 100 x 100 mm |
| Depth (with stand) | 223.3 mm |
|---|---|
| Height (with stand) | 523.7 mm |