2-12 Removal and Replacement HP Omnibook 6000/6100
Replacing Small Parts
(User-Replaceable)
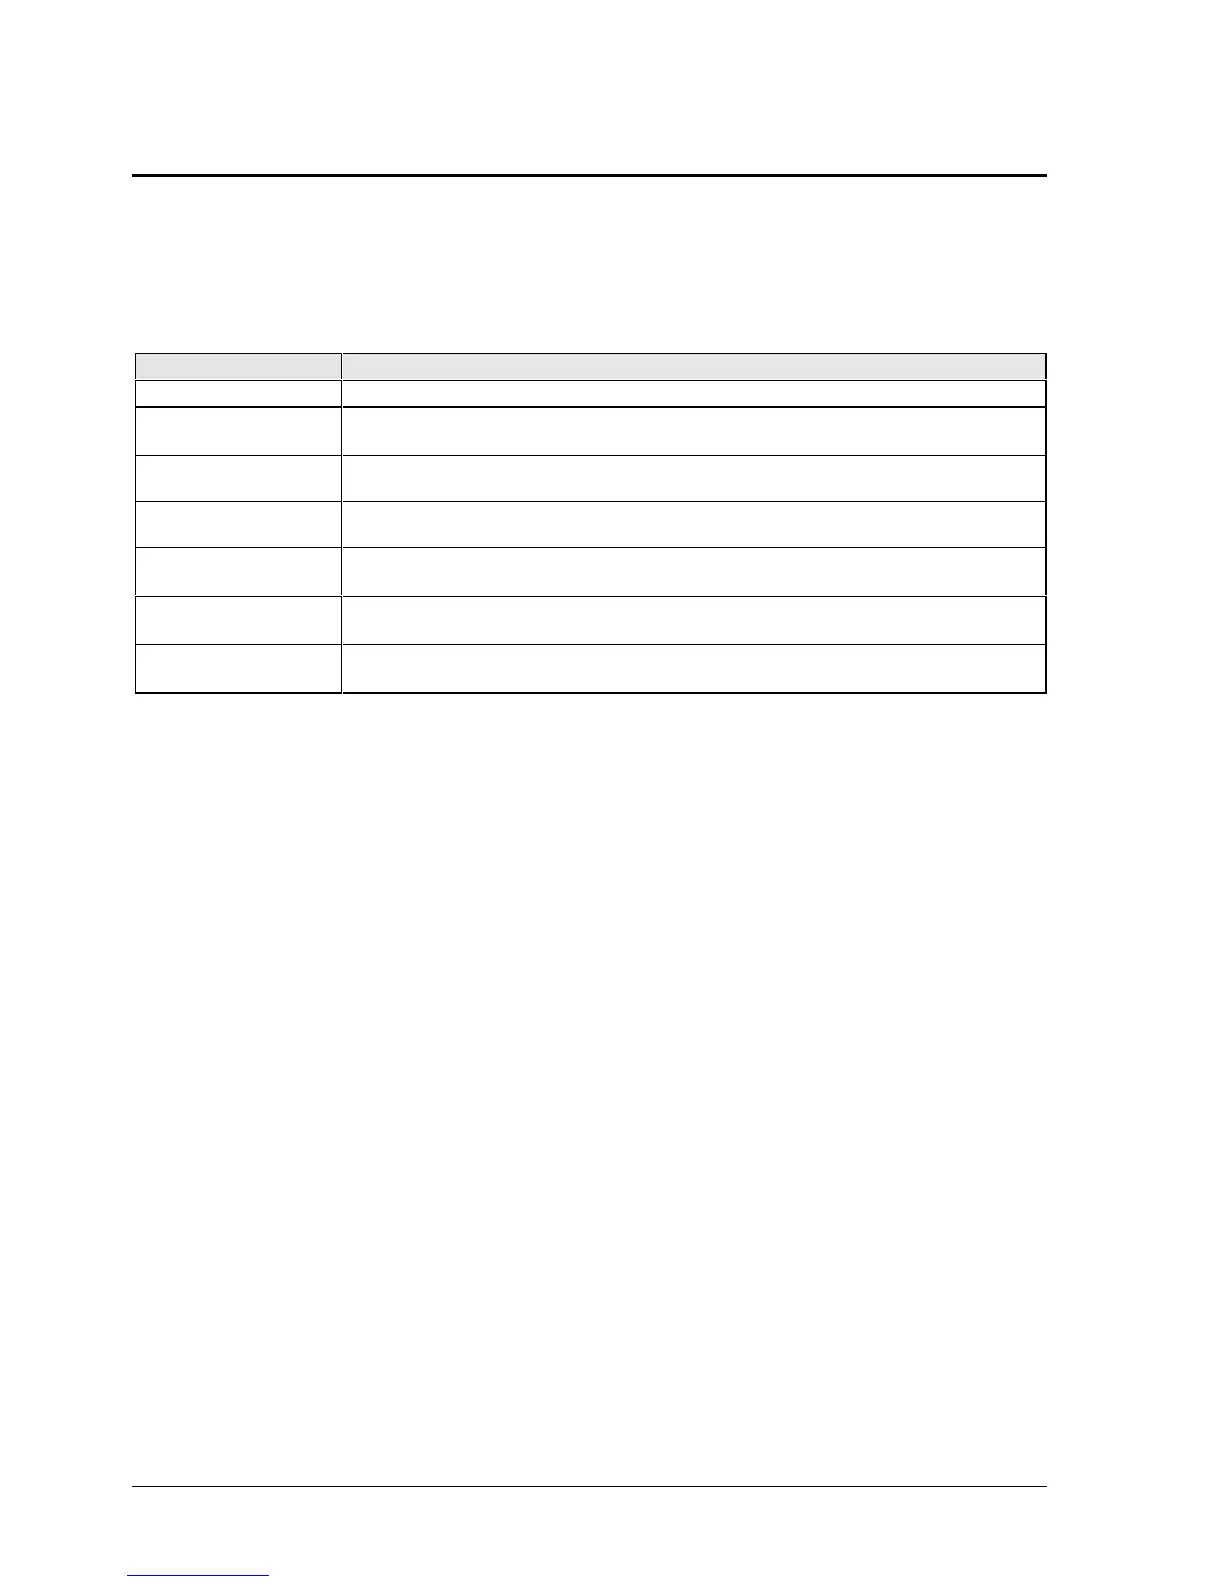
The user can replace the following small parts.
Table 2-4. Replacing Small Parts (User-Replaceable)
Part Replacement Procedure
Cap, pointing stick
Pull the cap off the pointing stick.
Bumpers, display (on
display bezel)
Insert a small flat-blade screwdriver under the bumper and pry it loose. To replace,
firmly press the adhesive side of the bumper into the recess.
Cover, mini-PCI
On the bottom of the computer, loosen the screw in the mini-PCI cover (the cover
retains the screw) and remove the cover.
Cover, SDRAM
On the bottom of the computer, loosen the one or two screws in the SDRAM module
cover (the cover may retain the screws) and remove the cover.
Covers, screw (on
display bezel)
Insert a small flat-blade screwdriver under the cover and pry it loose. To replace,
firmly press the adhesive side of the cover into the recess.
Covers, left/right
corner
From the bottom of the computer, remove the screws holding the corner covers, then
remove the covers.
Feet, rubber (on
bottom of unit)
Insert a small flat-blade screwdriver under the foot and pry it loose. To replace, firmly
press the adhesive side of the foot into the recess.
 Loading...


