Do you have a question about the HP PageWide XL and is the answer not in the manual?
Prepare the printer for the installation of the top stacker unit.
Remove the accessory hook or the cover from the printer.
Remove the upper lateral covers from both sides of the printer.
Unlock the system using a 5mm Allen key on the axis pins.
Install the gas springs for the top stacker module.
Fix holding tools by aligning holes and using screws.
Remove the 3 outer screws, loosen inner ones, and remove belt motor.
Remove the top screw from both gas springs and remove the springs.
Take new gas springs from the box and lock them.
Install the new gas springs, ensuring proper alignment.
Install the top stacker structure and fix it with screws.
Fix the 2 L supports with 4 screws each.
Install the belt motor tightening inner and outer screws.
Install belt motor using only inner screws for Pro models.
Install 4 wire frame shaft supports with screws.
Connect the cables, passing connector through side-plate.
Warning for using NTP, insert and slide wire to fix position.
Fix the 2 cam pin axis into place on each side.
Use 5mm Allen key to turn axis pins and lock system.
Configure and adjust the top stacker based on printer status and accessories.
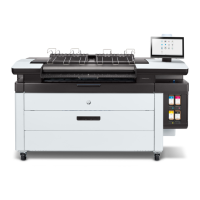
| Print Technology | HP PageWide |
|---|---|
| Print Resolution | Up to 1200 x 1200 dpi |
| Media Types | Bond |
| Roll Capacity | 2 rolls (standard) |
| Print Speed | Up to 30 D/A1 pages per minute |
| Connectivity | Ethernet |
| Compatibility | HP DesignJet, HP PageWide XL printers |
| Package Contents | HP PageWide XL printer, printheads, ink cartridges, maintenance cartridge, media input bin, output stacker, user documentation |