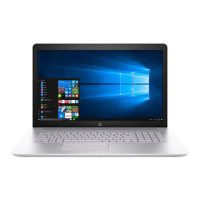
Do you have a question about the HP Pavilion 17-AR050WM and is the answer not in the manual?
Explains how to identify and locate the installed hardware components using Device Manager.
Guides users on how to find installed software applications and features on the computer.
Details the components and ports located on the right side of the laptop.
Details the components and ports located on the left side of the laptop.
Identifies and describes the components related to the laptop's display assembly.
Describes the keyboard layout, TouchPad, and associated control zones.
Explains the various indicator lights on the laptop and their meanings.
Describes the function of the power button and the laptop's speakers.
Explains the functionality of special keys on the keyboard, including Fn and Windows keys.
Identifies and describes the vents located on the bottom of the laptop for cooling.
Explains where to find crucial identification and warranty details on the computer's label.
Lists various computer components and their corresponding spare part numbers for replacement.
Details the individual parts that make up the display assembly and their spare part numbers.
Lists additional miscellaneous parts for the laptop, along with their spare part numbers.
Lists the necessary tools for disassembling and reassembling the computer.
Provides general guidelines and precautions for handling computer components during service.
Explains the importance of grounding and measures to prevent electrostatic discharge (ESD) damage.
Provides guidelines for safely packaging and transporting computer equipment to prevent static damage.
Outlines recommended practices for setting up an ESD-safe workstation for component handling.
General instructions and notes applicable to all component removal and replacement tasks.
Step-by-step guide for removing and replacing the optical drive assembly.
Instructions for removing the bottom cover of the laptop to access internal components.
Detailed steps for safely removing and replacing the laptop's battery.
Procedure for removing and replacing the hard drive, including precautions.
Instructions for removing and replacing the wireless local area network (WLAN) module.
Steps to remove and replace the laptop's memory modules (RAM).
Comprehensive guide for removing and replacing the main system board, including component transfer.
Instructions for removing and disassembling the laptop's display assembly.
Procedure for disconnecting and removing the laptop's power connector cable.
Explains how to access and navigate the Computer Setup (BIOS) utility for system configuration.
Details the process of resetting all Computer Setup settings to their original factory defaults.
Provides instructions on how to determine the current BIOS version and download/install updates.
Explains how to access and modify Trusted Platform Module (TPM) settings within the BIOS.
Information on HP Sure Start, a technology for BIOS protection and recovery.
Instructions on how to start and use the HP PC Hardware Diagnostics tool to test system components.
Steps for downloading the diagnostic tool onto a USB drive for bootable testing.
Describes methods for creating recovery media or system backups for data protection.
Utilizing Windows built-in tools for system restore points and personal data backups.
Explains how to use HP Recovery Manager to restore the computer to its original factory state.
Instructions on how to modify the computer's boot sequence to start from a specific device.
Outlines the universal specifications and safety standards for power cord sets.
Lists country-specific requirements and accredited agencies for power cord sets.
| Brand | HP |
|---|---|
| Model | Pavilion 17-AR050WM |
| Series | Pavilion |
| Operating System | Windows 10 Home |
| Storage | 1 TB 5400 RPM SATA HDD |
| Display Size | 17.3 inches |
| Battery | 3-cell, 41 Wh Li-ion |
| Optical Drive | DVD-Writer |
| RAM | 8 GB |
| Display Resolution | 1920 x 1080 |
| Graphics | AMD Radeon R7 |
| Dimensions | 16.33 x 10.72 x 0.96 in |
| Wireless | Bluetooth 4.2 |
| Ports | 1 HDMI; 1 headphone/microphone combo |