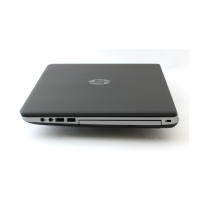
Display assembly – non-touch
Description Spare part number
Display panel assembly, touch screen (entire assembly)
NOTE: Touch displays are spared only as whole assemblies.
NOTE: Non-touch displays are spared only at the subcomponent level. Non-touch assemblies are not
spared as whole units.
L01102-001
Before disassembling the display assembly, follow these steps:
1. Shut down the computer. If you are unsure whether the computer is o or in Hibernation, turn the
computer on, and then shut it down through the operating system.
2. Place the computer in “Battery Safe mode” (Battery Safe mode on page 32).
3. Disconnect all external devices connected to the computer.
4. Disconnect the power from the computer by rst unplugging the power cord from the AC outlet, and
then unplugging the AC adapter from the computer.
5. Remove the following components:
a. Service doors (Service doors on page 33).
b. Hard drive (Hard drive on page 41)
c. Keyboard (Keyboard on page 44)
d. Top cover (Top cover on page 48)
Disassemble the display assembly:
1. Position the computer upright on a at surface and open the display as far as possible.
2. Flex the top (1) of the bezel, the inside edges of the left and right sides (2), and then the right side of the
bottom (3) and the left side of the bottom (4) of the bezel until it disengages from the display enclosure.
TIP: The bottom, inside of the bezel is secured to the display enclosure with double-sided adhesive.
When removing the bezel, be sure to remove the tape from the bezel so that it remains connected to the
display.
Component replacement procedures 73

 Loading...


